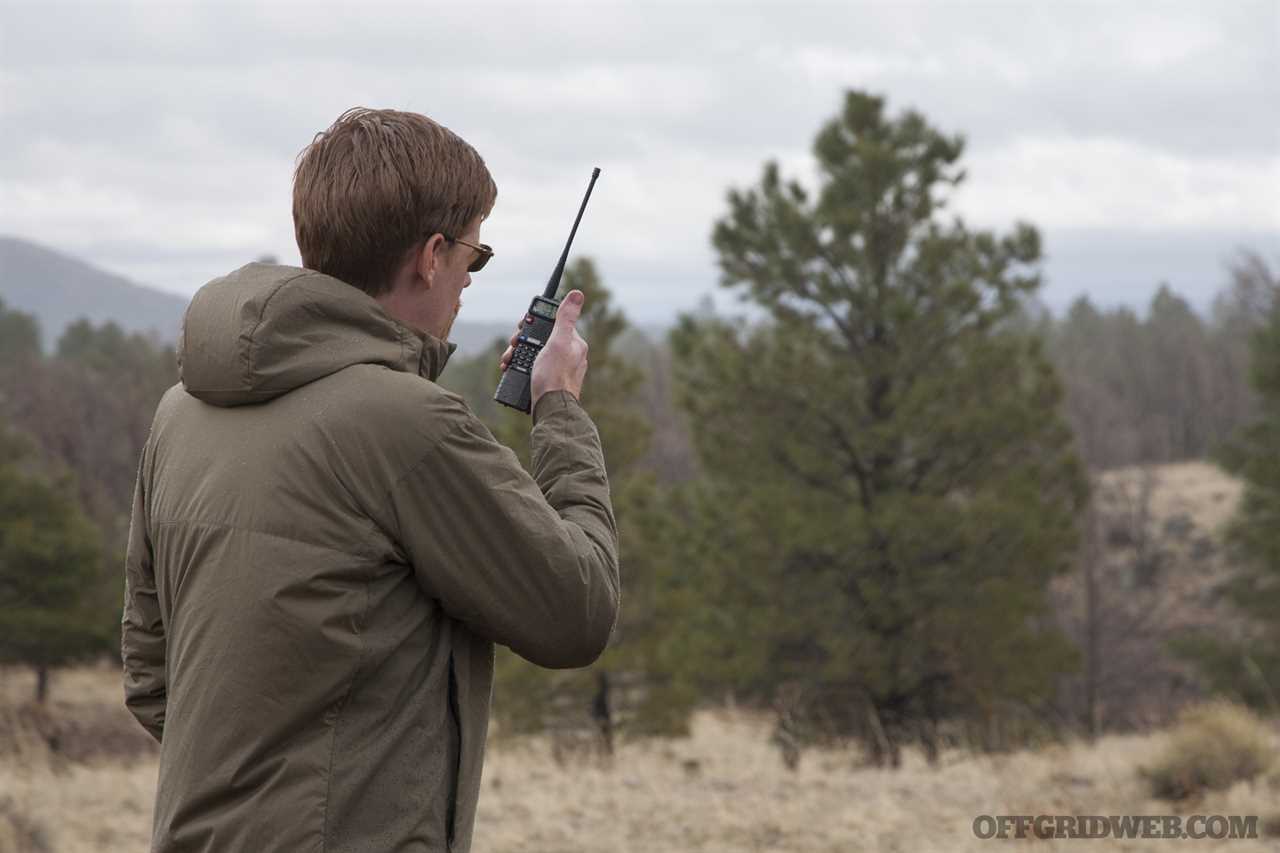
I recently picked up a new 2022 Toyota 4Runner with the intention of adding a few modifications to make it a more fun daily-driver and more capable overland vehicle. Communications were near the top of my list, since I often venture into parts of Arizona where cell signal is spotty or nonexistent. It's valuable to have a quick and reliable method of staying in touch with nearby friends and family, whether we're shooting in the desert, off-roading in the mountains, or cross-country caravanning on a road trip. The new 50-watt Midland MXT575 GMRS mobile radio fits the bill, and can easily connect to local repeaters, other mobile radios, and the half-dozen cheap Baofeng handheld radios I already own.
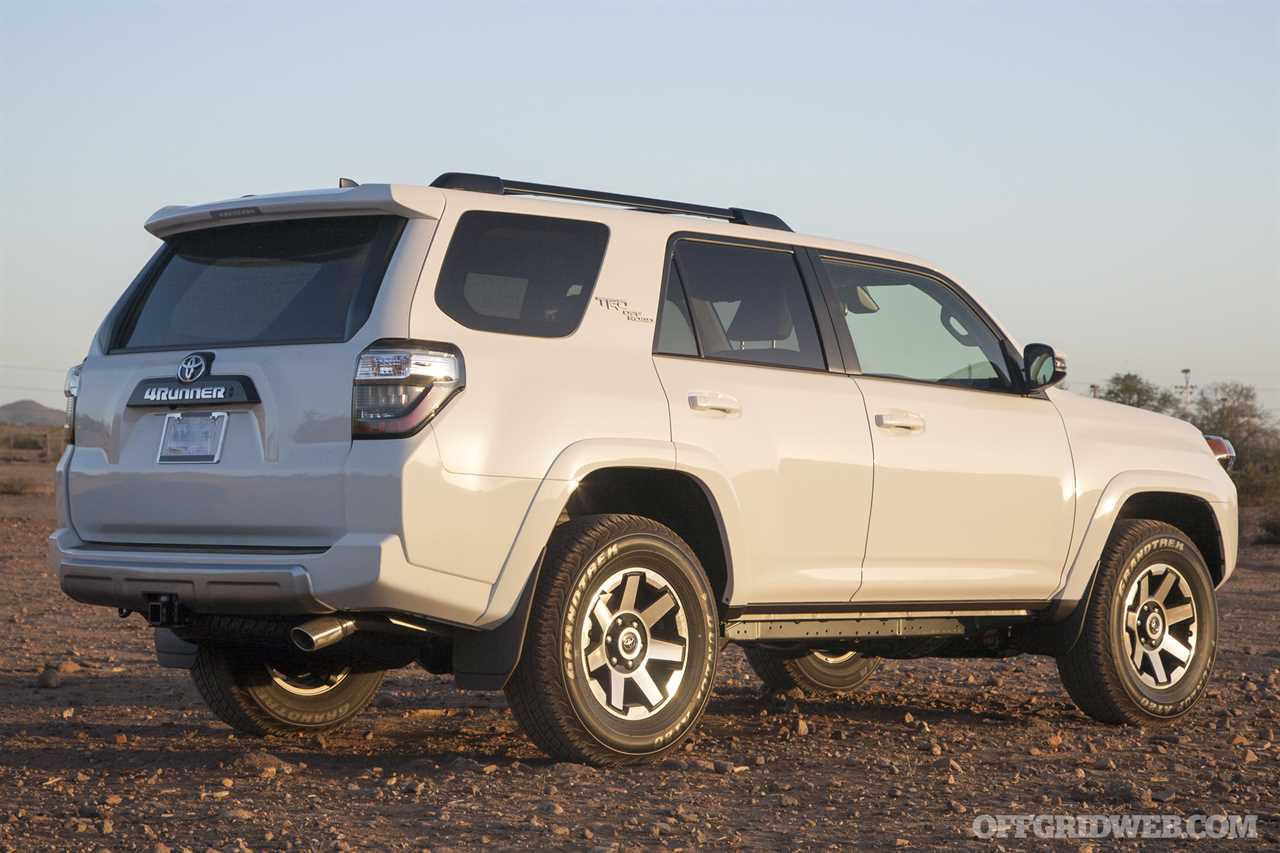
Above: With a reliable V6 engine, four-wheel-drive, and a locking rear differential, the 4Runner makes a good platform for an overland vehicle or bug-out truck.
Read on for my thoughts on the MXT575 and a step-by-step guide showing how I installed it discreetly in my 4Runner.
About the Midland MXT575
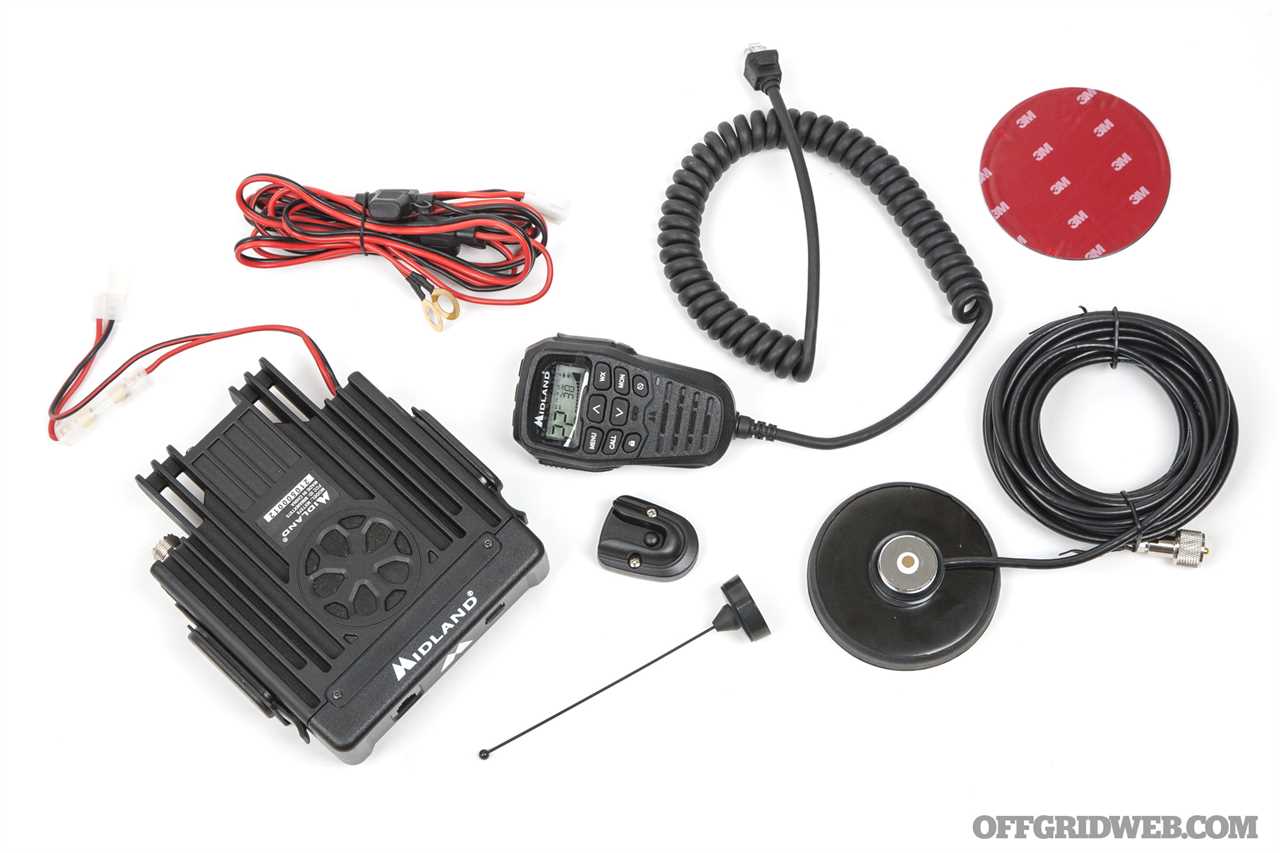
The Midland MXT575 MicroMobile radio is Midland's flagship GMRS product, boasting 50-watt broadcasting power, the maximum allowed by law in the United States. It features 15 high-power GMRS channels with 142 privacy code options, as well as the ability to scan NOAA weather channels and provide automated alerts if a storm is rolling in. It has 8 repeater channels and is split-tone repeater capable, so you can extend the radio's range by connecting to any GMRS repeaters that happen to be nearby. There's also a USB-C port on the base, which can be used for fast charging of cell phones and handheld radios.
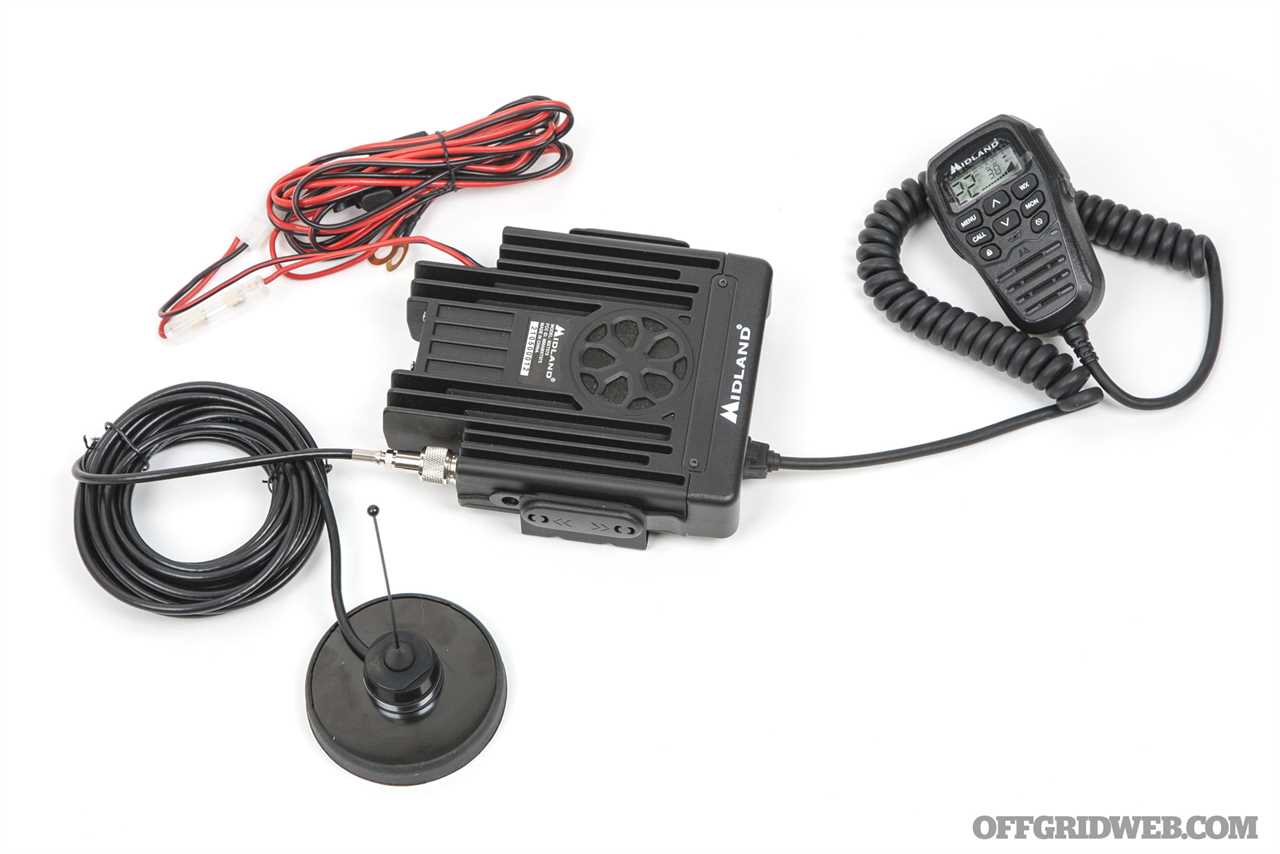
The MXT575 kit consists of three main components:
- Midland MXT575 base unit with quick-detach cradle mount, wiring harness, and in-line fuses
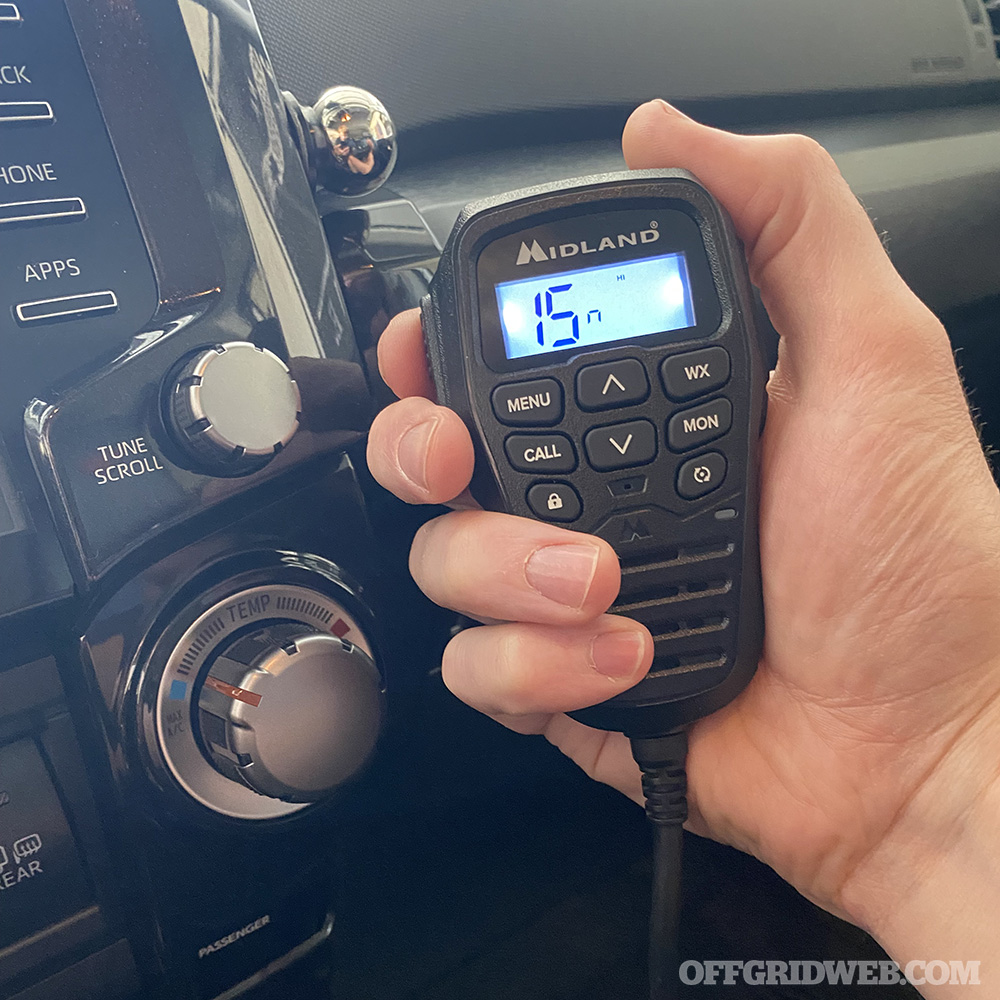
- Control microphone/speaker with backlit LCD display
- 2.1dB unity gain antenna with coaxial cable and magnet mount
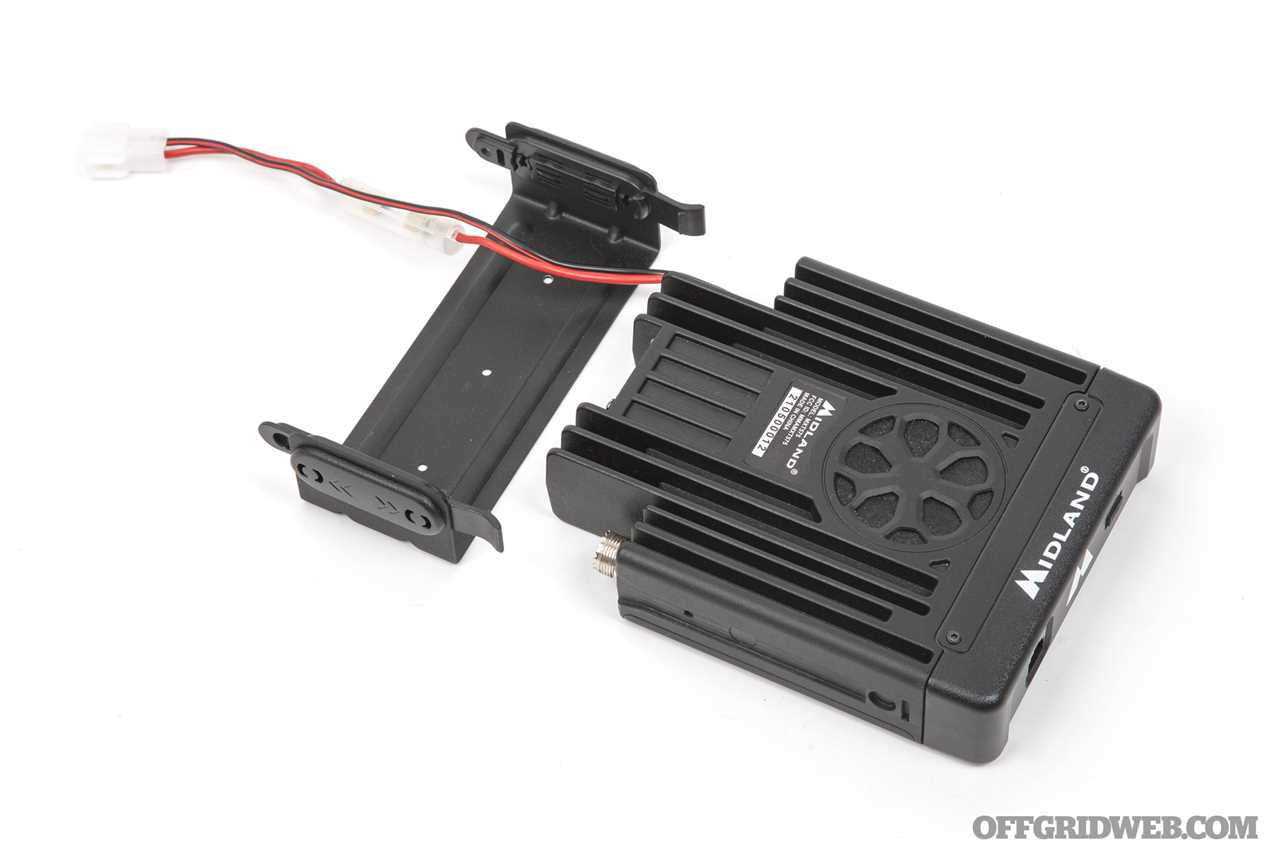
Above: The radio clips into a mounting bracket that can be attached to any hard surface. Self-tapping screws are included.
Since the controls for the MXT575 are integrated completely into the handheld mic, the base can be tucked away anywhere in the vehicle, as long as there's adequate airflow to keep it from getting too hot. This was good news for me, since I didn't want a radio taking up space on my dash and/or catching the eyes of potential thieves. I wanted it out of sight and out of mind until it's needed.
Of course, the short coiled cable attached to the mic wouldn't be long enough for many mounting locations, but that was easily extended. More on that later.
As for the antenna, the MXT575 comes with an MXTA51 magnetic antenna with 20-foot RG-58A/U coaxial cable, NMO threaded connector, and 2.1dB detachable antenna. This is easy to attach anywhere on your vehicle without cutting or drilling. For maximum performance, you should position the antenna as high as possible on top of a large ground plane (e.g. metal roof, hood, or trunk lid). A soft rubber cover is included to prevent the strong magnet from scratching your paint as you install or remove it.
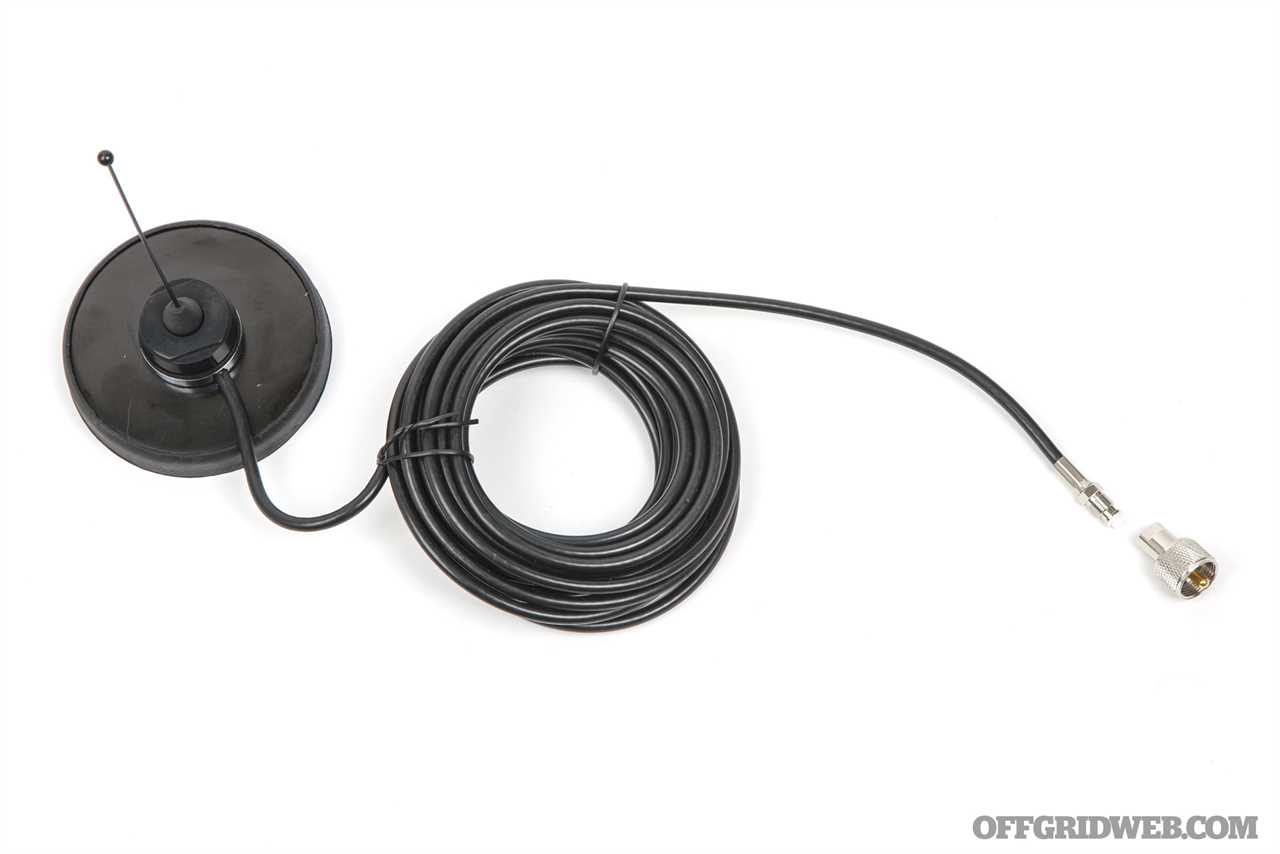
Above: The antenna cable has a removable connector, making it easier to pass through tight spaces.
One much-appreciated feature of the Midland antenna is its removable connector. This temporarily reduces the diameter of the cable end, and makes it significantly easier to feed the cable through panels or under carpet. Anyone who has tried to cram a large wire through a small hole in a cramped space knows how much of a headache that can turn into.
MSRP for the Midland MXT575 is $400. The radio seen in this article is a pre-production test model — the retail release of the MXT575 is slated for summer 2022.
An Overview of GMRS
If you're well-educated on radios, you probably know all about how GMRS works, but we'll give a quick overview of this radio category for readers who may not be well-versed yet.
The General Mobile Radio Service (GMRS) occupies channels between 462 and 467 megahertz, and is designed for (relatively) short-range two-way communications. Unlike the Family Radio Service (FRS), which is what most cheap blister-pack walkie-talkies use, GMRS offers increased broadcasting power limits and the ability to interface with repeaters (both of which extend the radio's maximum range). Although handheld GMRS radios are limited to 5-watt output, mobile radios such as the MXT575 can push a maximum of 50 watts.
The downside to GMRS is that it requires a license — but don't write it off just yet. It's exceptionally easy to get your GMRS license, since (unlike ham radio) no test is required. Better yet, the license fee used to be $70, which wasn't too bad, but that fee recently dropped to $35 (as of 4/19/2022). One license applies to your entire immediate family and it lasts for 10 years. Once you get a license, which shouldn't take more than one or two business days, you'll be issued a call sign you can use on the air.
For more information on FRS, GMRS, and ham radios, refer to our article “Can Anyone Hear Me?” from Issue 38 of Offgrid.
DIY Installation
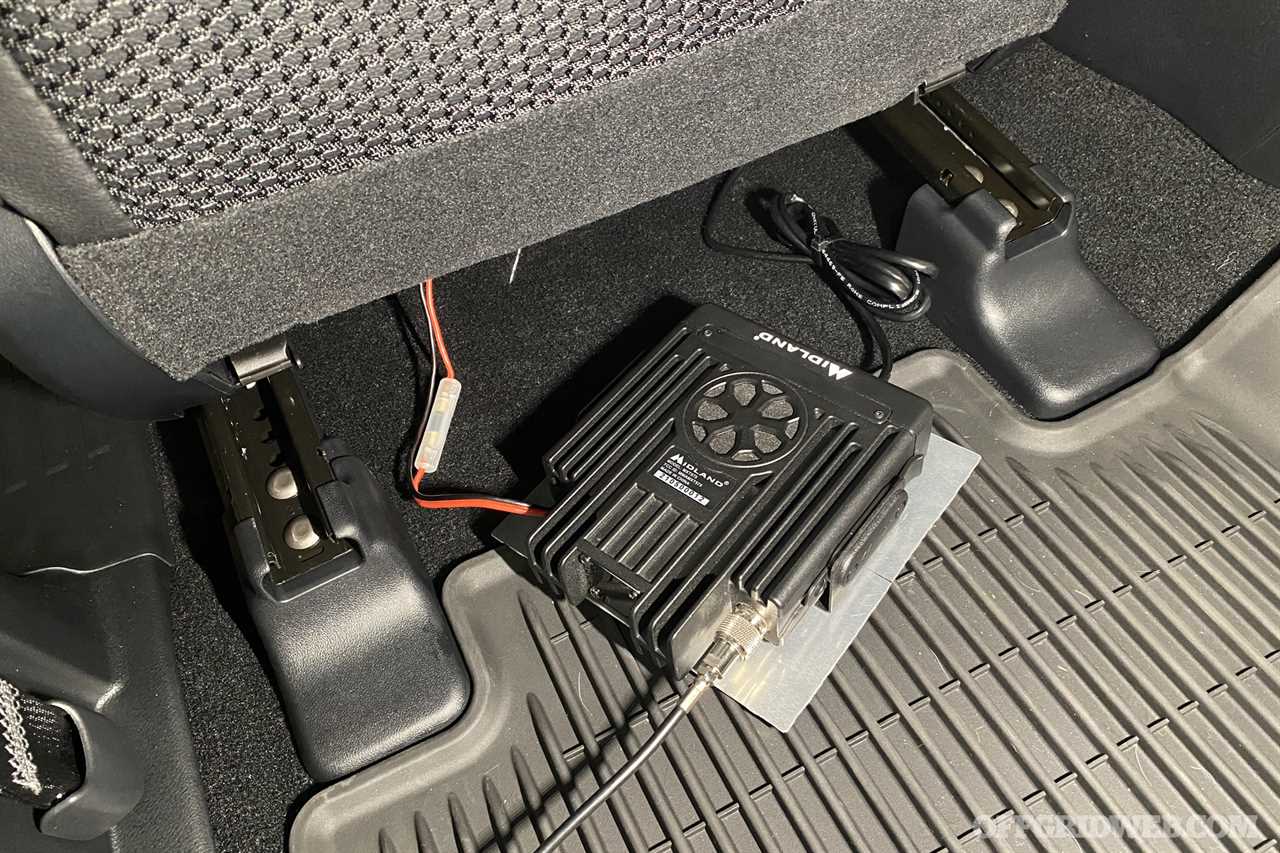
Before I started work on my 4Runner, I spent a few days reading other DIY radio installation guides online. This helped me determine where I could put the radio, how I could run the wiring, and even where to attach the mic. Credit where credit is due, several elements of my project were inspired by two DIY articles from Trail4Runner.com. However, I didn't want to put the larger, higher-output MXT575 in the glovebox, console, or inside the dash due to concerns about overheating. Instead, I decided to place it under the driver's seat.
Mounting the Radio
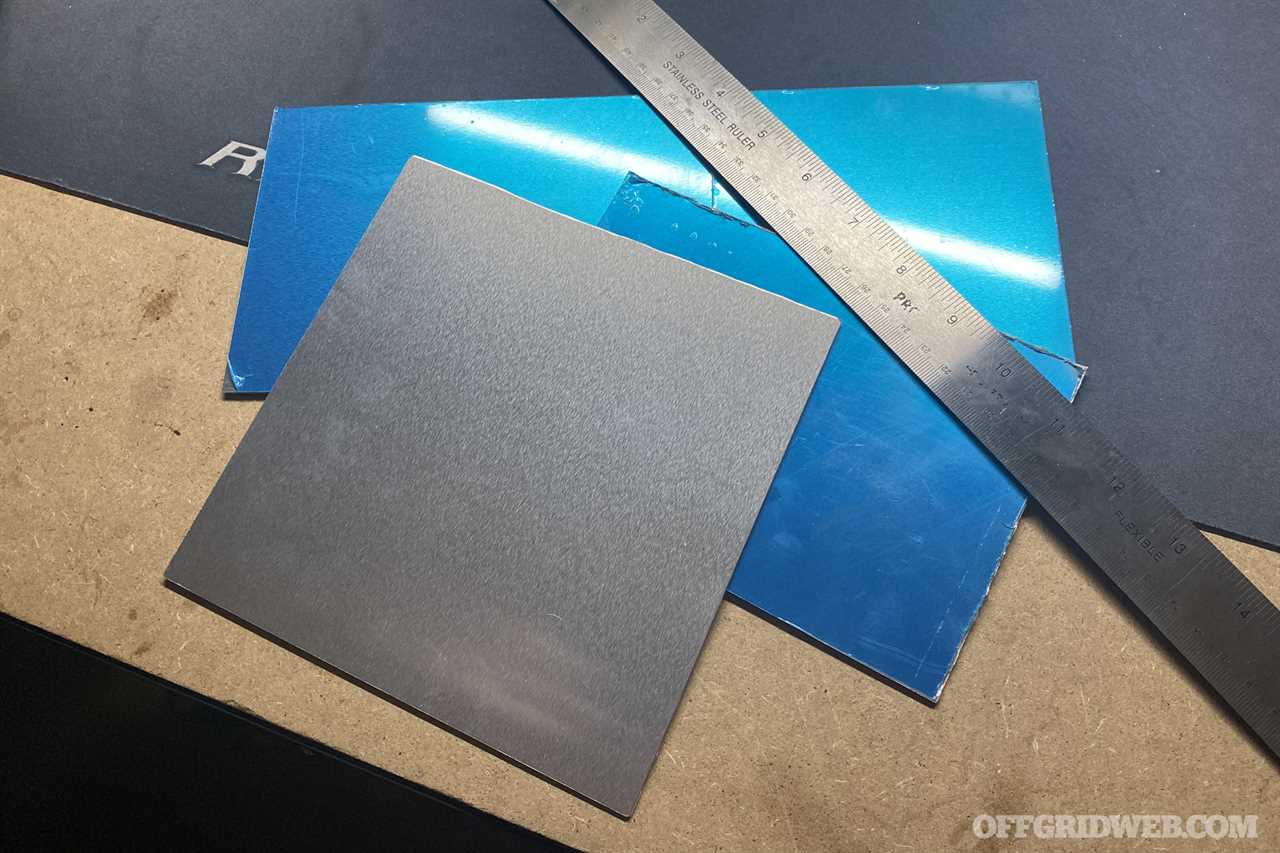
Rather than cutting carpet and drilling into the floor of my nice new truck, I created a mounting base that would attach to the carpet with strong Velcro strips. I bought an 1/8-inch-thick aluminum sheet off Amazon and used a Dremel to cut it to 7×7 inches square. This provided lots of surface area for Velcro and a sturdy platform for the radio mount. I probably could have used wood or plastic sheet, but I know aluminum will dissipate heat better — I live in the land of 120°F summers, after all.
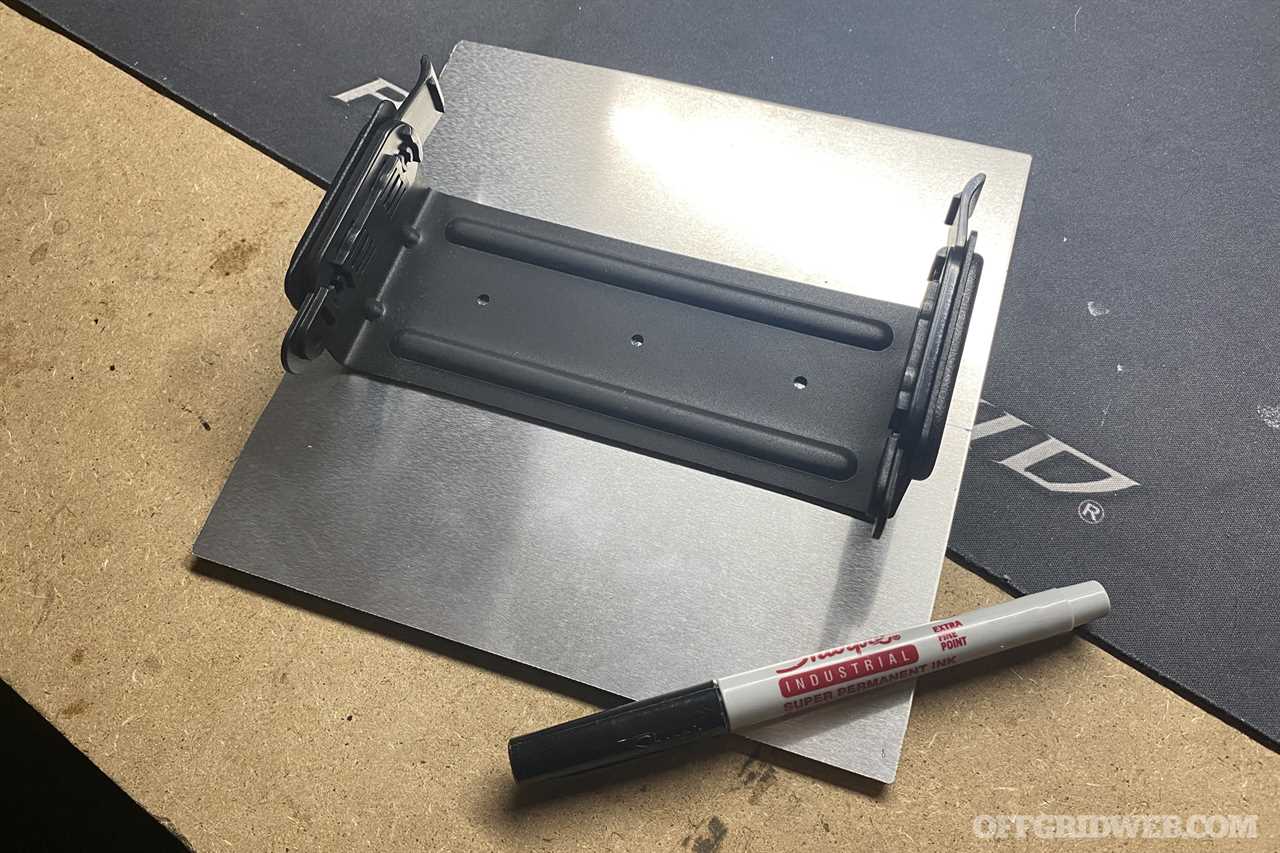
I detached the Midland MXT575 cradle mount from the radio, marked the screw holes, and drilled them out. A few short cap screws and nuts were used to attach the mount to the plate.
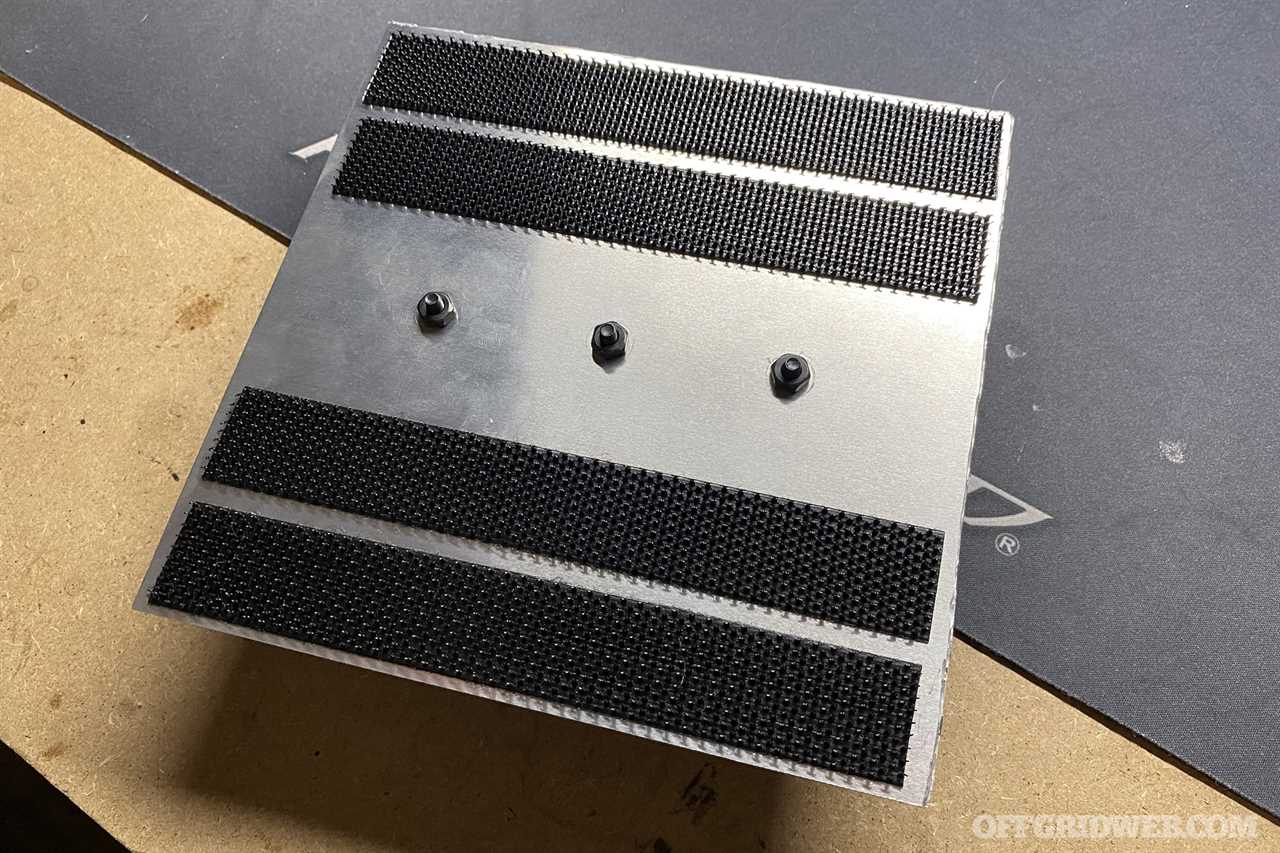
On the underside of the plate, I stuck four strips of Velcro Extreme Outdoor hook material, which grabs the truck's carpet with surprising force. It won't budge an inch, even if I'm bouncing down rocky trails and shaking my own fillings loose.
Hardwired Power
Next, I needed to figure out how to get power to the MXT575. Even though it would be possible to run the included power cable to the fuse box inside the cab, the high draw of a 50W radio could lead to problems down the line, and the harness is clearly designed with ring terminals for direct connection to the truck's battery. So, I decided to hardwire it straight to the battery. This meant finding a way to run the cable through the firewall into the engine bay.
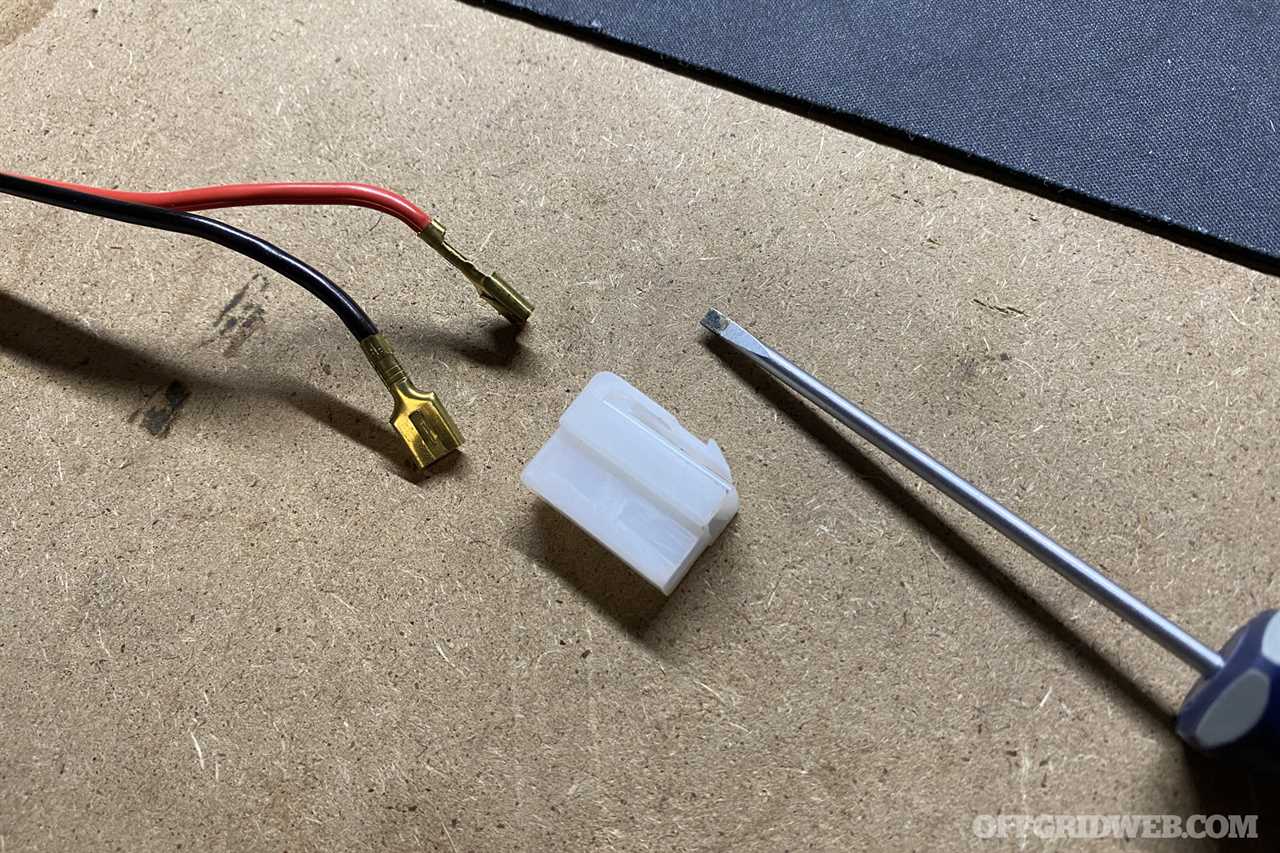
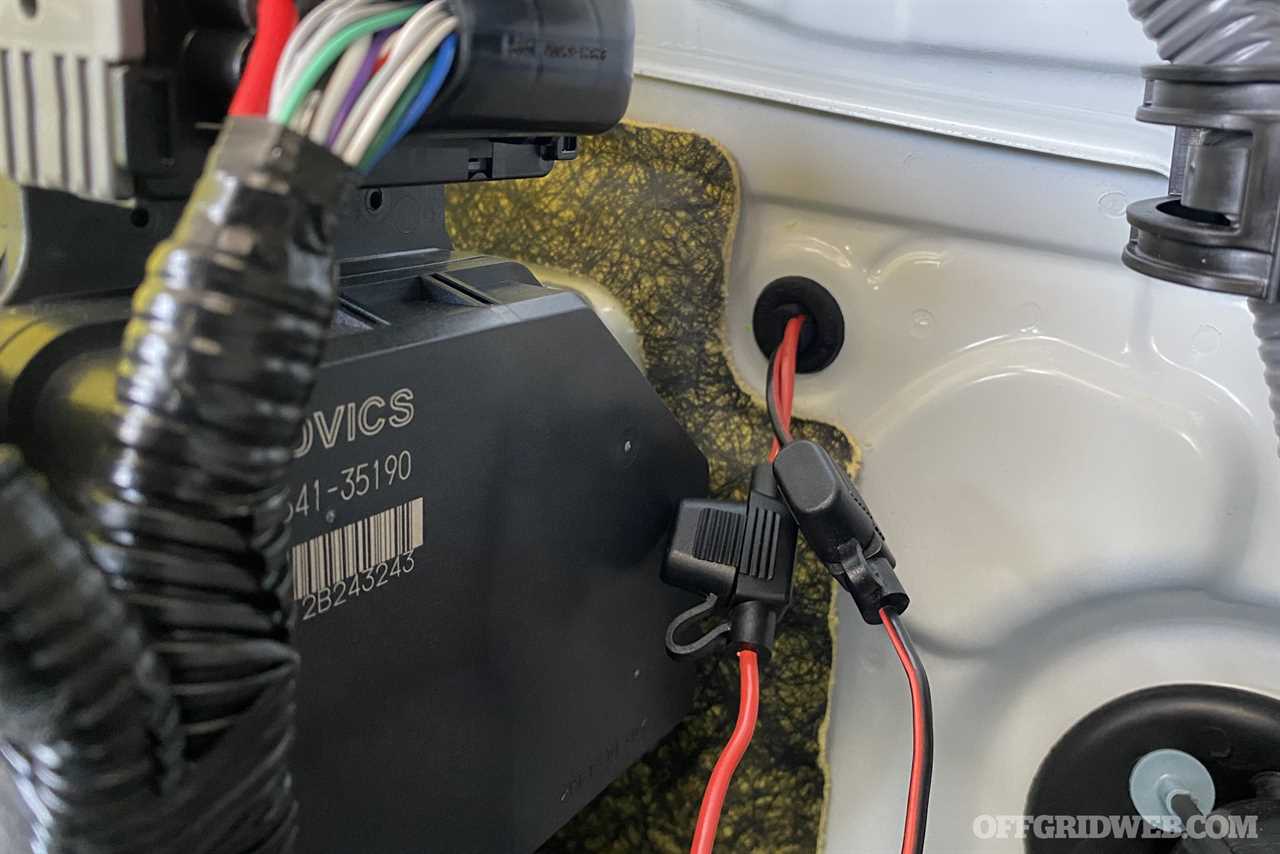
The plastic connector on the end of the power cable was far too large to fit easily through the firewall, so I carefully used a small screwdriver to pry out the terminals inside. I then found a suitable location to pass the wires through:
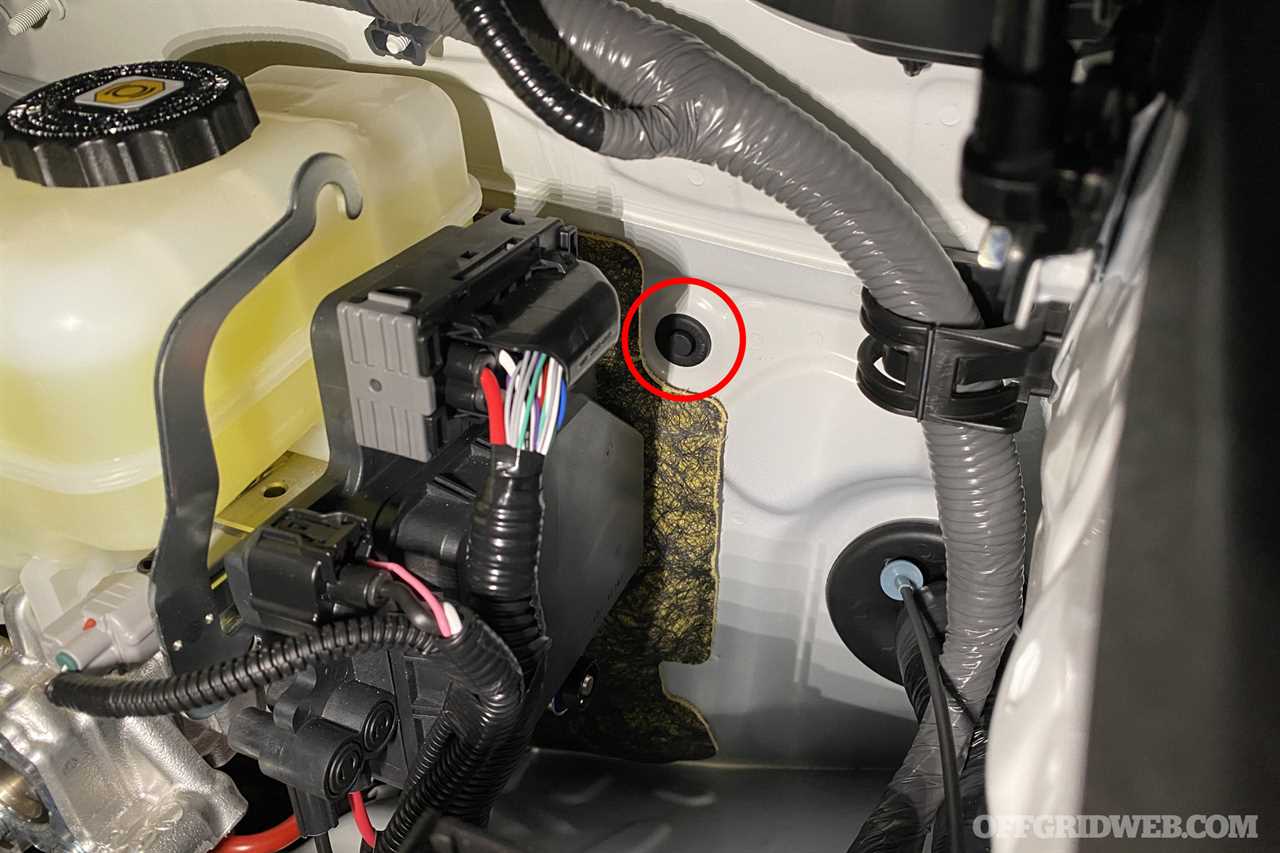
Other 4Runner owners have noted that this small rubber grommet on the driver's side can be removed to act as a pass-through for wires. So, I popped it out, cut a hole in the middle, and pulled through the terminals one at a time.
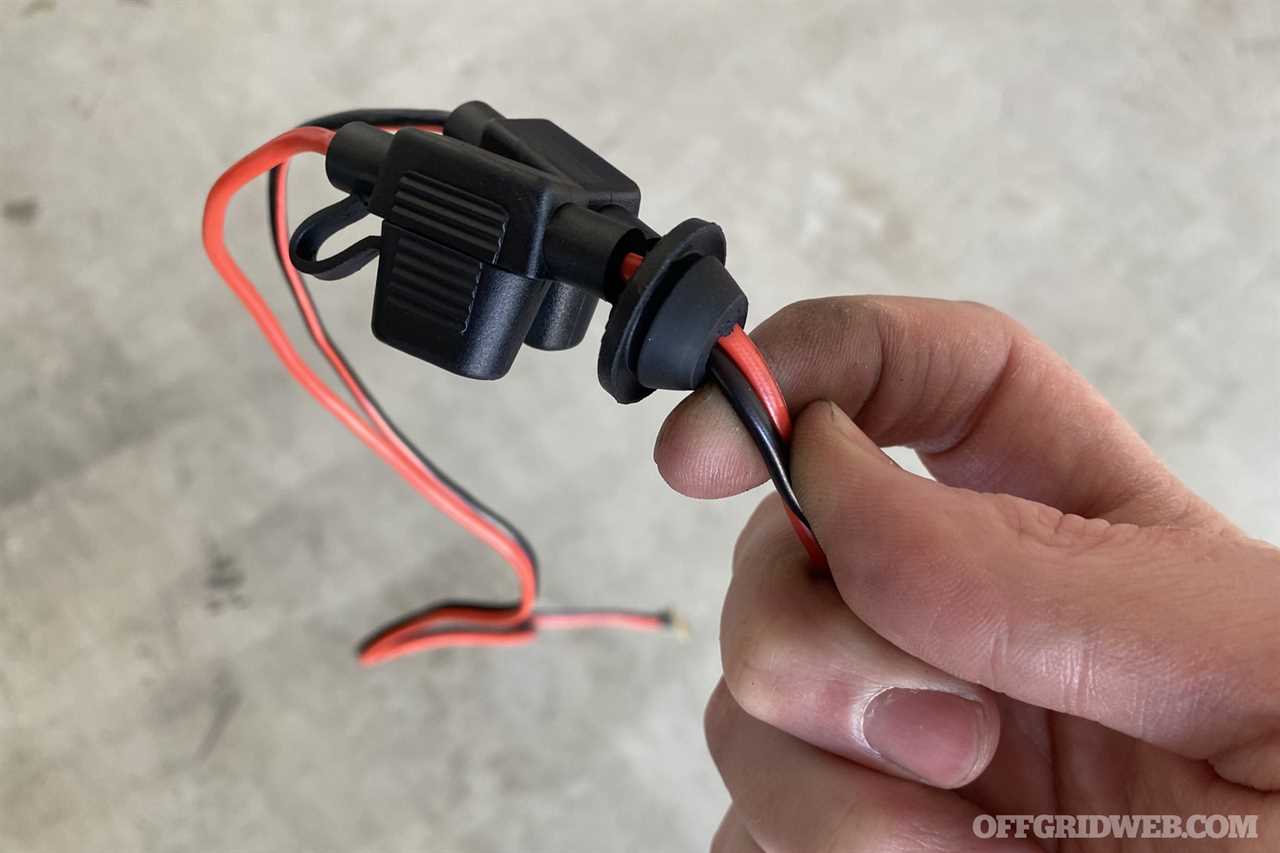
With the grommet in place on the power cable, I used a fish tape to feed the end of the wire into the cab:
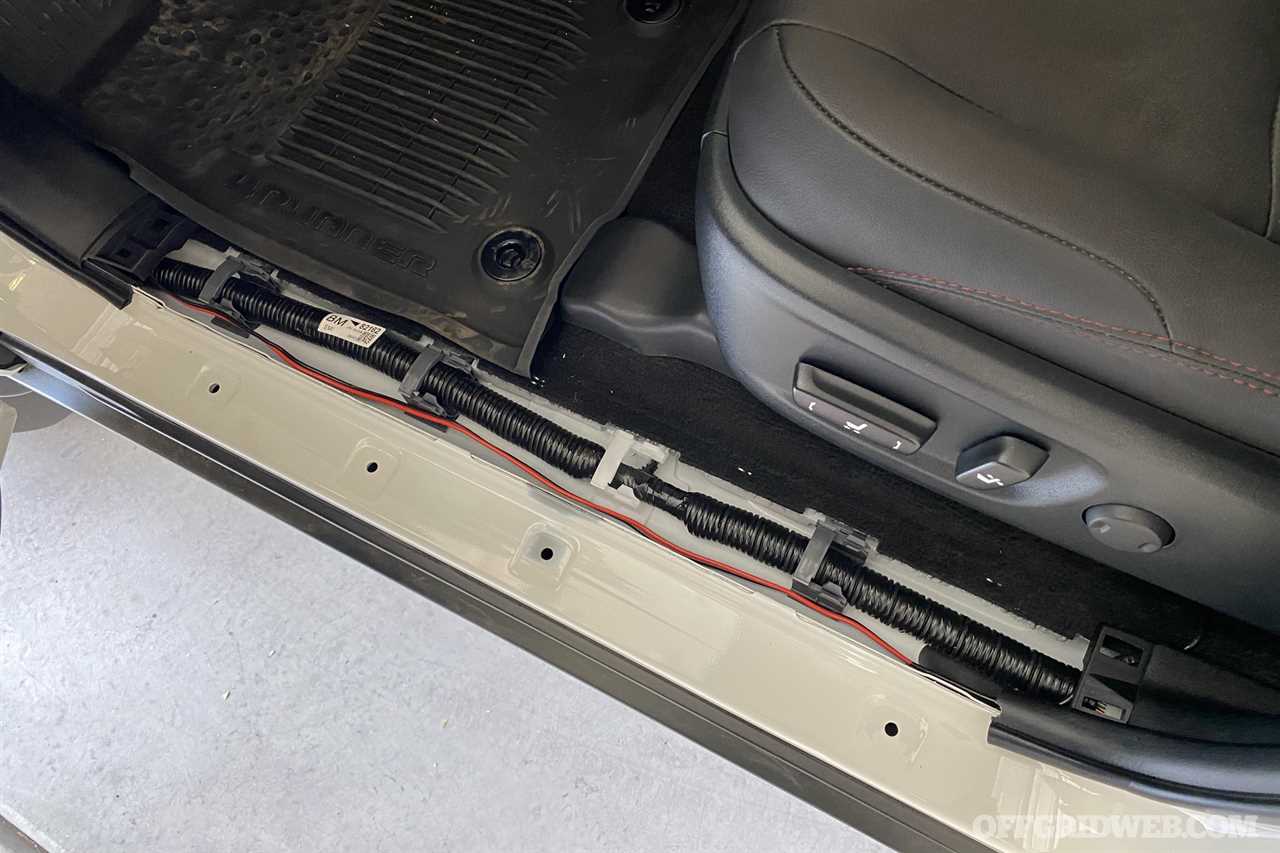
The loose end of the power cable appeared above the pedals, and was pulled through from there. Next, it was routed through the kick panel and door sill, then underneath the carpet. I used the fish tape to pull it up through an opening in the carpet next to a floor A/C vent, leaving the loose end directly under the seat.
At this point, I replaced the plastic connector, ensuring the wire terminals were snapped back into their original positions. This is important since I didn't want unprotected hot wires during the next step.
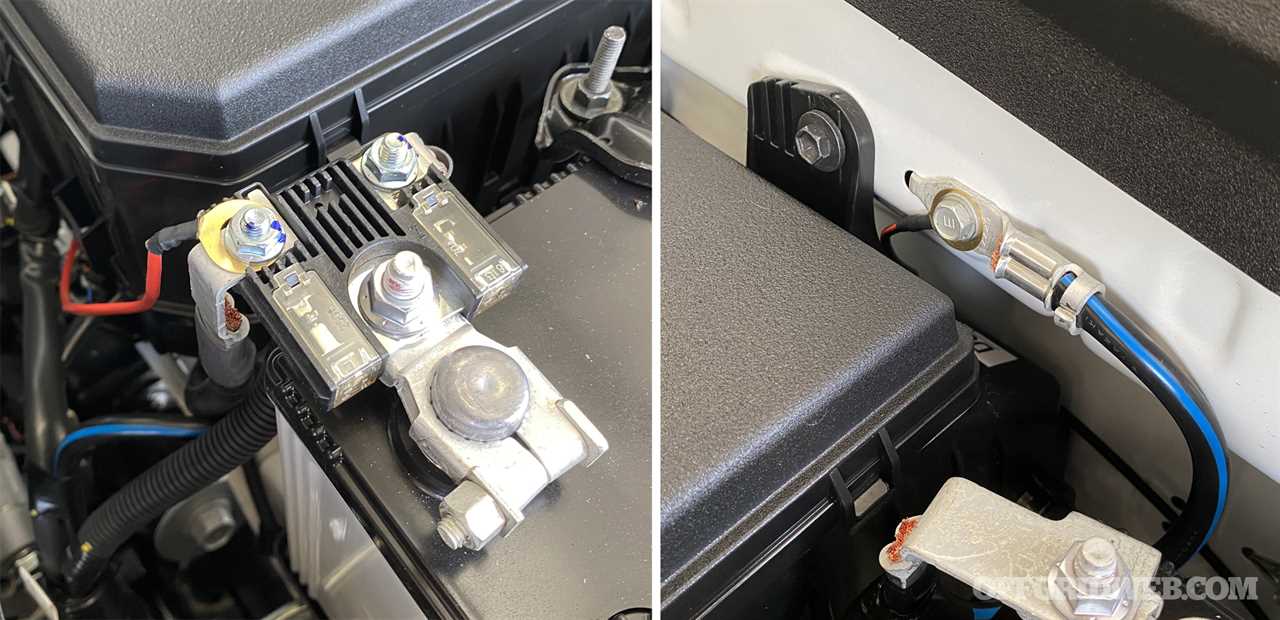
Now that I had the power wire where I wanted it, I connected the ground wire to a ground point in the 4Runner's engine bay next to the fuse box. The positive wire was connected to the battery terminal.
Adding a Mic Port
If I wanted to keep things simple, I could have connected the mic directly to the radio under the seat, but this would have meant pulling it between my legs every time I needed to use it. I decided to put in some extra work to make the radio setup appear as though it had been installed on the Toyota assembly line.
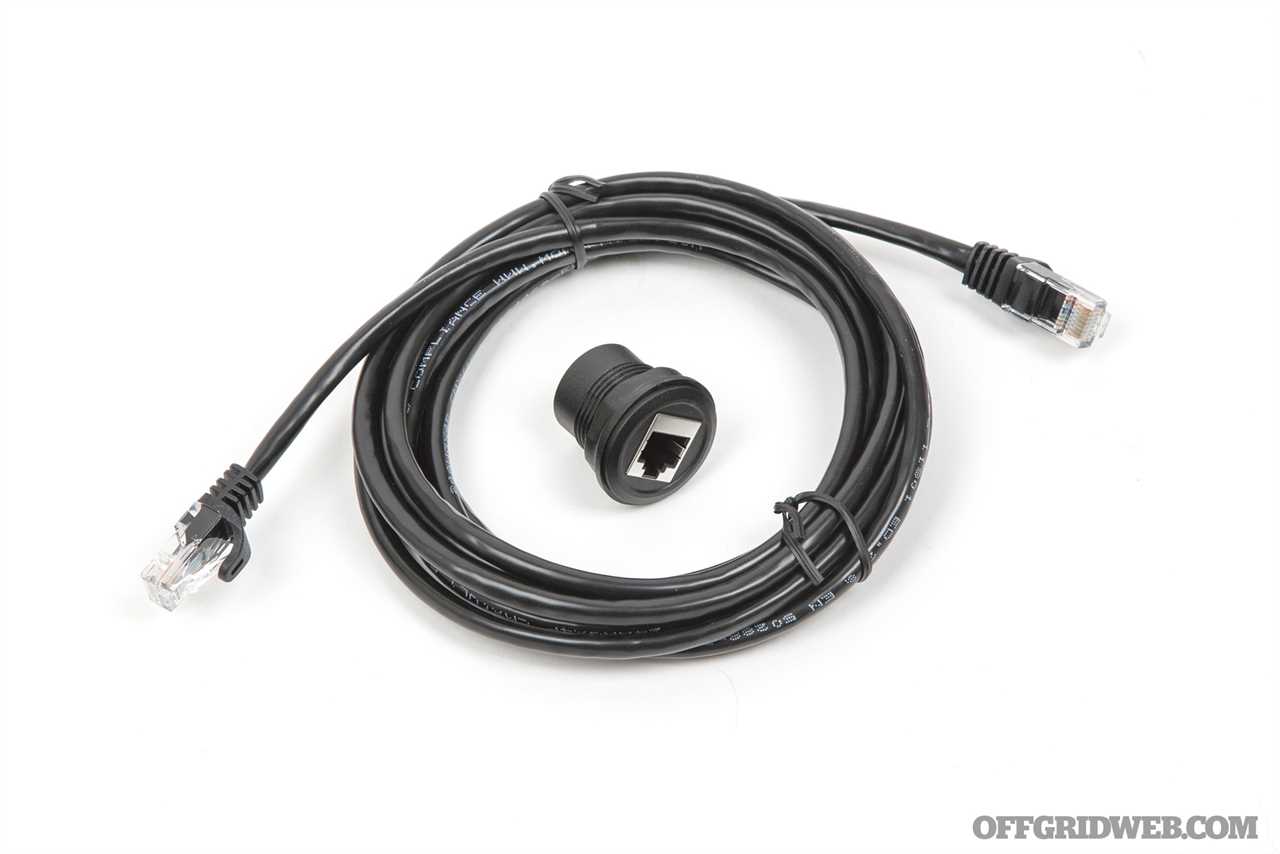
Luckily, the mic uses a standard CAT-5 ethernet cable, so it's simple to extend it. Inspired by @Dumbo_T4R's DIY article, I purchased a 10-foot CAT-5 cable and an RJ45 panel mount plug for a total of $16 on Amazon.
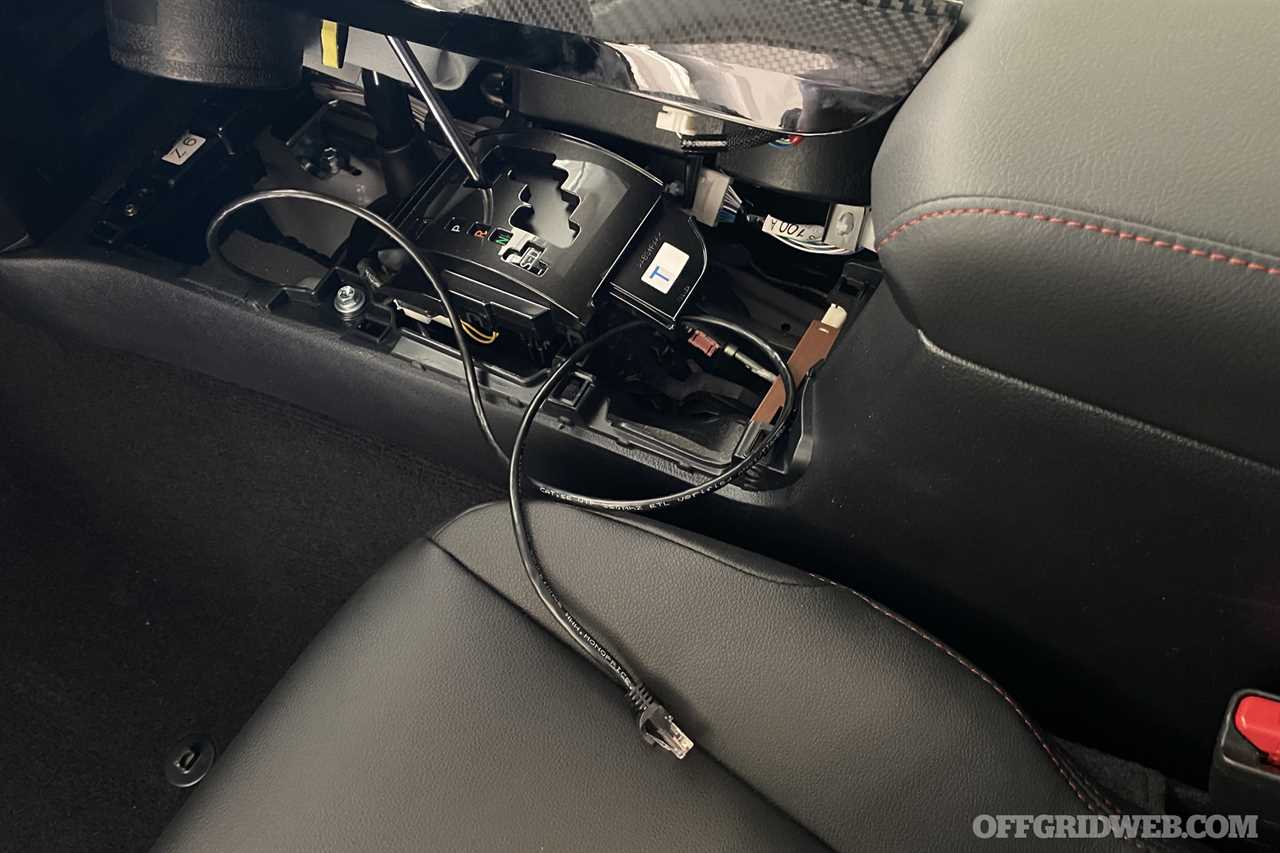
The CAT-5 cable was pulled from under the driver's seat up through the center console, around the shifter, and out under the dash on the passenger side.
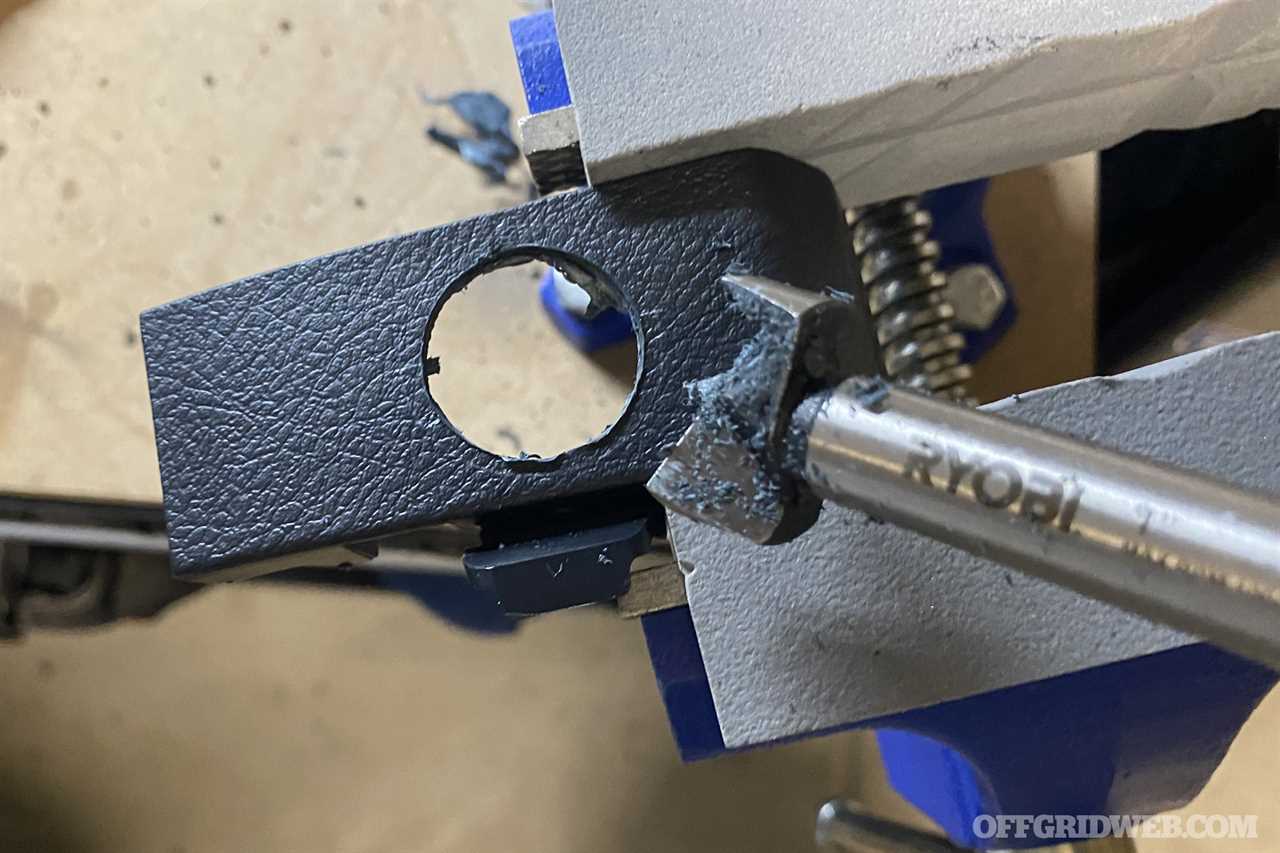
Below the glovebox where the CAT-5 cable exited, I removed this small plastic panel. After centering and tracing the panel mount plug onto its surface with a pencil, I used a Forstner drill bit to cut a 1-inch round hole into the panel. The edges were cleaned up with a razor blade, and the panel mount plug was installed into this plastic piece.
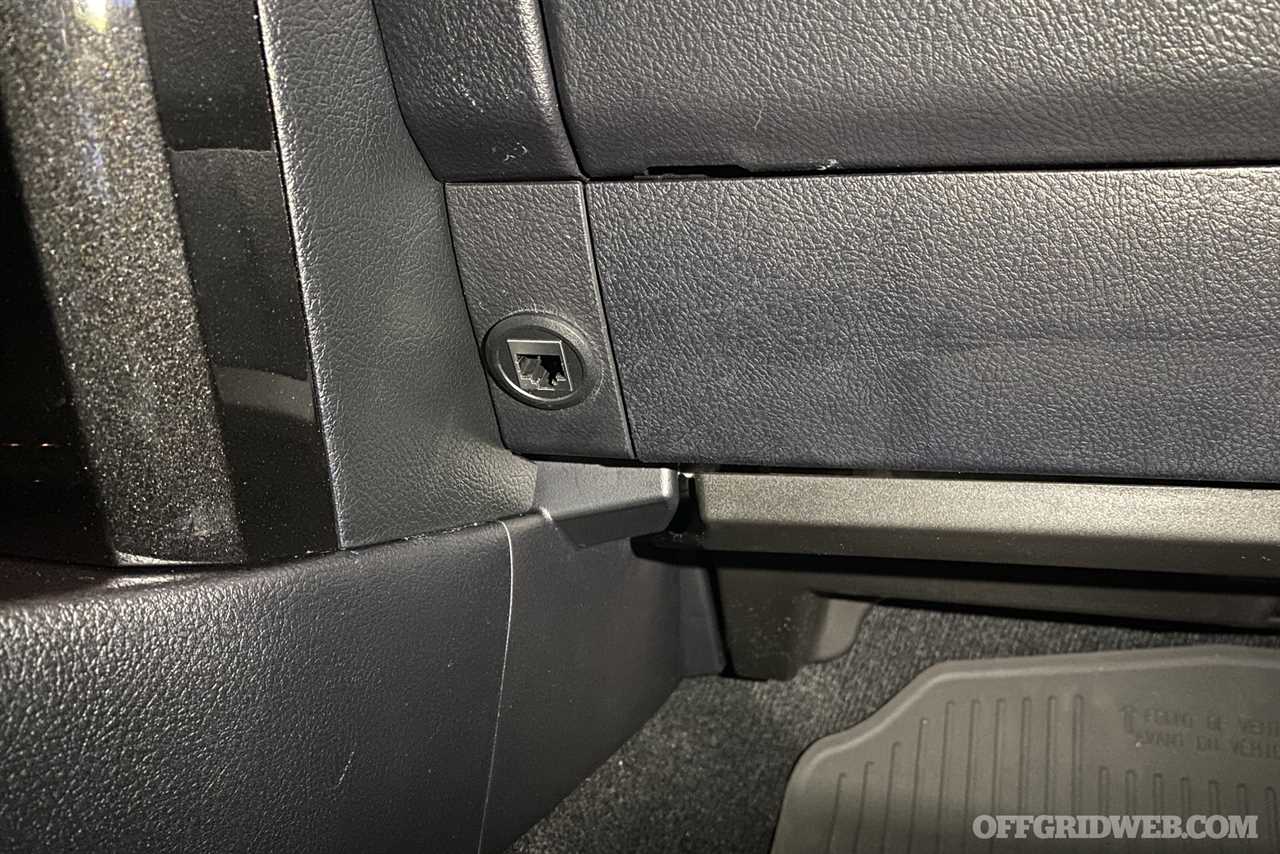
The plastic panel was reinstalled and connected to the CAT-5 cable I routed through the console. The result is a port at the bottom of the dash where I can connect the Midland MXT575 mic. If I'm not using it, I can disconnect the mic and stow it in the glove box, maintaining the factory look of my 4Runner and giving thieves no hint of what my truck contains.
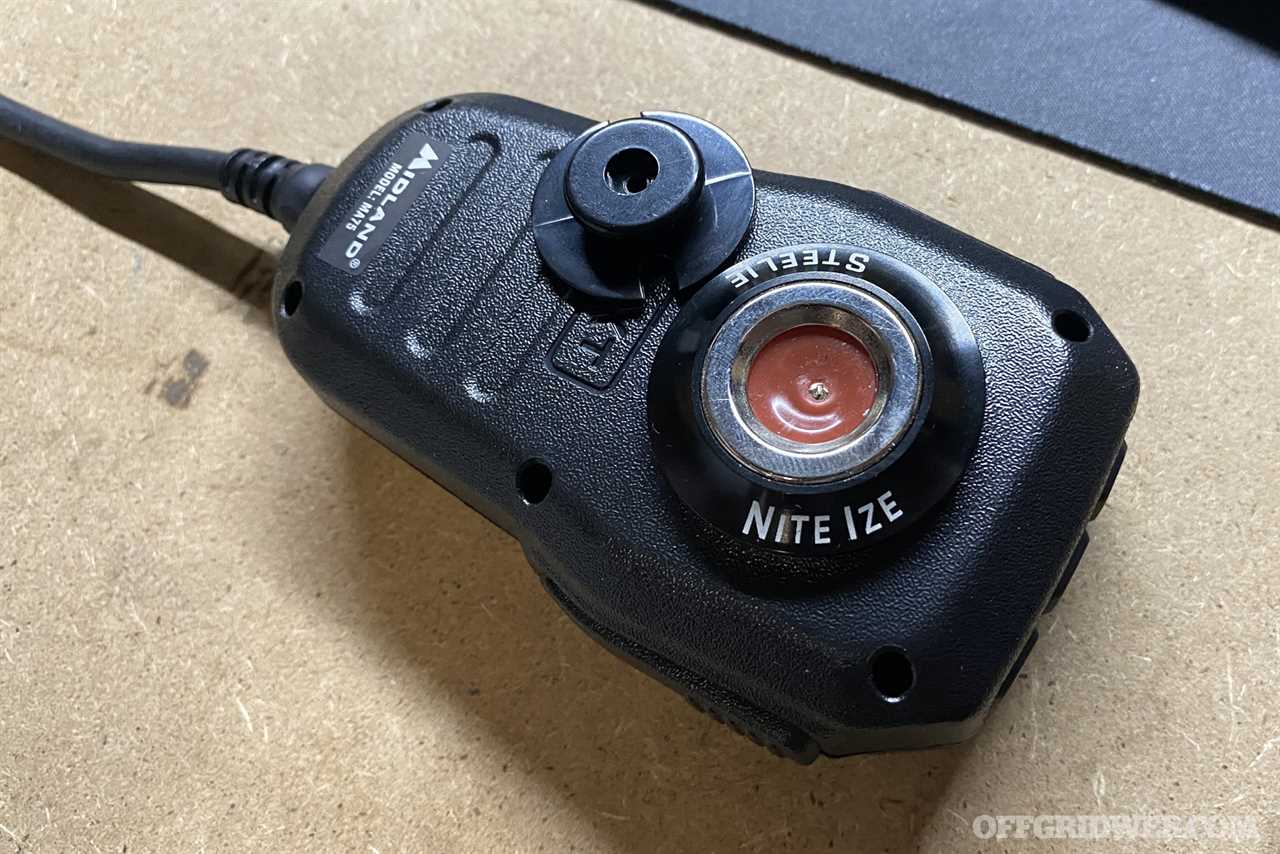
The Midland mic includes a connector and stick-on plastic dash mount, but I had a sturdier Nite Ize Steelie magnetic ball mount on hand, so I swapped it onto the mic. A small hole was drilled through the Steelie plate, and the Midland screw was used to attach it securely to the mic.
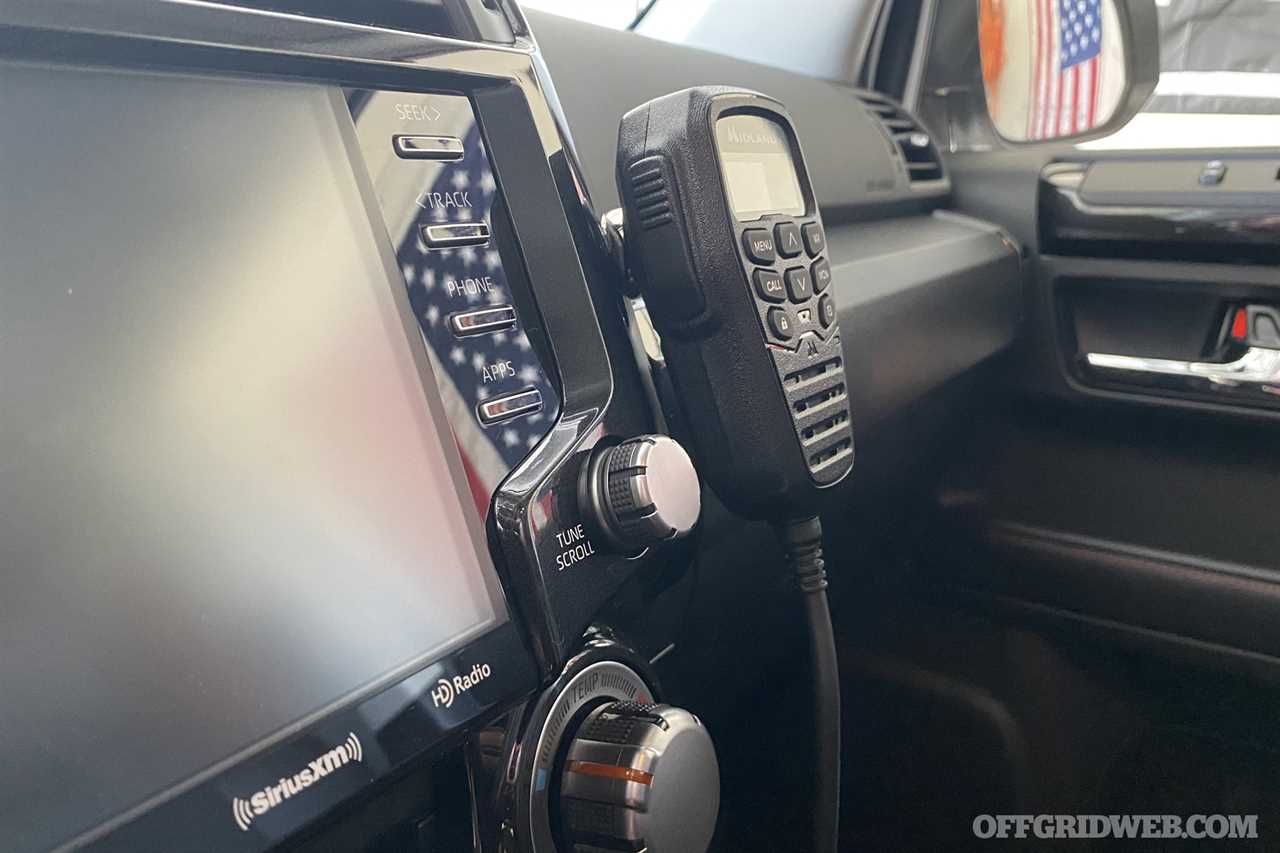
The other side of the Nite Ize magnetic mount was attached to the passenger side radio trim panel. Now the MXT575 mic is always within arm's reach of the driver or passenger, and its display is clearly visible at all times. Pretty slick, if I do say so myself.
Final Steps & Testing
Since the mic and power cables were ready under the seat, I attached the radio to the mounting plate and connected both cables. I also screwed in the antenna cable and placed the magnetic mount on the roof of the 4Runner:
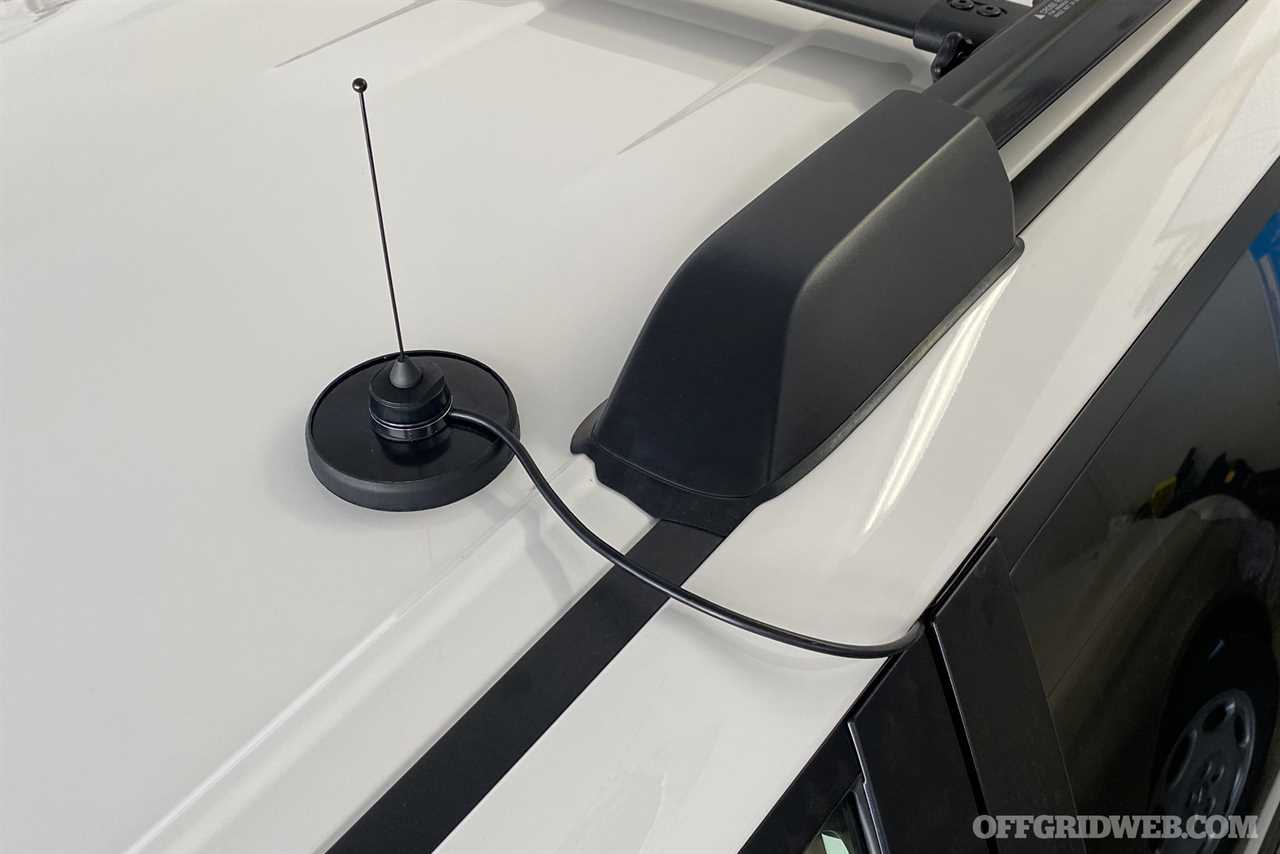
This is only a temporary antenna location, but it'll allow me to use the radio until I come up with a more permanent mounting solution.
With a press of the power button on the mic, the radio chirped and lit up. As I scrolled through the channels, I overheard some chatter from neighbors discussing supplies they needed for a new chicken coop. It works! To test the broadcasting ability, my wife headed out to walk the dog, and brought a handheld radio with her. She was able to hear me loud and clear throughout the neighborhood.
With the radio mounting plate Velcro'd to the carpet under the seat, it's protected and completely invisible to passengers:
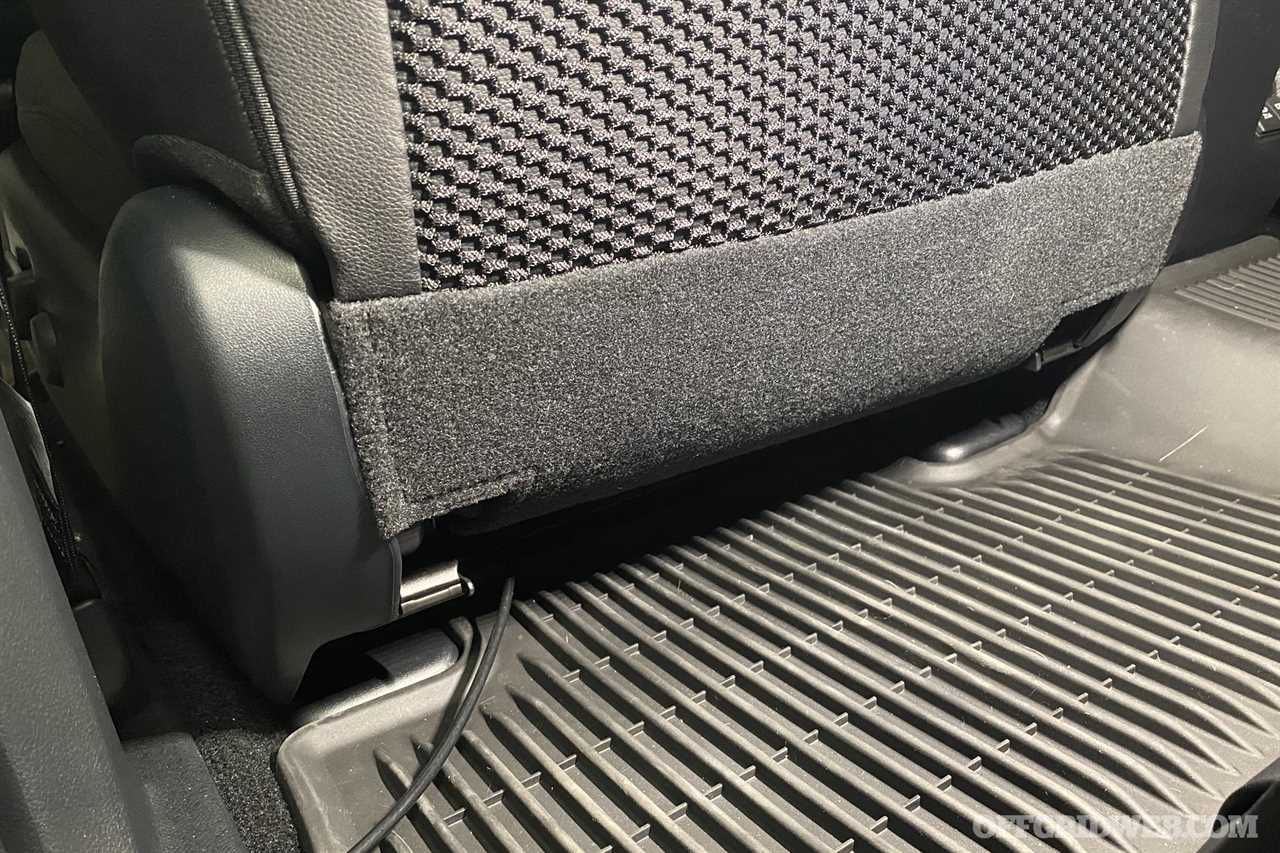
Only the antenna cable can be seen here — I plan to reroute that and hide it once I determine a final location for the antenna (preferably something more discreet).
Closing Thoughts

The new Midland MXT575 served as an easy way to add off-grid communication capabilities to my 4Runner. Its 50W broadcast power and high-mounted antenna on a large ground plane ensure I'll be able to squeeze every bit of range and clarity out of this GMRS setup. I'm also pleased with its hardwired power and concealment-friendly control mic — these features allowed me to integrate it seamlessly into the truck, rather than cluttering up my dash with wires and brackets.
Admittedly, even a 50W GMRS mobile radio can't reach as far as a top-of-the-line ham radio setup, and public repeaters are less common. However, GMRS doesn't require every member of my family to pay a fee, pass a test, and obtain a separate license. With one $35 family license, I can simply give my wife a spare handheld radio and let her spot my approach to challenging trail obstacles. This low barrier to entry also means that many local off-roaders and overlanders use GMRS, so if I ever need to call for help, I'm likely to reach someone nearby. Combine this with a healthy network of GMRS repeaters in the Phoenix area, and I have a reliable alternate comms tool to fill out my PACE plan (Primary, Alternate, Contingency, and Emergency).
As I mentioned earlier, the new Midland MXT575 will be released to the public in summer of 2022. For more information, go to MidlandUSA.com.
Related Posts
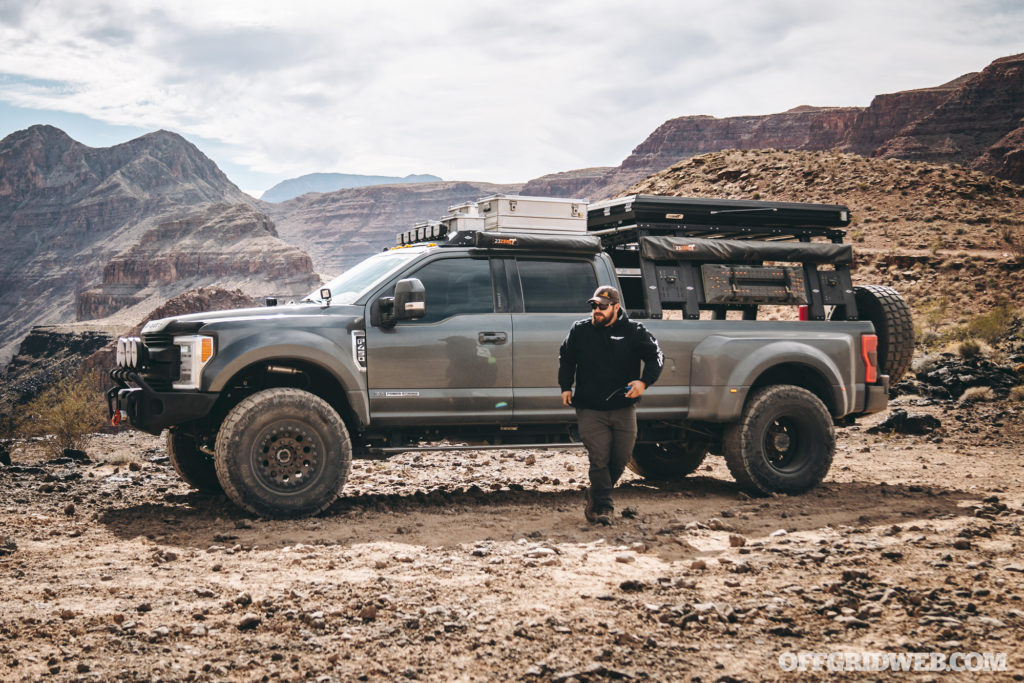
Colossus: TinyHomeToyHauler's Overland Ford F-450 BuildThe Peru family wanted their Ford F-450 overland truck to have most of the capabilities of an Earthroamer at a much lower cost.

What If You're Stranded on a Remote Backroad?Preparation and planning can go a long way, in case you get stranded during a road trip. The key to success is planning for the unexpected.
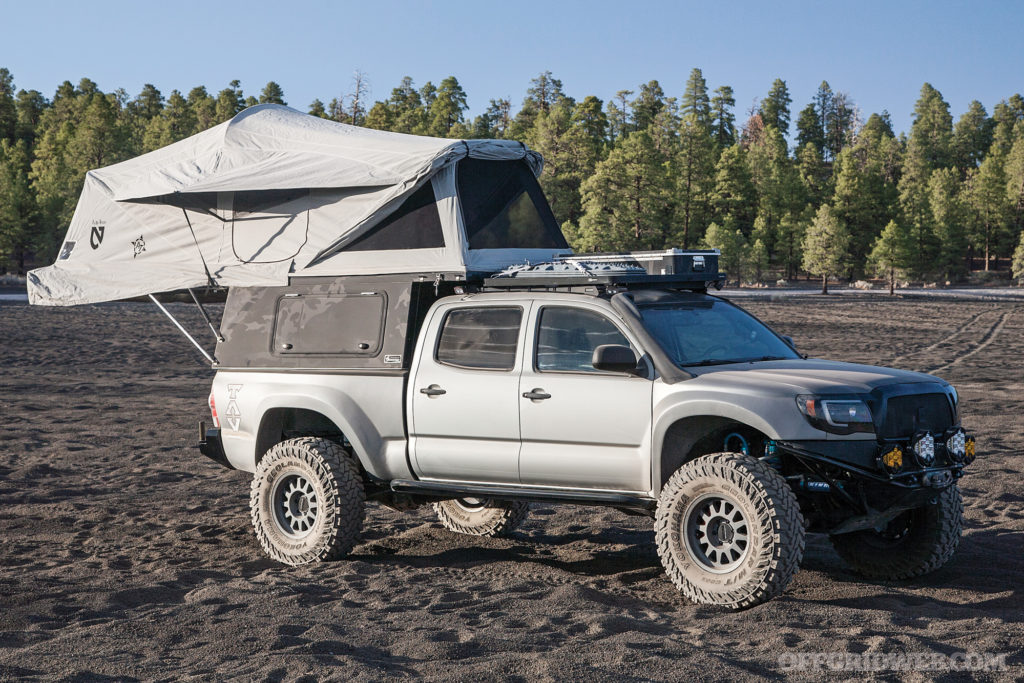
The TAV “Ranger Goat” Overland Tacoma BuildAfter his cousin passed, Walt inherited the truck and decided to use it to keep his legacy alive by building it into an overland Tacoma.

Distress Signal Device Buyer's GuideThese distress signal devices can be life-saving rescue tools, but don’t let the first time you need one be the first time you test one.
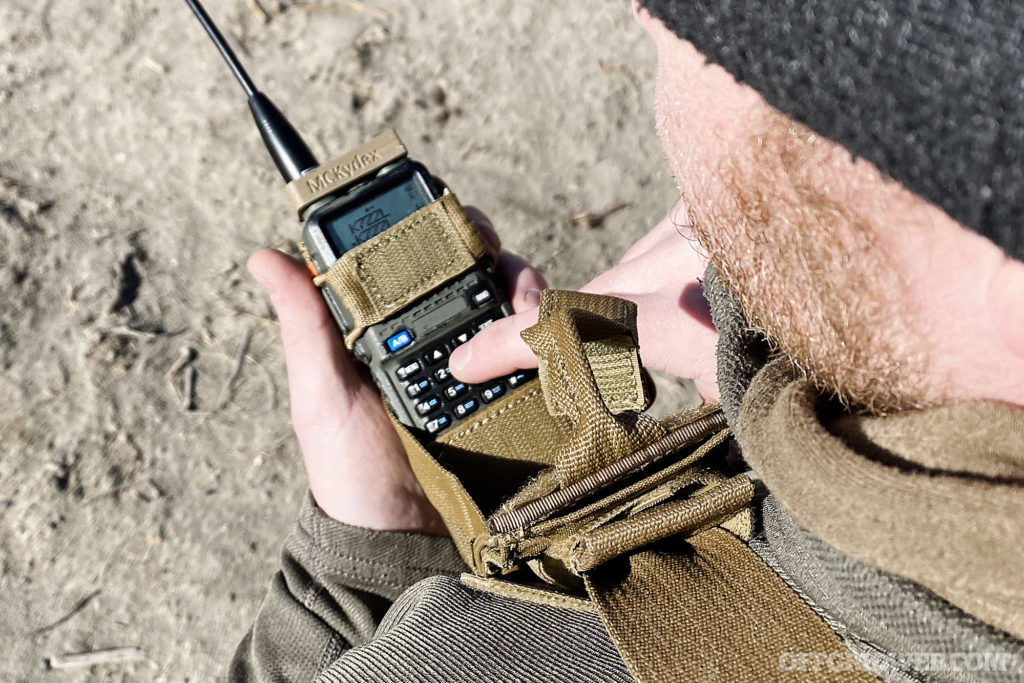
How to Carry Your Handheld Emergency RadioUnlike cell towers, HAM radio doesn’t get overwhelmed during crises. This is why it's wise to carry a handheld emergency radio in your survival kit.
Roamr's 1974 Jeep J20 “Tomahawk” Overland TruckThe Roamr team has always been fond of J-Series trucks, so when they found a rusty 1974 Jeep J20 for sale, they decided to rebuild it.

Bag Drop: 5.11 RUSH12 Hurricane Response BackpackThe RUSH12 is my “12-hour pack” used for the 16- to 18-hour shifts that we end up working during a hurricane search and rescue deployment.

A Quick Look at Smartphone Security AppsWe looked at a few smartphone security applications that can help you protect yourself, your data, and your hard-earned currency.

Faraday Bags: Testing Commercial and DIY Wireless Signal BlockersFaraday bags can block various types of signals from communicating with electronic devices, including GPS, cellular, Bluetooth, and Wi-Fi.
The post Midland MXT575 GMRS Mobile Radio Review & DIY Installation appeared first on RECOIL OFFGRID.
By: Patrick McCarthy
Title: Midland MXT575 GMRS Mobile Radio Review & DIY Installation
Sourced From: www.offgridweb.com/transportation/midland-mxt575-gmrs-mobile-radio-review-diy-installation/
Published Date: Tue, 26 Apr 2022 18:52:16 +0000
-------------------------------------------------------------------------
Did you miss our previous article...
https://outdoorsnewswire.com/survivalist/how-to-take-a-sponge-bath-without-running-water
 CampingSurvivalistHuntingFishingExploringHikingPrivacy PolicyTerms And Conditions
