There’s something undeniably cool about a rope ladder. I don’t know what it is. Maybe it reminds me of scaling one up into my tree house when I was a boy, maybe thoughts of a daring escape dangling beneath a rescue helicopter. They are just plain rad. But they’re also totally practical!

Rope ladders have all kinds of uses, as improvised solutions for climbing a vertical face, evacuating from the upper story of a building, or even getting you into a tricky tree stand.
Rope ladders have been around for a long time and compared to traditional ones they are extremely portable and often very light.
And even better, you can easily make one yourself with basic materials and just a little bit of practice. Keep reading and I’ll tell you how to make two different types from rope, one with wooden rungs and one without.
Caution: Be Sure of Your Rope Before Trusting Your Ladder
Before we get to the actual list of materials and steps, I must caution you to be entirely sure of the rope you are using before you trust either of these ladders to bear your weight.
A thorough discussion of rope types and qualities is beyond the confines of this article, but any rope you’re going to use for any practical purpose and especially emergency purposes must be very strong and also kept in good repair.
No matter how good the rope is, if you let it get frayed, moldy, dry rotted, or otherwise degraded from neglect banging around in the back of your truck or sitting out in a shed or garage, it might fail when you can afford it the least. Don’t take any chances!
What You’ll Need
You don’t need much besides plenty of rope to make a good rope ladder, whichever design you want to go with. Gather the following, and we will be ready to start…
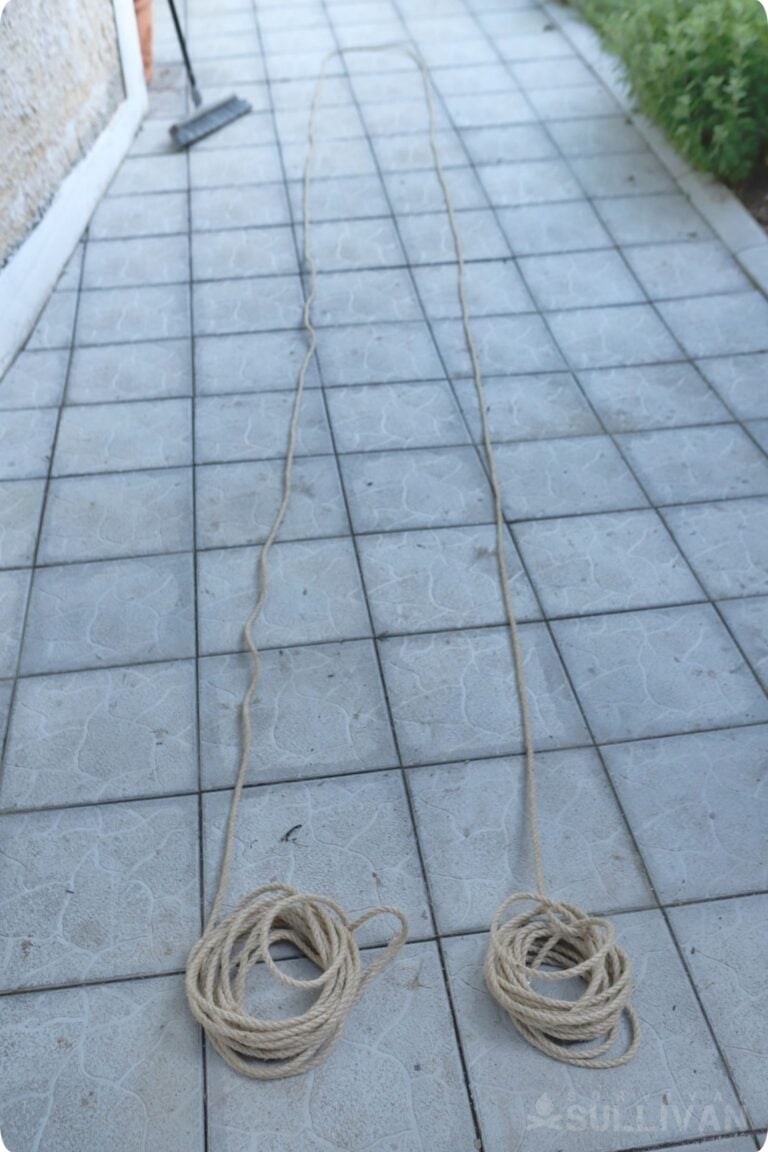
Rope: you’ll need plenty of rope, especially for the second design. To help you climb down on the first-floor window, we used 2 pieces of 16 feet (5 meters) each for the first design, and one whole 50 feet /15 meters piece for the second one. You can, of course, use the longer one for both designs.
I like to use manila rope, but you can use climbing rope or anything else that’s suitable for holding the weight of a human being.
Make sure whatever you’re using isn’t too elastic. If you’re going to make one with wooden rungs, you’ll need two equal lengths that can span the height you want to use the ladder with, plus several extra feet on either end for attaching to an anchor point above and below.
For an all-rope ladder, get a long, long length of rope because you’ll be using a ton to craft the rungs.
Here’s the rest of the tools and materials you’ll need for this first design…
- Twine or Floss: any cut ends of your rope should be whipped and rapped with fine twine to prevent them from fraying and unraveling. If you don’t have any appropriately strong twine, you can use dental floss in a pinch.
- Wooden Dowels, 2-inch: if you want to make a ladder with wooden rungs, get enough 2-inch or thicker hardwood dowels to place one about every 10 or 12 inches along the length of your ladder.
- Calculate and buy accordingly depending on how long you want your ladder to be. Cut these dowels into sections about 18 inches (45 cm) in length.
- Saw: you’ll need some kind of saw in order to cut your dowels into sections to form rungs.
- Knife or Scissors: you’ll need a good, sharp knife or shears to cut the rope with.
- Stakes (optional): you may optionally use stakes or other anchors to secure the bottom of your ladder if you’re going to leave it in place for climbing into a tree stand, tree house, or for some other utilitarian purpose. This will keep it from swaying and make it much easier to climb.
- Measuring Tape or Meter Stick: you’ll need this to help you measure the length of your rope and the intervals between the rungs whether or not you’re using wooden dowels.
And that’s it, not much to it even though you do need a lot of rope for a tall ladder. Now it’s time to learn how to make one.
Making a Rope Ladder with Wooden Rungs, Step-by-Step
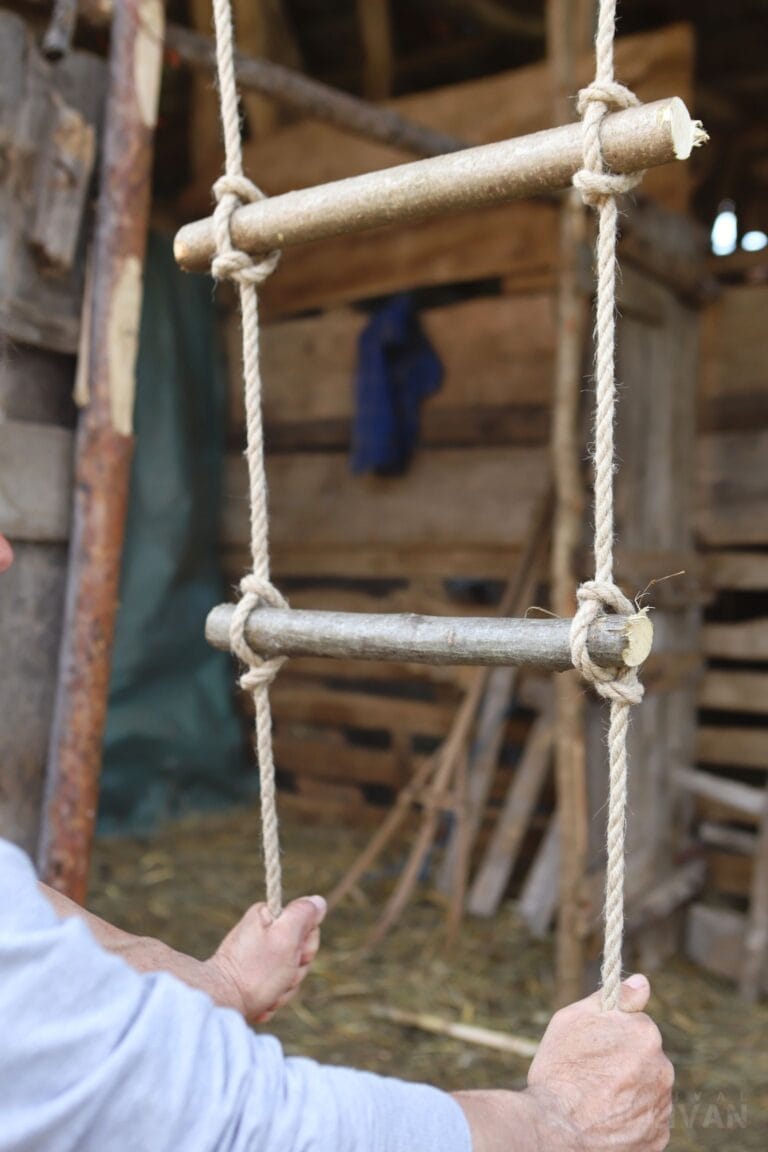
DIY rope ladder with wooden dowels
The following steps will walk you through making a rope ladder that uses wooden rungs. Make sure to review all of the steps before you begin so you know what to expect. This will make it easier. Note that this design is easy to put together in a hurry, but not the strongest way.

Step 1: measure rope. You’ll need two equal lengths of rope. Measure the distance that you want your ladder to span, then leave a couple of extra feet on each end to assist in anchoring and tying off.
In our case, each piece is 12 feet / 3.6 meters in length. After we make the knots and insert the dowels, we’ll end up with a ladder that’s 8 feet (2.5 meters) in length. This means the remaining 4 feet (1.2 meters) are used up by the knots and the fact that the rope has to accommodate each dowel.
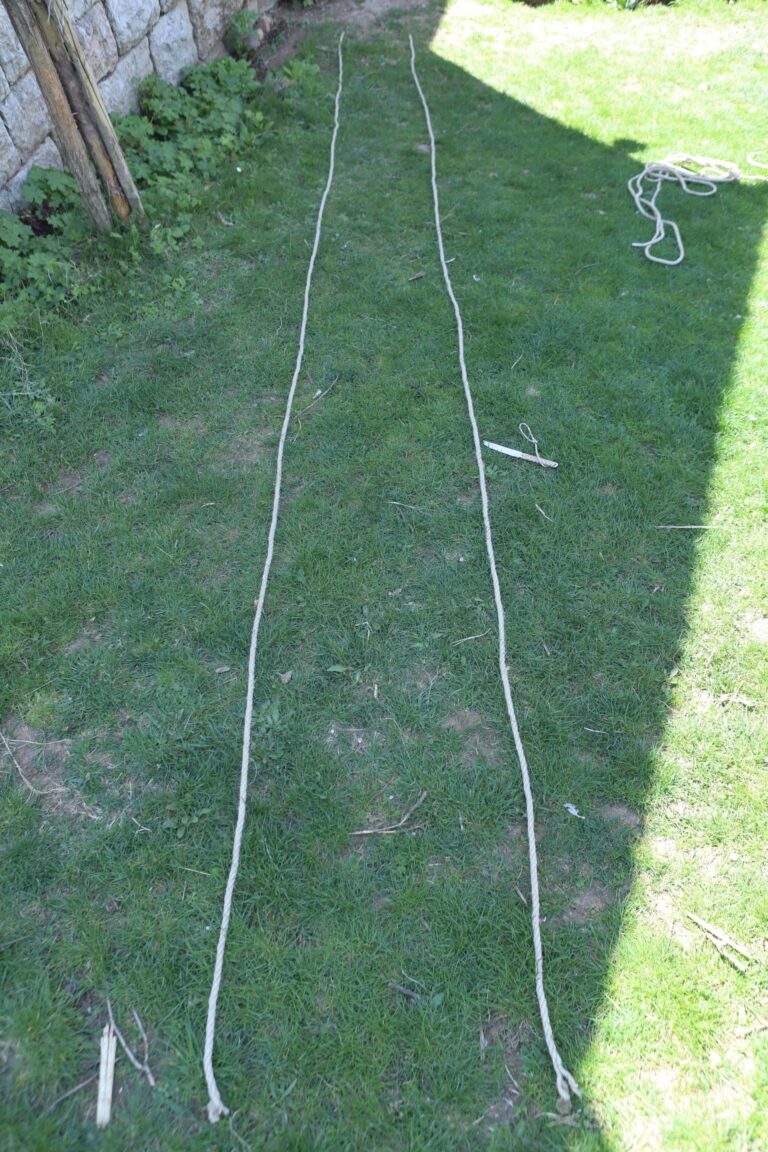
two long pieces of rope
Step 2: cut rope. Using your scissors or shears, make a clean cut at the point that you measured. You should now have two equal lengths.
Step 3: whip ends. Whip the ends of the rope to prevent fraying using the twine or, lacking that, the floss. If you’re using a synthetic rope that can be melted safely, you can seal the ends with a lighter.
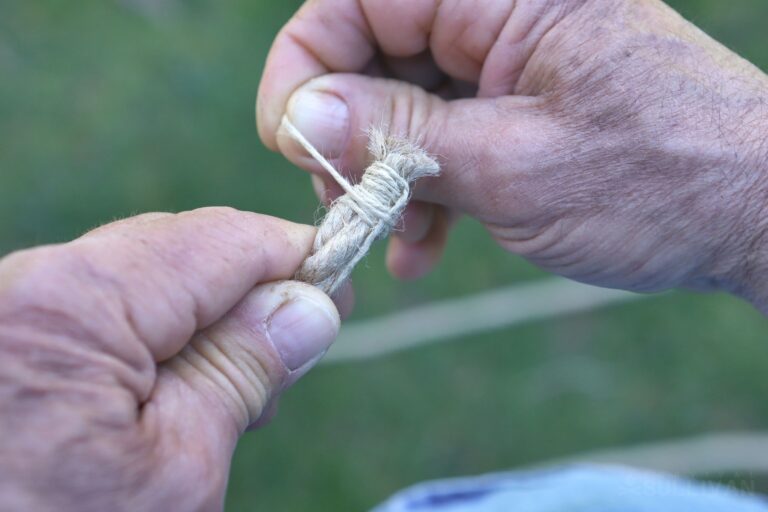
whipping end of rope
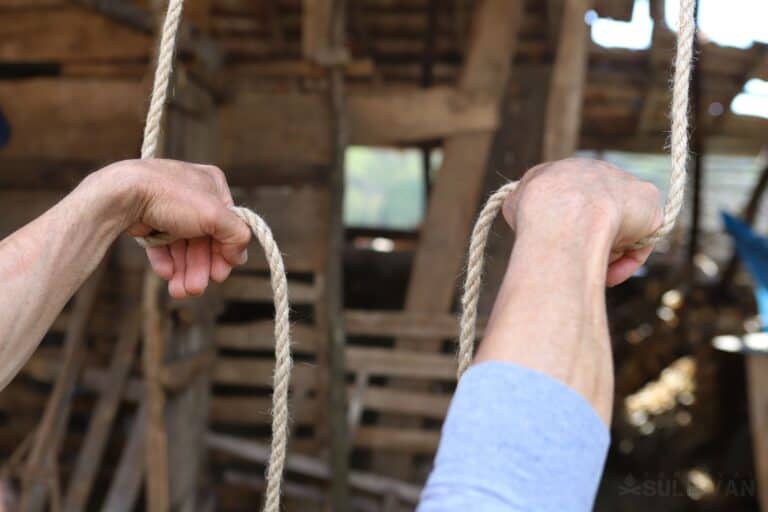
Step 4. Hang ropes. Attach the top of each rope to an anchor point using any knot that is appropriate to the task. Any that you choose must not slip or spill under the weight of an adult. If the ladder isn’t being hung permanently, tie on your attachment system.
** Steps 5 through 10 are to be repeated for each ladder rung.
Step 5: create bend(s). Starting at 2 feet from the end of one rope, curl a bend in each of the pieces of rope by passing it up under your palm while holding them with your thumb:
curl bend in both ropes
… then over your palm:
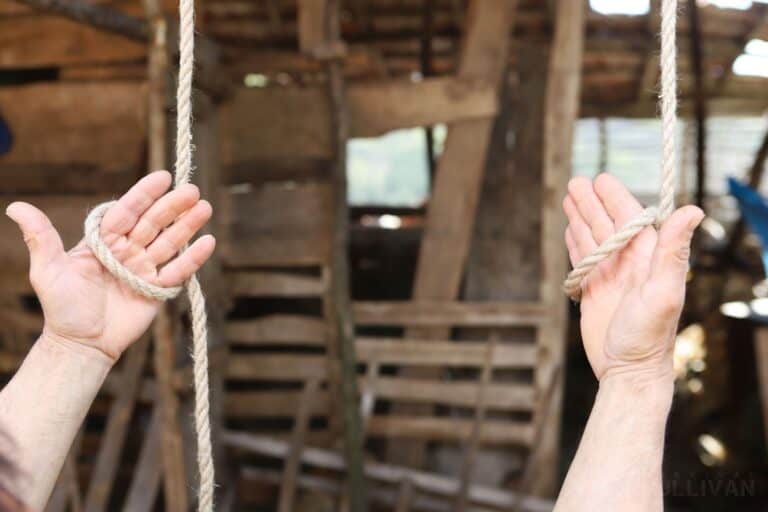
curl bends over both hands
Step 6: create loop(s). Slip your thumb under the rope with your palm…
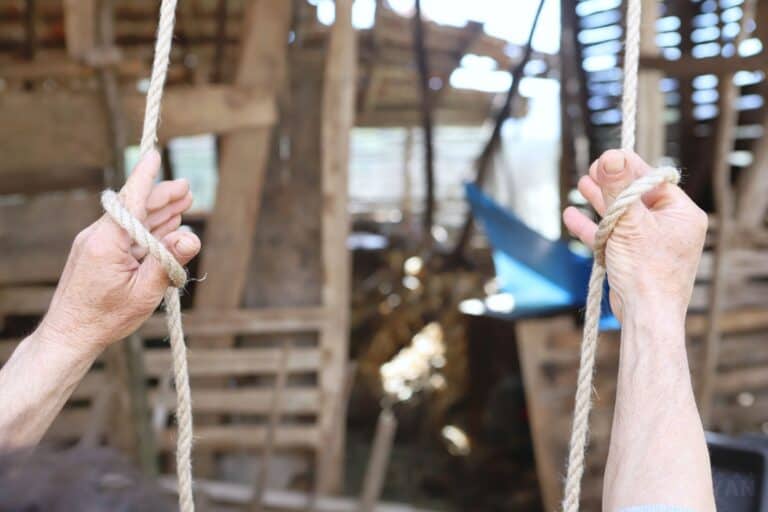
slip thumbs under rope
Then reach through with the fingers of the other hand (or with your partner’s hand) to grab part of the standing end and pull it through. This will basically make an open slip knot:
pull standing part through
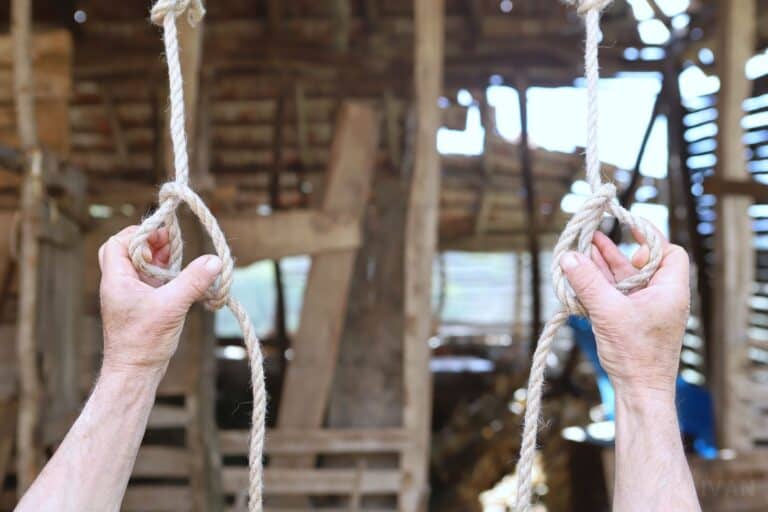
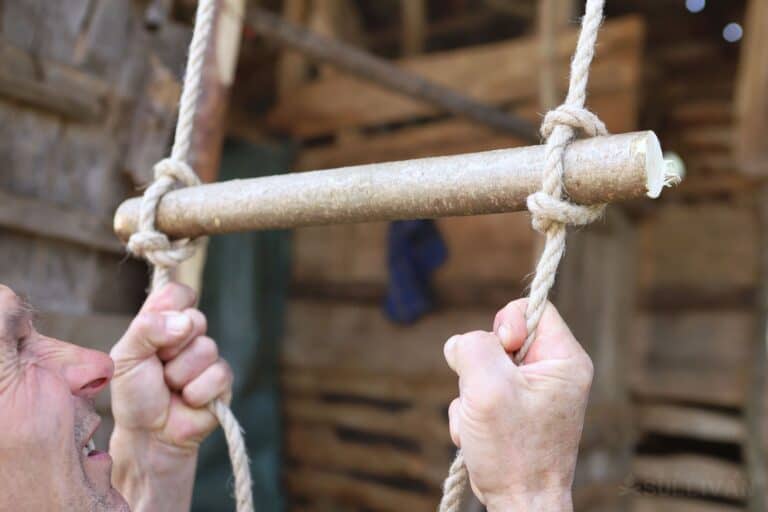
Step 7: insert dowel. Take one of the dowels and insert it through the loops you just formed before cinching it tight by pulling on the standing and working ends of the rope.
insert dowel through loops
Pull it as tight as you can so the rope will bite into the dowel somewhat. If the dowel skids around it could come loose under load.
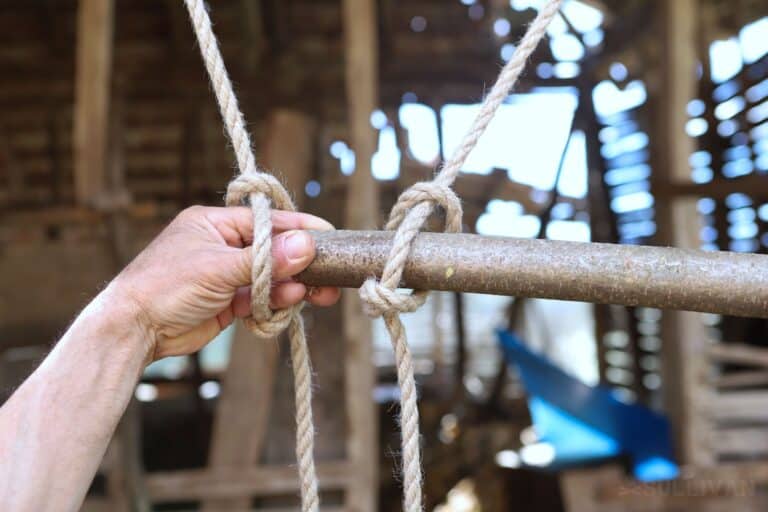
Step 8: secure rung. Repeat steps four through six with the other rope, taking care to make your loop at precisely the same place that you did on the opposite rope. If you get sloppy, your rungs will be uneven and dangerous.
tighten dowel
Step 9: start next rung. After securing the previous rung, go back to the rope that you started with and measured down anywhere from 10 to 12 inches before repeating steps four through six, cinching the dowel tight as before…
Step 10: secure next rung. Repeating the process again to secure the next rung in the opposite rope.
Step 11: install all rungs. Repeat these steps, measuring carefully each time for consistency and to ensure levels, until you’ve installed all of your rungs or as many as you need. Make sure you stop leaving at least 2 feet of rope on each side at the bottom.
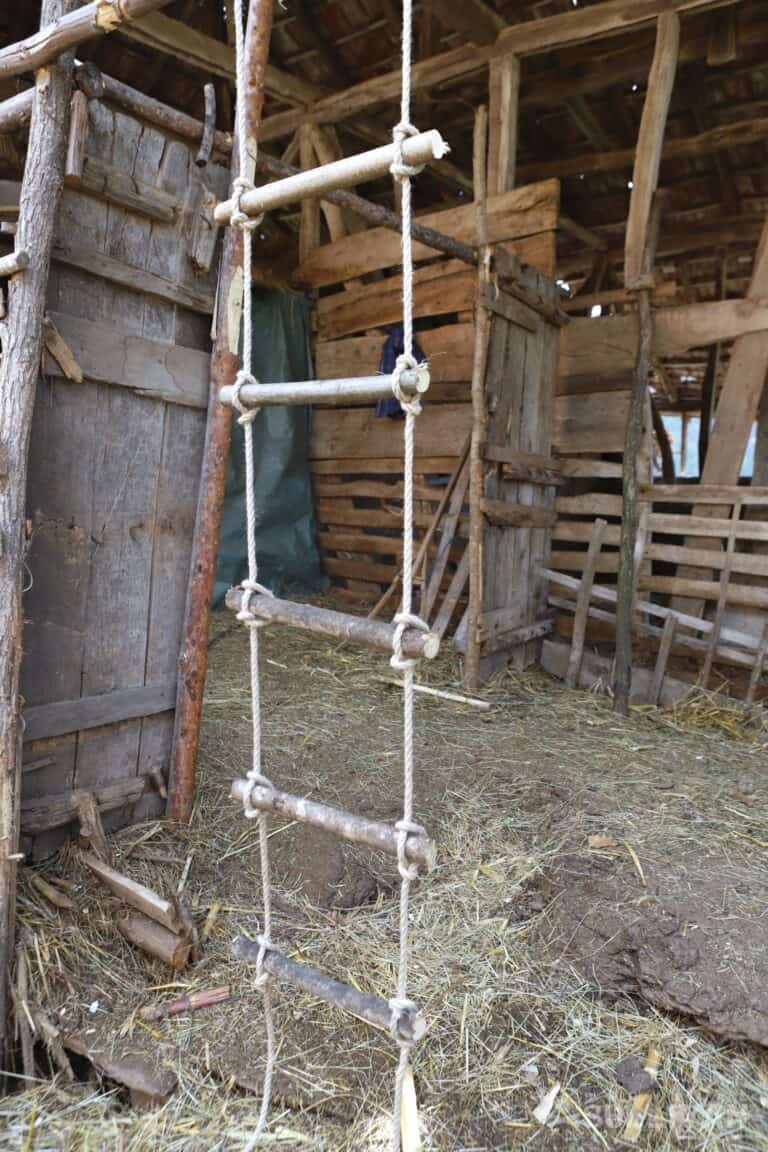
wooden dowels ladder finished
Step 12: anchor ladder. Optionally, if the ladder is being permanently hanged, tie the bottom of each rope onto a stake for driving in the ground or a fixed anchor. This will greatly increase stability and safety when climbing because it’ll prevent the ladder from swaying.
Step 13: finished! You’re done. That wasn’t too hard was it? Your ladder is ready to give you years of faithful service.
Your ladder is now ready to hang, stow, or store in a handy spot just in case depending on your purposes.
As you might have guessed, make it a point to inspect it regularly for any signs of degradation, slippage, or other problems. Don’t neglect repair or replacement! Ladders of all kinds are leading causes of accidents.
Making a Rope Ladder with Rope Alone
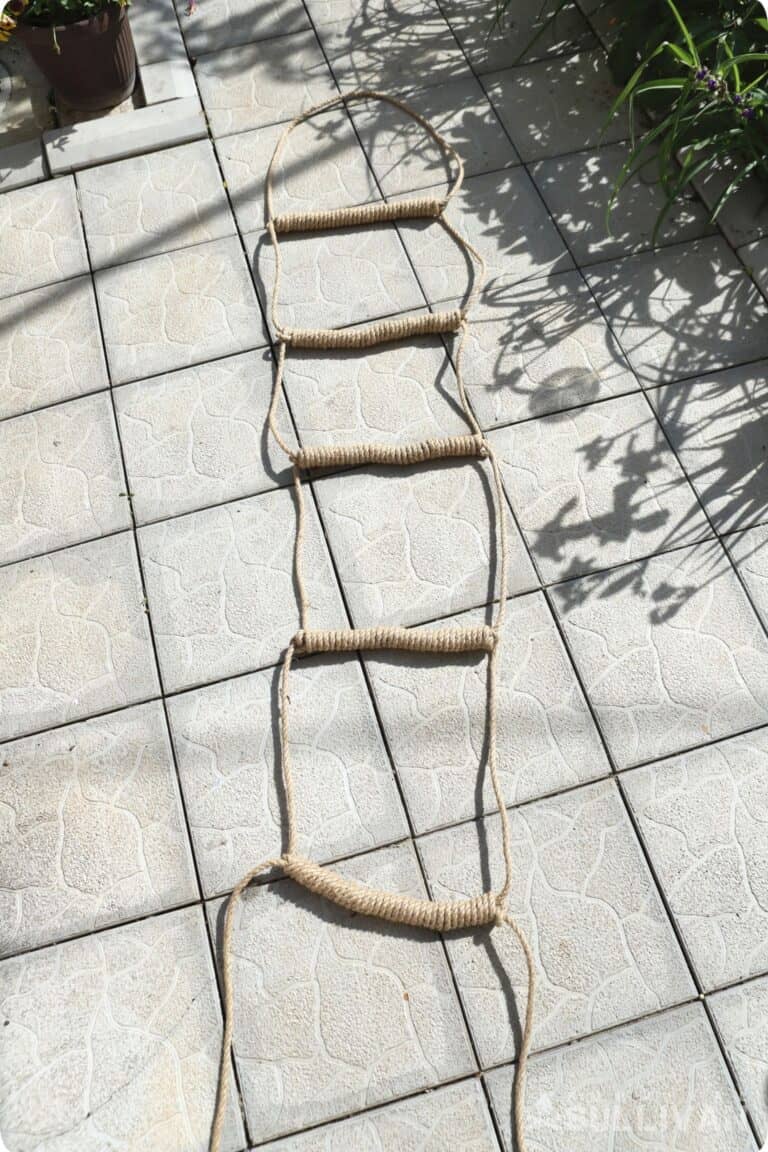
a DIY rope ladder from just rope
If you don’t have or don’t want to use wooden rungs, the following instructions will help you craft a ladder using rope alone for bushcraft scenarios or for when you don’t have much time.
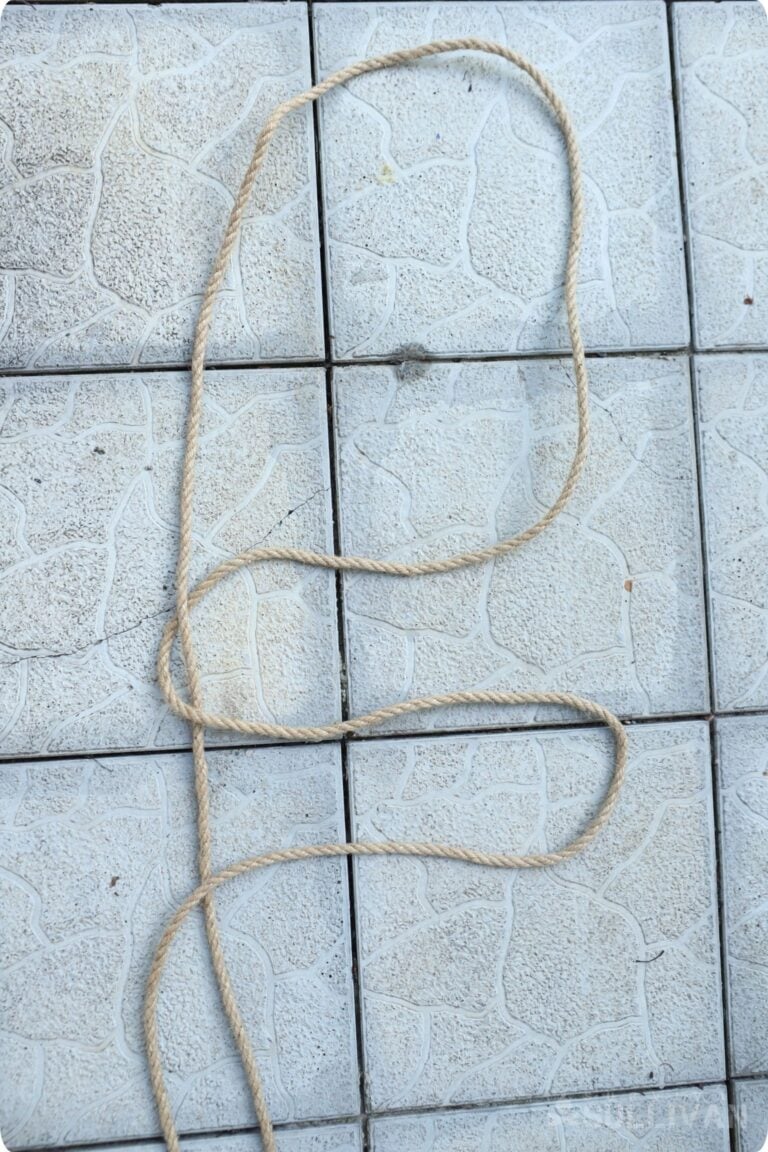
Step 1: measure rope. You can make this ladder using a single length of rope that’s folded in half in the middle, or using two strands of equal length (as before).
two pieces of rope side by side
Again, you’re going to need a ton of rope for this one so leave yourself plenty of surplus when you begin. Regardless, you want two parallel strands side by side.
Step 2: create two bends in rope. Starting with the rope on the left-hand side, create two bends in the shape of an S.

S shape in first rope
Step 3: pass opposite rope through first bend. Taking the opposite rope, pass it through the first bend from above, then beneath the working end of the next bend from below.
passing second rope through bend
Step 4: wrap rope. Continuing with the rope that you just passed through the bends, start wrapping it tightly around each bend in the S, starting next to itself and continuing until it reaches the opposite rope.
Make the first look like so:
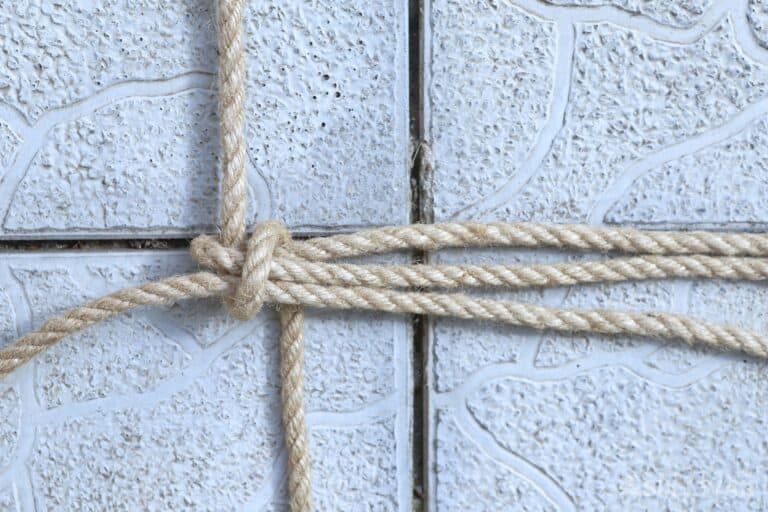
first loop of the wrap
This wrap should look like a tight coil:
starting to make first wrap
Keep going…
first wrap finished
Step 5: pass wrap through bottom bend. Once you’ve completed all of the wraps, pass the rope you’re working with through the bottom bend (now on the right side in the pic) that you made in the original rope from below.
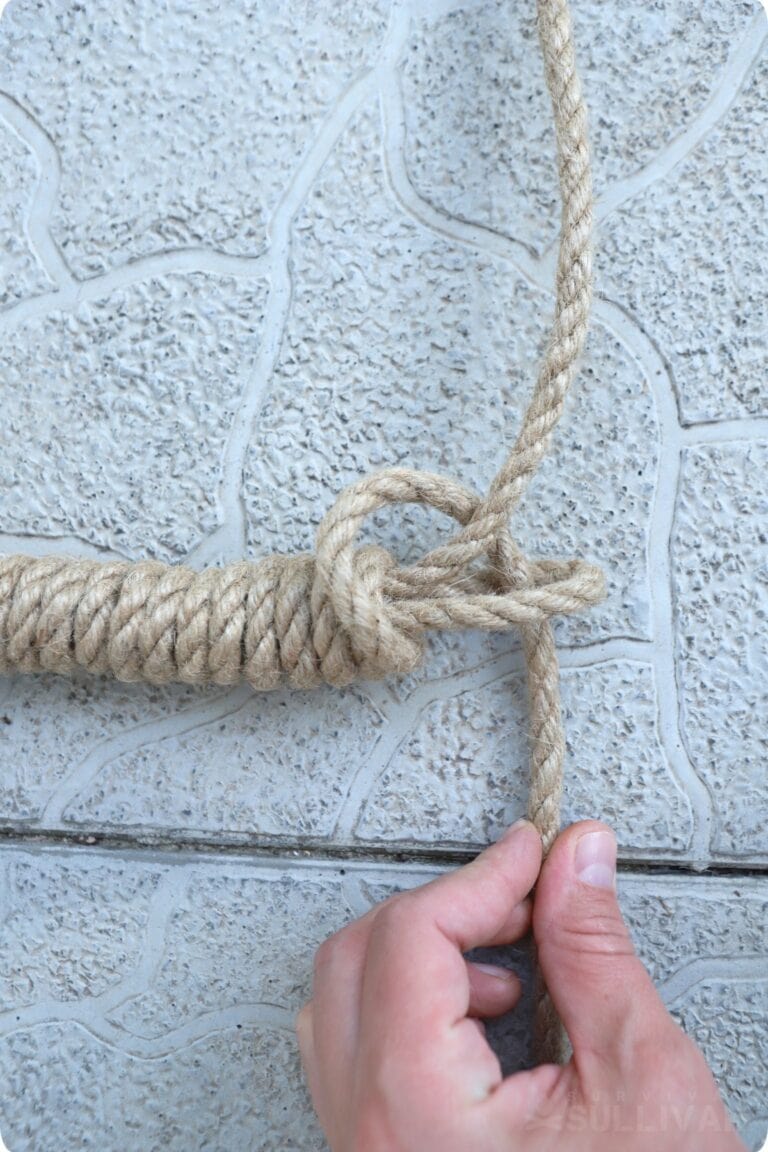
passing wrap through end
Pull it all the way through and remove the slack gently.
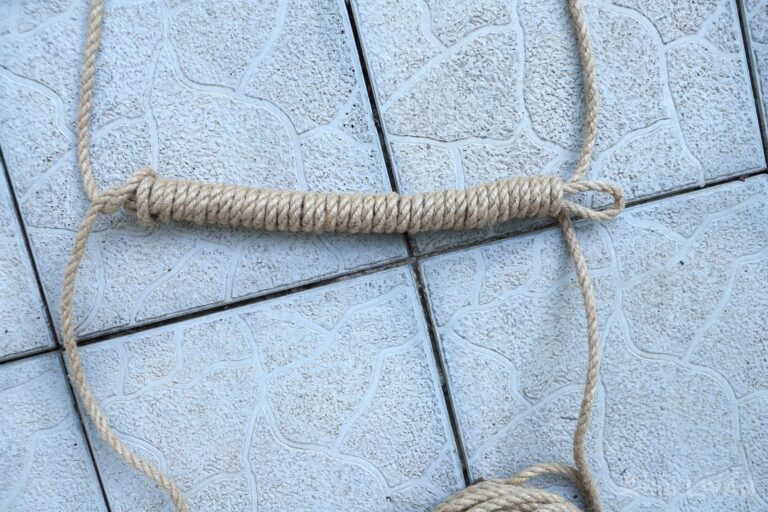
Step 6: dress wrapping, tighten. Now take the time to dress the wraps you just completed and make sure they are snug, symmetrical, tight, and properly spaced. This forms the rung.
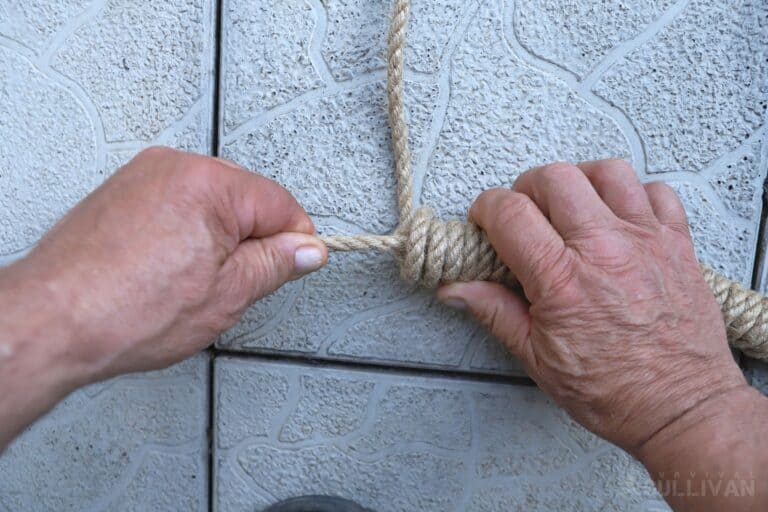
dressing the wrap
Now pull on both working ends of rope sticking out on either side to cinch everything down. This securesthe rope you just passed through the loop in the previous step. You’re now ready to start the next rung…
Step 7: create two bends in opposite rope. Starting 10 to 12 inches (25 to 30 centimeters) further down with the working part of the rope on the right now, create two more bends in the shape of an S exactly as before.
creating S shape in second rope
Step 8: repeat. Repeat Steps 3 through 6 exactly as before to create the next rung. Take great care to keep your measurements and wrapping identical so that the rungs will stay level and evenly spaced.
starting to make first wrap
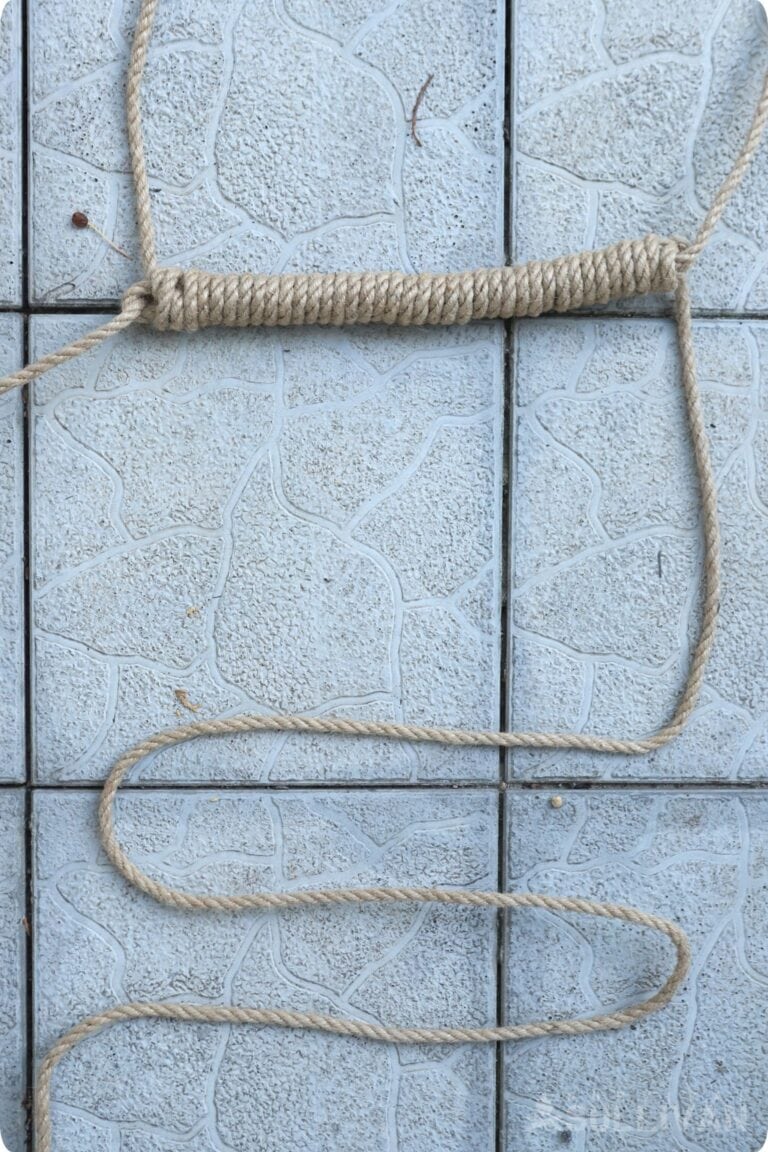
Step 9: create all rungs. Repeat all of the steps above to keep crafting rungs until the ladder is as long as you need it.
5th rung done
Remember to always drop down in the exact same increment and start the rung with the bend on the opposite side each time. If you drop 10 inches, you’ll always move down 10 inches. If it’s 12 inches, you’ll always move down 12….
Stop when you know the ladder is long enough or when you only have about 2 feet of rope left on either side.
Step 10: whip ends as necessary. When the ladder is finished, cut off any excess and whip or melt the ends as necessary.
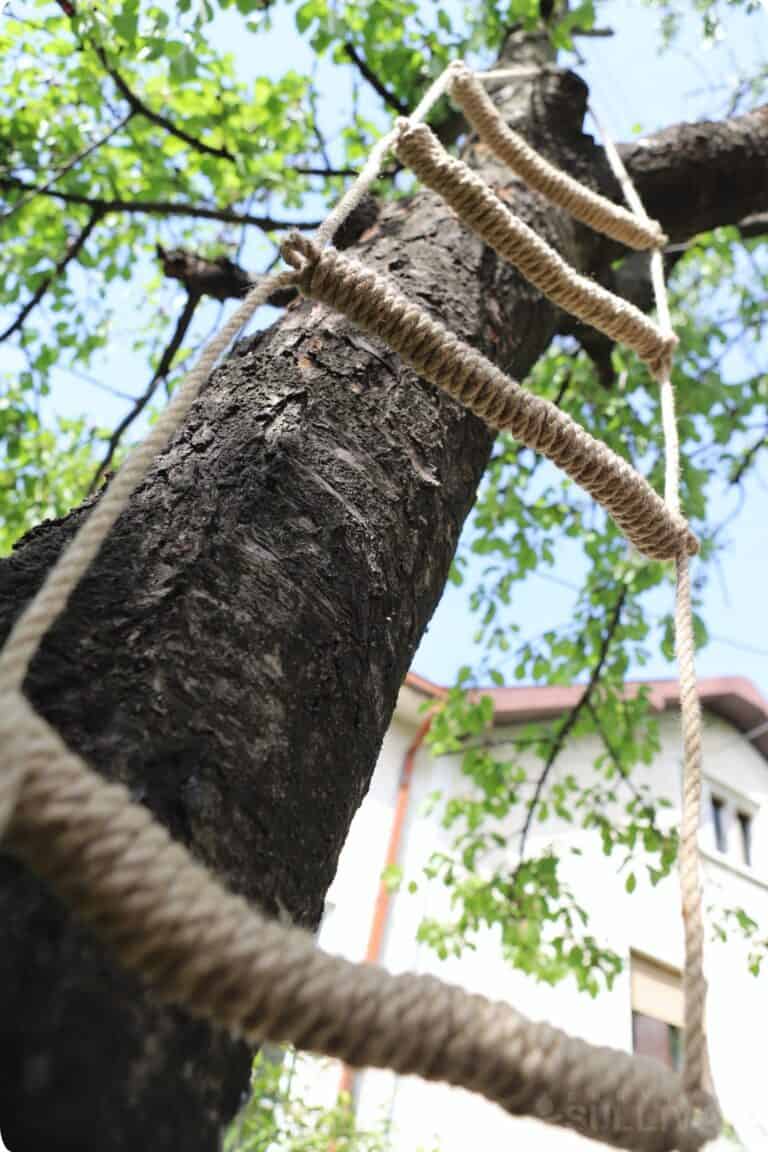
Step 11: hang ladder. Tie off the ladder to an anchor point or to hanging hardware as required using an appropriate knot or lashing. A killick hitch or figure-eight on a bight will work for attaching to a round anchor point. Keep in mind that any knot you use must not slip or spill under load from an adult human.
Step 12: anchor ladder. Optionally, tie off the bottom ends of your ladder to stakes for driving into the ground or to anchors that are already fixed in place. This will prevent the ladder from swaying and make it much easier to climb.
Step 13: finished! Your ladder is ready to hang, install or put away until it is needed.
And with this, you can see how easy it is to create a rope ladder using nothing but rope, and a very, very strong one to boot. As before, make sure you inspect your ladder regularly for any loosening, fraying, damage, dry rot, and the like. Replace it before it gets bad!
Helpful Tips
Use tape to mark measurements. If you’re having trouble keeping your rungs level, you can measure carefully with a meter stick or measuring tape and then mark your measurement with a piece of tape, so you know precisely where to start your loop or wrap.
Try using two different colors of the same kind of rope when making an all-rope ladder. It’s easy to get confused with all that wrapping and bending. Using two different colors will help you stay consistent and make the process easier to visualize.
Natural rope can be soaked for better security. If you’re using manila or some other natural fiber rope, you can soak it in water prior to starting.
Once the rungs are inserted, as the rope dries, it will get tighter and tighter beyond what you were able to achieve and give you better security. Make sure you let the rope dry out completely before you store it to prevent mold and rot.

The post Making a Rope Ladder 2 Ways (With and Without Wood) appeared first on Survival Sullivan.
https://www.survivalsullivan.com/diy-rope-ladders/
 CampingSurvivalistHuntingFishingExploringHikingPrivacy PolicyTerms And Conditions
