Anyone who has ever studied for a difficult test understands that memory devices such as sayings, rhymes, and abbreviations can be extremely helpful for remembering key information. Similar memory devices can help us be more prepared to recall important survival skills. S.T.O.P. (Stay Put, Think, Observe, and Plan) and the O.O.D.A. (Observe, Orient, Decide, and Act) loop are two very popular ways of framing your mindset in an emergency situation. The rule of 3s (3 minutes without air, 3 hours without shelter, 3 days without water, 3 weeks without food) is a popular way of recalling survival priorities. Other catchy number and letter memory devices have been introduced over the years to organize processes and groups of ideas with different levels of success. With fire starting, we know there’s a way to remember what’s needed with the ever-present “fire triangle” of heat, air, and fuel found in so many survival manuals.
Close your eyes and you can probably picture the illustration or recall an instructor saying it’s like a tripod trying to stand on two legs if one is taken away. We started thinking about creating a similar memory device related to the regular task of building a fire. We wanted to throw our hat in the ring and present the process of fire-starting with just a knife and ferro rod using a list of 10 S's you should always keep in mind as you work.
Source – Finding It From the Land
Sourcing materials is one of the most critical components to making a fire. The better the firewood, the stronger the fire and the easier it is to get started. When you look out on a landscape, you’ll likely see a collection of trees, both living and dead. You’ll see downed trees or piles of dead material. If your observation skills are strong, you’ll pick up on the micro features of the terrain and notice there are some dead leaves still on branches. Some trees may have bark peeling from them. Think of that bark like your own skin. When your skin is dry, it may crack. If you see cracked bark surrounding branches, there is a very good chance dry wood is underneath it. Another key element of sourcing wood from the land is learning to identify drier areas of the environment. You might find dry wood high up on riverbanks as the river dries out throughout the summer. You may find dry wood on rocky features instead of underneath wet leaves. The fire process starts with sourcing the materials you’ll need.
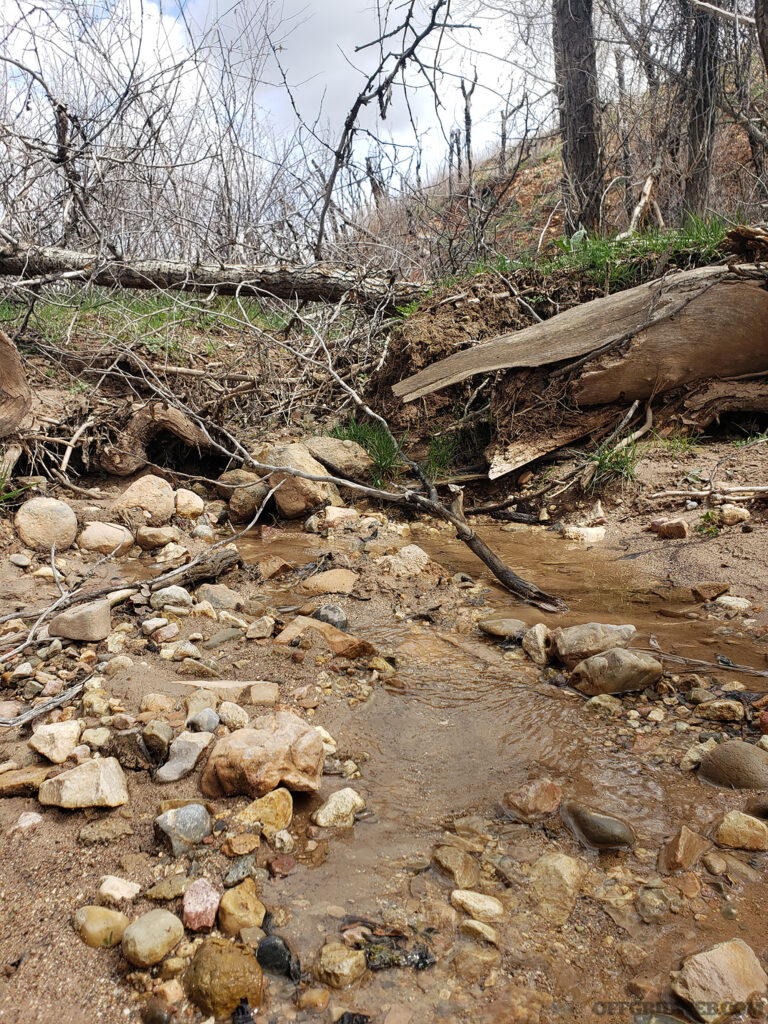
Above: Firewood is best sourced from dead and downed trees. An entire tree can be used for various fuel sizes in building a fire.
Select – What You Can Utilize
Just because you have wood to burn, doesn’t mean you have the right wood to burn. You may locate an entire dead standing tree that’s prime burning wood, but you need to work with the right amount of fuel for each stage in the fire-building process. Consider this one option. This means collecting plenty of small twigs for kindling, and perhaps light inner bark fibers for tinder. This also means being selective of what you use and making quality decisions if certain wood is punky, rotten, or partially green. As you select the wood you’ll use to make your fire, set it aside in piles that give you a visual reference to the quantity used to build a strong bed of coals. Select wood that’s pencil-lead thickness for one pile, pencil-to-finger thickness for another, wrist thickness for the next, and arm or leg thickness for the main fuel.
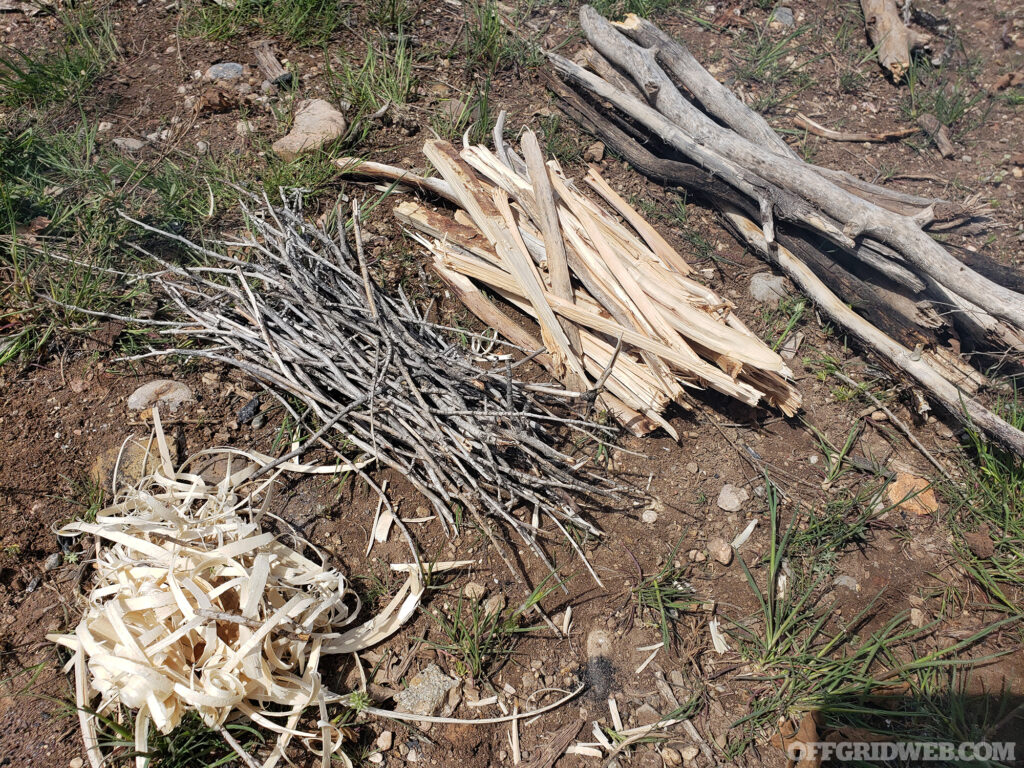
Above: Take the time to select the materials you need to build your fire and create visual piles that leave no doubt you’ll have enough.
Testing Wood for Fire-Making
All wood will burn if there’s enough heat. Even living wood will dry out from the heat of a fire, although this isn’t ideal. The best wood you can burn is dead standing wood that’s up off of the ground where moisture collects. It sounds simplistic, but the process of testing wood is important, and it can be done prior to smoking out your buddies around the campfire.
There’s an old expression, “If it doesn’t snap, throw it back.” That is, when you pick up a branch, bend it. If there isn’t a distinct snap or crack, it’s probably still too green. Dead wood has little flexibility and lets you know it. This process is quick and easy to do, even for little kids.
Another method of testing a wood source is to feel it for moisture. A piece of wood can be cut and held to the back of the hand or to your cheek (as long as you aren’t trying to test a poisonous plant). Some moisture is OK, but too much will make your fire smoke as it burns off.
You can also take a test sample of the wood you’re using and try burning it before you burn a larger log. Don’t waste all your time roasting a large wet round of wood if a smaller chunk won’t burn.
Split – Processing the Main Fuel
You may be stuck with mostly larger rounds of wood that contain dry fibers inside. This is common in winter or rainy conditions. Finding all that you need, like a downed tree with small twigs to large branches, in a single firewood source is ideal but not always the reality. You may have to resort to another option, which involves processing large wood down into smaller pieces. You may locate dead and downed trees with natural cracks you can exploit with some elbow grease. Or maybe you’ll locate wood that can be split with the tip of your knife and a thumb-capped grip. If you have an extra branch with some heft, you can use it to baton through the wood as another method to reach the inner fibers. Splitting wood not only exposes dry burning material but it also increases the surface-to-mass ratio of the wood you’re burning. The more surface, the faster the wood will burn. Not all wood needs to be split, and in fact, you may want to keep some in round form to burn through the night.
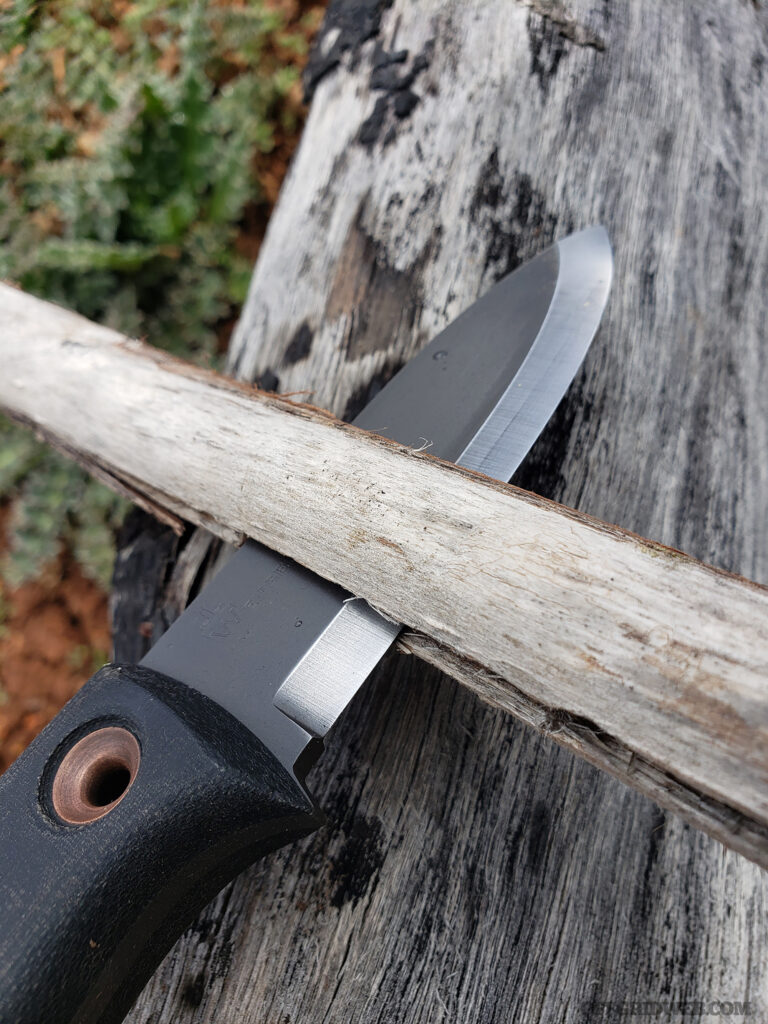
Above: Using the tip of your knife, cracks can be exploited to split your smaller wood fuel supply.
Splinter – Processing the Small Fuel
Very similar to splitting wood is the process of splintering it. A round split in two is halved. A half split creates two quarters. Breaking it down even further creates thinner splinters of wood that burn readily. The splinters you create follow the grain of the wood and may contain rough edges or smaller splinters that catch flame easily with improved surface-to-mass ratio. Another benefit of splintering wood is the texture it creates and the way that texture clings to itself. This is an added bonus when building freestanding fire lays mentioned later in this article. Splintering usually doesn’t require a baton, and simple downward pressure will be all that’s necessary to cut through smaller pieces of wood.
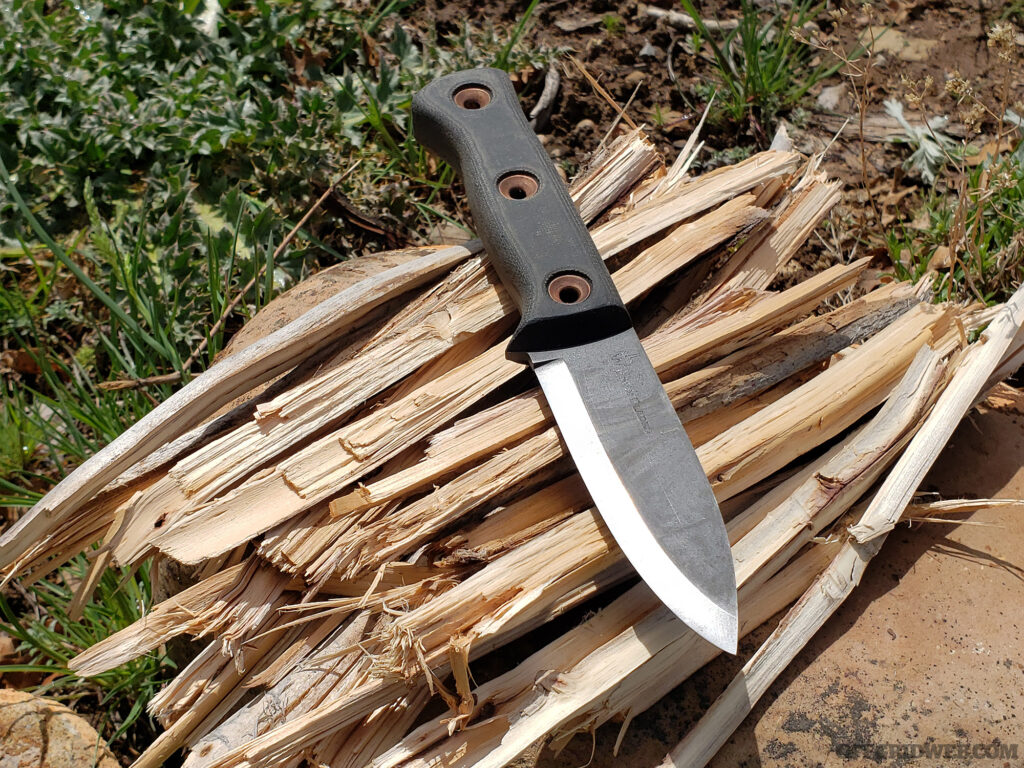
Above: Split pieces of wood can be further splintered to increase the surface to mass ratio and improve the burning quality.
Shave – Processing the Tinder and Kindling
You can use your knife to split wood, or you can use it to shave it. Shaving will create curls of wood used for kindling or very fine feathers used for tinder. Traditionally, bushcrafters would create three to four feather or fuzz sticks to get a fire going. These sticks are often just as much a test of your knife’s edge or the skill of the user as they are tinder for fire starting. Don’t get too hung up on keeping all of the shavings you create attached to the stick you’re shaving them from. If you have a hat or bandana, you can shave them off into a pile and they’ll burn just as well attached or not. Shaving is different from splintering in the size and shape of the final product. Splinters tend to be long, straight, and semi-inflexible, while shavings are shorter, curly, and flexible. Shavings are also more easily fed into tighter nooks and crannies, unlike splinters.
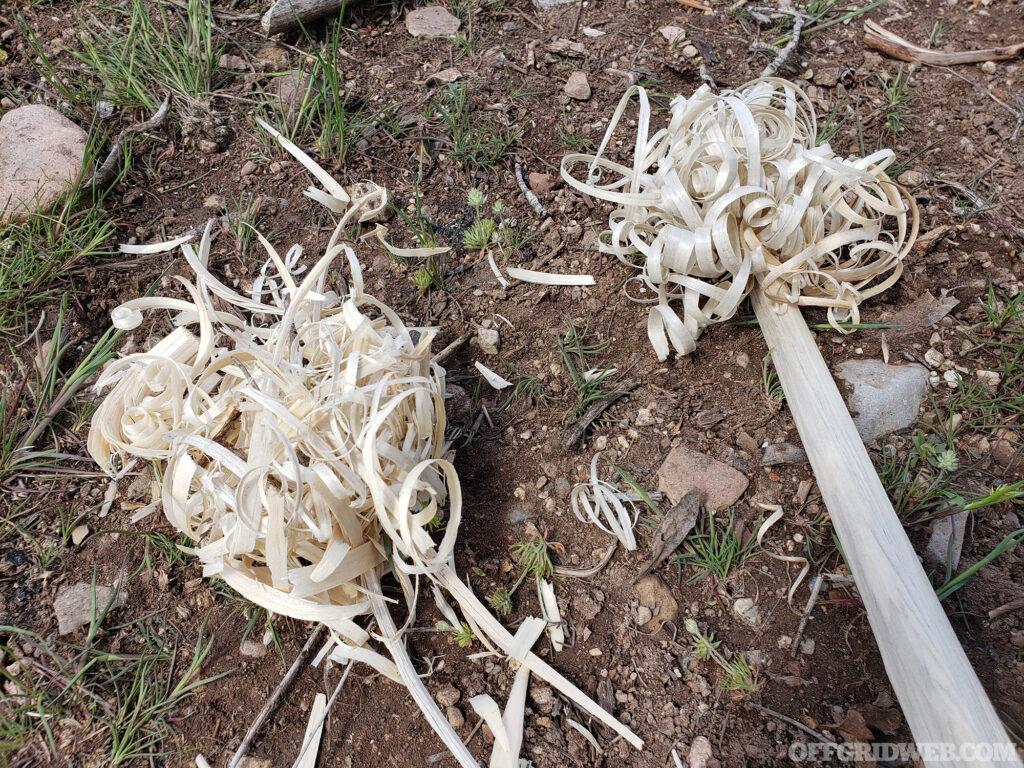
Above: Feather sticks, also known as fuzz sticks, can be shaved to create tinder that will take a spark.
Scrape – Another Tinder Process
While processing wood for your fire, you may find the wood you use is suitable for tinder scraping. Cedar bark is easily scraped, as is resinous pine wood (also known as fatwood). Scraping creates powder that will take a spark, and it’s best accomplished with the 90-degree spine of your knife or a rock with a sharp edge. Scraping requires pressure and a repeated motion that’s usually done with some speed. You must exercise caution in all aspects of knife use and just because you’re using the unsharpened spine doesn’t give you an excuse to throw caution to the wind.
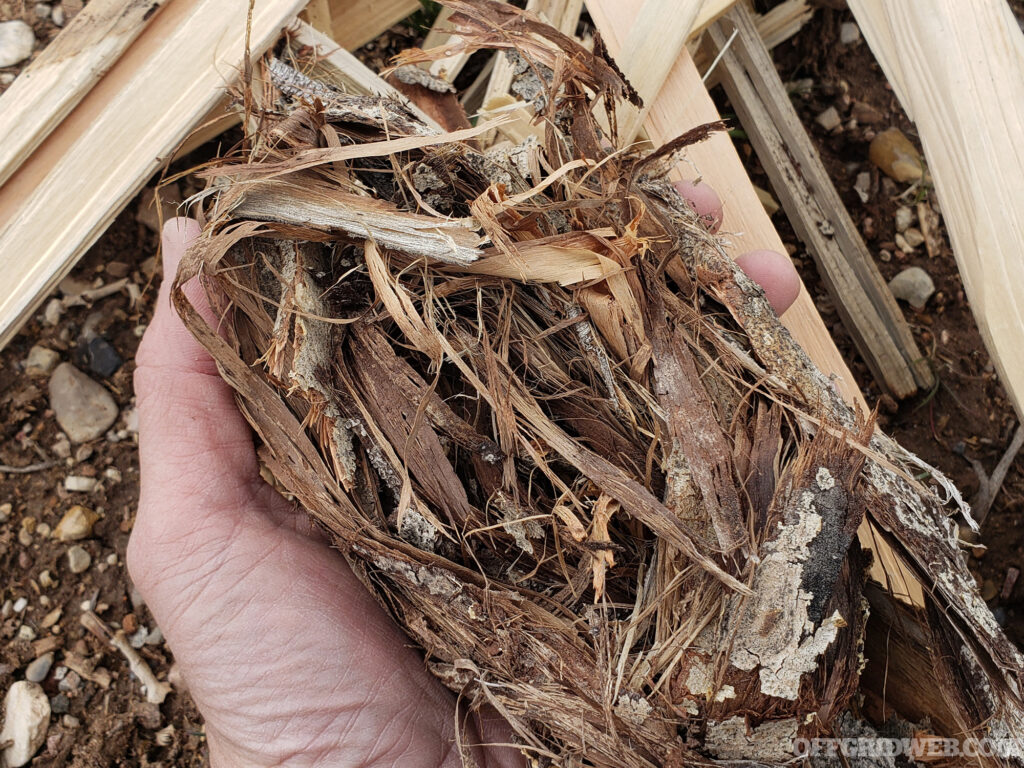
Above: Using the spine of your knife or a sharp rock, you can often find tinder by scraping the fibers of some inner barks of trees.
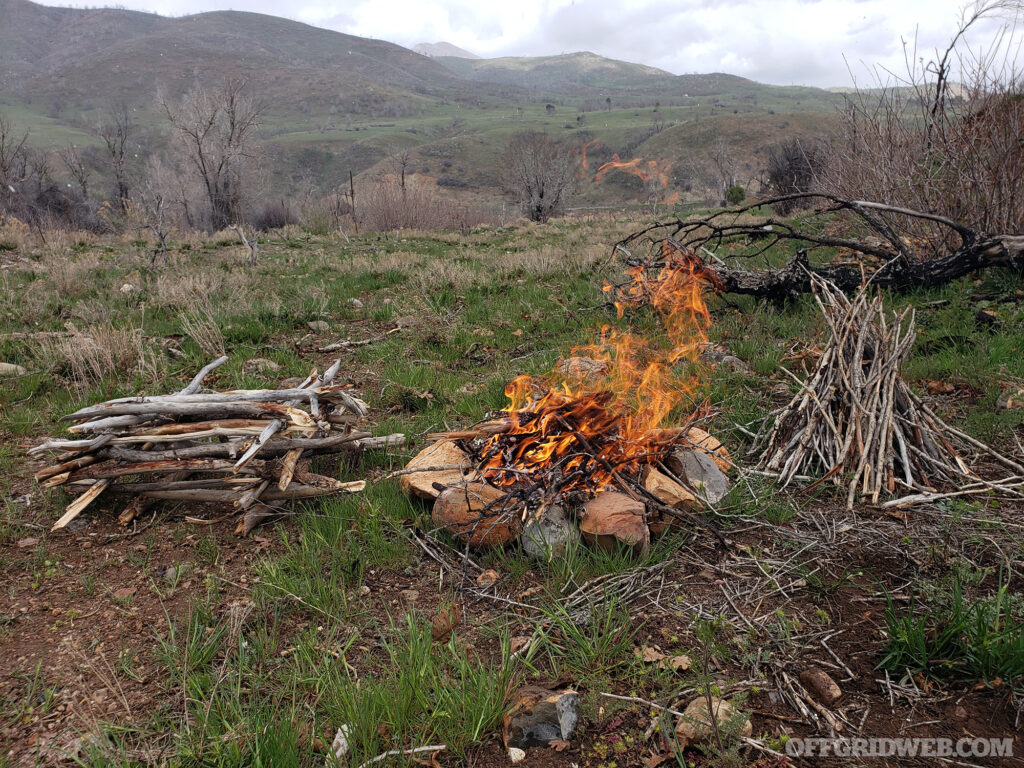
Setup – The Firelay
With all of your firewood properly staged and squared away, you should determine which type of firelay will work best for your fire needs. The 90-degree platform and brace is popular for general fire-starting; the tipi is used for a fast-burning tall fire; use a log cabin for controlled cooking fires; build a long-fire the length of your body for warming comfort while sleeping. Keep in mind while you’re setting up your fire that fire tends to burn upward. There are specialty “top burn” fires that burn down, but you’ll find the most basic setups previously mentioned will be lit at the base and the materials will slowly catch from the bottom up. As you create your fire setup, think about the direction of the wind and how that’ll help fan the flames. Avoid crowding your fire and don’t add large fuel too soon. You may find a combination of firelays works best for certain fire applications. Think of building a tipi fire inside the frame of a log-cabin fire for smoke generators, for instance.
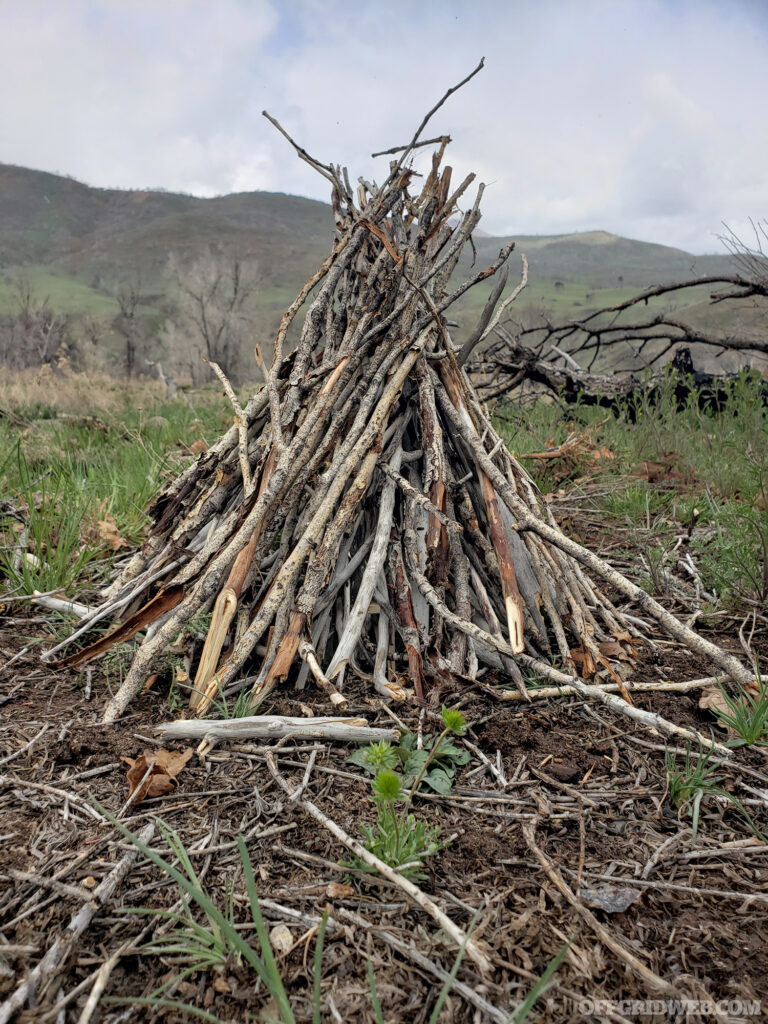
Above: How you setup your fire depends on what you need it to do. Tipi fires burn high and hot.
Spark – With a Ferro Rod
If done correctly, a single shower of sparks should catch on the feather sticks. If you have the time and energy, build your fire in a manner that can be ignited with a spark. If you only have a lighter or flame-based firestarter, it’ll work on the properly prepared materials. The opposite is not true. If you build a fire that is meant to be lit with a flame, but you only have a ferro rod, it will not ignite unless you have proper tinder. Also, you don’t have to start your fire inside your fire lay. You can start a small fire outside of it and use a couple sticks to transfer the flame inside. This will prevent toppling a well-made fire lay and make the process easier.
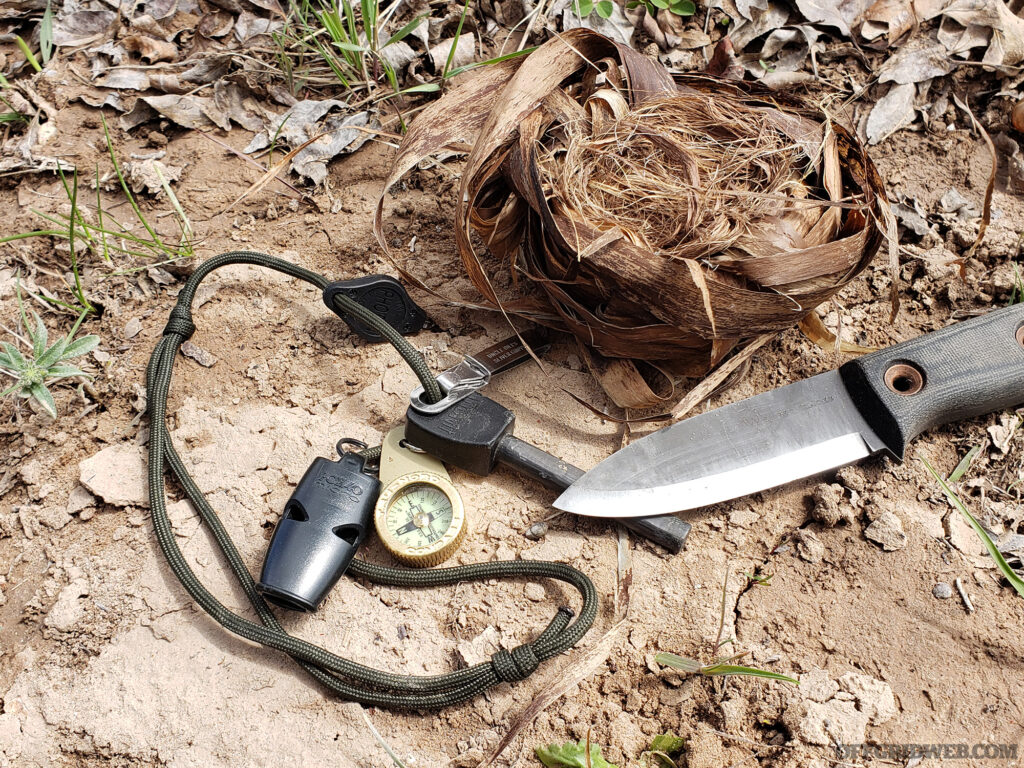
Above: With just a knife and a ferro rod, you should be able to throw sufficient sparks to get a tinder bundle lit.
How you scrape your ferro rod will depend on the flammability of your tinder. If you happen to have man-made tinder like petroleum-soaked cotton balls, the smallest spark will get it going. If you’re using natural tinder, you’ll find pushing harder on your ferro rod to create more substantial sparks will result in those that burn longer in contact with the tinder you’re using.
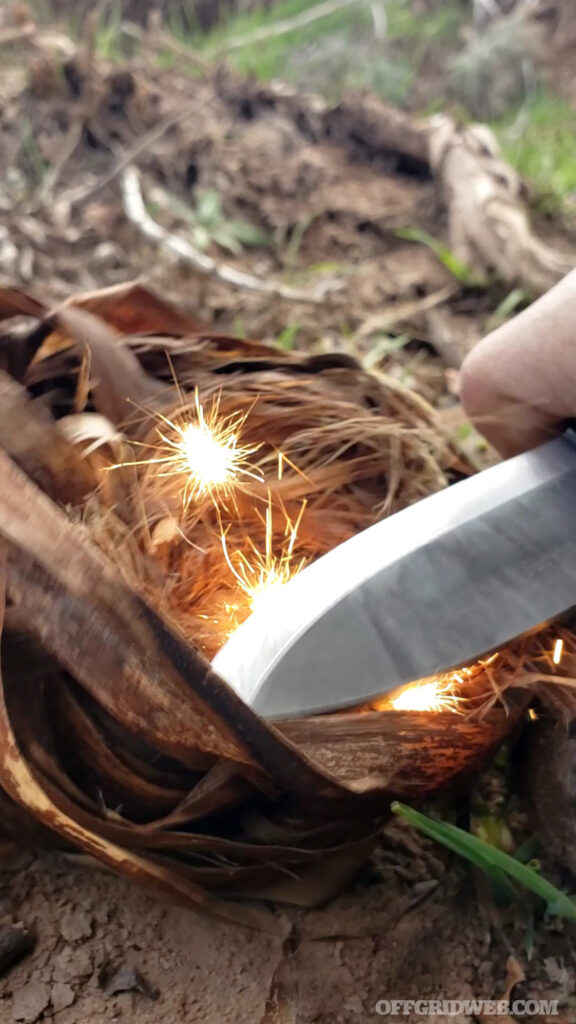
Above: Close-up detail of ferro rod sparking into a tinder bundle.
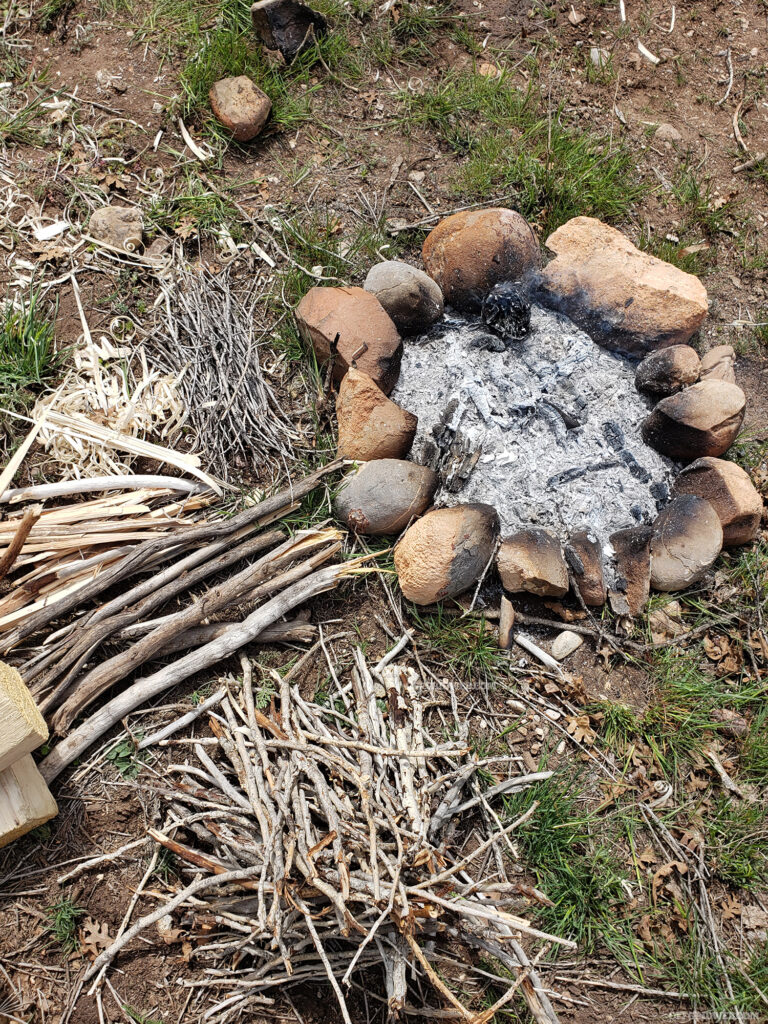
Sustain – Keep It Going
Don’t just get your fire going, make sure you can keep it going. It’s a mistake to overlook this aspect of sustainment. You may be a pro at getting a fire started and seeing a flame from your efforts but unless you can keep that flame going, fire starting is just a parlor trick. Sustaining a fire means not building a fire too large for its intended purpose. It means not wasting fuel for no good reason. It also means making sure you have enough fire-making materials to get your fire going again if it burns out.
You may also need to build up the level of flame in a hurry if the situation calls for it. You’ll find a good habit for fire sustainment is setting the next pieces of wood used to fuel your fire adjacent to it to dry out. If you underestimated your fuel needs or if your fire requires more fuel, you’ll need to step away from it to gather more, which requires either banking your wood (covering it with ash to slow the burn) or adding enough fuel to keep it going while you’re away. It is a terrible feeling to come back to your firepit and find it burnt out. Sustaining your fire also means using wood that’s meant to burn longer, like full rounds of wood instead of split wood.
Above: Log cabins burn consistently and steadily. Fire rings aren’t a bad idea to keep coals in place.
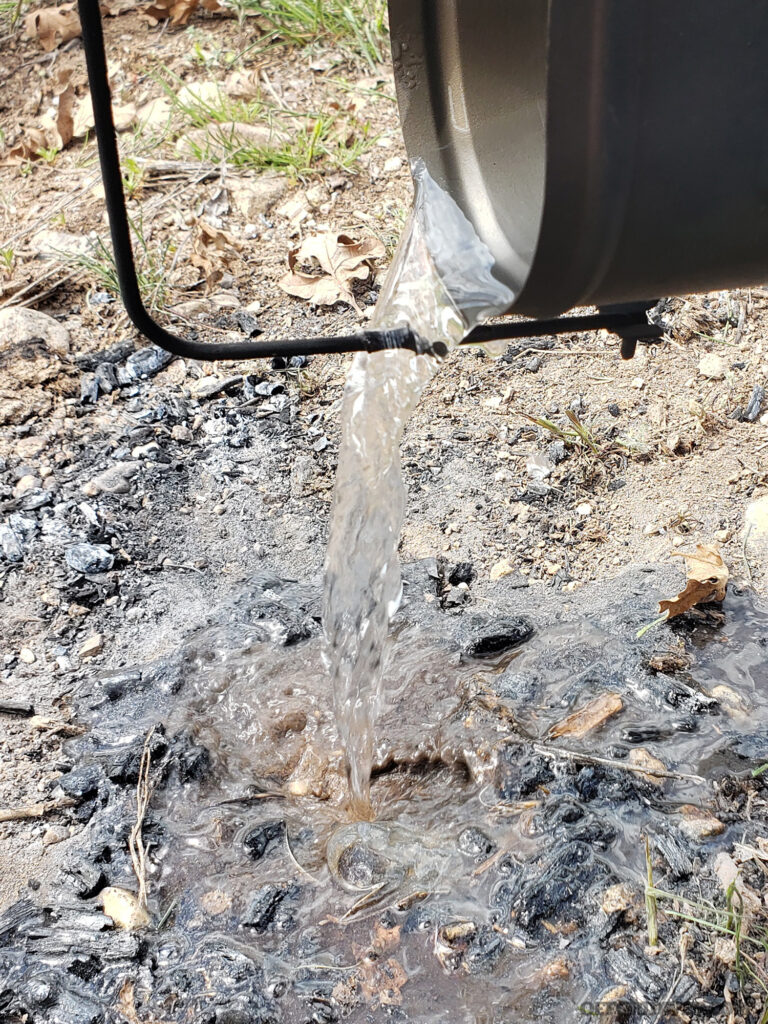
Stop – Extinguish Responsibly
Never start a fire you can’t put out. One of the S's of fire is stopping it. The process is fairly simple if you think about reversing what you did to build it. Space out the fuel in your fire pit to slow the burn. Snuff it out by adding more moisture to the wood, drowning it in plenty of water. Don’t leave it unless you see no visible smoke coming up from it. Irresponsible campers start forest fires that cause untold destruction each year — don’t let that be you.
Above: Don’t stop processing wood when your fire is going. Build up the fuel sources needed to sustain it or coax it back to life.
Above: Don’t stop processing wood when your fire is going. Build up the fuel sources needed to sustain it or coax it back to life.
Closing Thoughts
Could this “S” fire methodology catch on? Perhaps. We know we may have a couple more S's than our short-term memory could retain, but then again, we also know you can remember lengthy chains of items in long-term term memory if you repeat them. We want you to practice fire starting, and even if this system of S's doesn’t work for you, find one that does and make it Systematic (that’s the 11th S). You’ll find out the process of assigning letters to a particular task for memory isn’t as complicated or difficult as owning the skills that could save your life.
Read More
Subscribe to Recoil Offgrid's free newsletter for more content like this.
Editor's Note: This article has been modified from its original print version for the web.
The post The 10 S’s of Fire Starting appeared first on RECOIL OFFGRID.
https://www.offgridweb.com/survival/the-10-ss-of-fire-starting/
 CampingSurvivalistHuntingFishingExploringHikingPrivacy PolicyTerms And Conditions
