Where the rubber meets the road” is a saying that indicates a critical point of success or failure — in other words, the moment of truth. The logic behind this phrase is instinctual to anyone who has ever driven a vehicle and struggled to maintain traction in rain, snow, mud, or sand. Four tiny rubber-to-road contact patches are the only things that keep your two-ton vehicle under control, and by extension, keep yourself and your loved ones inside the vehicle safe. This is why good tires should be at the top of your priority list for every vehicle you own (like on our overland 4runner), especially for those of us who enjoy off-roading, overlanding, and driving through remote and challenging environments. In the city, bad tires might cause you to lose control and get into a fender-bender, but if you’re driving on a treacherous mountain road dozens of miles from civilization, bad tires could leave you stranded in a life-threatening predicament or cause you to slide off the edge of a cliff.
Above: In addition to the wheels, tires, and suspension, I bought a set of Westcott Designs rock sliders, which protect the truck’s lower rocker panels from impacts and also serve as convenient steps to reach the cab and roof rack. I also installed a pair of Morimoto LED “Gen 2” taillights, which give the truck a cool visual signature at night, as well as brighter reverse lights and sequential turn signals. You can read my full review of the lights on our website at offgridweb.com/?p=27301.
Choosing the Right Tires
So, what makes a good tire? As with many things in life, it’s situational. The tires you’d want on a sports car are drastically different than what you’d want on a semi-truck. One maximizes grip for cornering and acceleration on smooth, dry roads, while the other prioritizes load-carrying capacity and longevity. Aside from the fact that they’re both round and made of reinforced rubber, they couldn’t be more different.
When it comes to pickup trucks and SUVs, there are a few different types of tires to consider, each with different characteristics and capabilities.
- All Season tires are usually what your vehicle comes with from the factory. These have a relatively smooth tread pattern designed to be quiet, comfortable, and lightweight enough to maximize fuel economy. Put simply, these are road tires meant for nothing more difficult than wet asphalt, a dusting of snow, or smooth dirt roads. If that doesn’t describe how you use your truck, it’s time to upgrade.
- Mud Terrain (M/T) tires are the opposite end of the spectrum from all season tires, with big, blocky tread patterns, more resilient rubber compounds, and heavily reinforced sidewalls. They offer outstanding performance over deep mud, snow, sand, and rocks, so they’re the best choice if you do a lot of serious off-roading. However, this results in some substantial compromises for normal road use — usually continuous noise at highway speeds and reduced fuel economy.
- All Terrain (A/T) tires are about halfway between an all season and an M/T. They’re much better than an all-season for driving beyond the pavement, but they’re still relatively quiet for day-to-day use and won’t hit your mpg too hard. Some off-road-oriented vehicles or trim levels (for example, the Jeep Wrangler Rubicon) come standard with A/T tires; for others, it’s an optional upgrade. If your vehicle is used for a mixture of on-road and off-road purposes, or if you simply don’t plan to do a lot of hard-core mud-bogging and rock-crawling, an A/T tire will serve you well. Keep in mind that this category covers a wide range of designs. Some will be only a tiny bit more aggressive than an all-season, while others will be very close to an M/T (these are sometimes called Rugged Terrain or R/T tires).
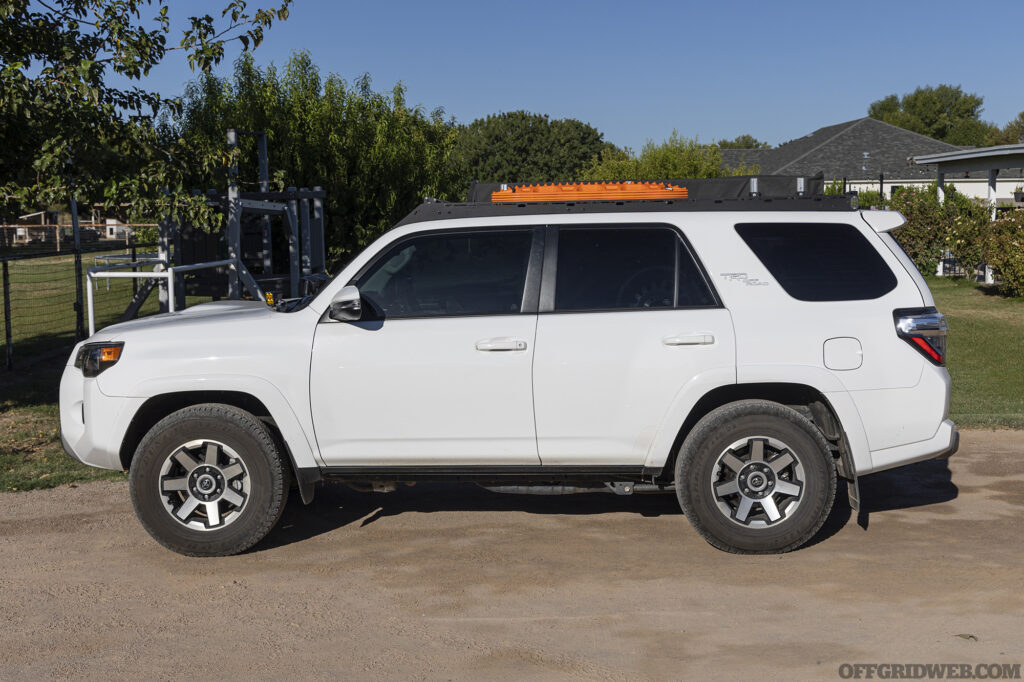
Above: With stock wheels, tires, and suspension, the 4Runner looked a little like it had been skipping leg day. And on the trails, it frequently bottomed out and struggled to maintain traction over bigger obstacles.
New Shoes for the 4Runner
Despite the fact that my 2022 4Runner has the TRD Off-Road Premium package, it came with a set of Dunlop AT20 all-season tires. Frankly, these are terrible, even within the all-season category — in Tire Rack’s ranking of 57 all-seasons from best to worst, the AT20 took 54th place with an overall rating of “poor.” Toyota offers an optional upgrade to A/T tires, but it’s much more cost-effective to swap tires on your own after leaving the dealership. You’ll also be able to shop around and find the exact tire that fits your needs, and you’ll be able to consider different tire sizes as well.
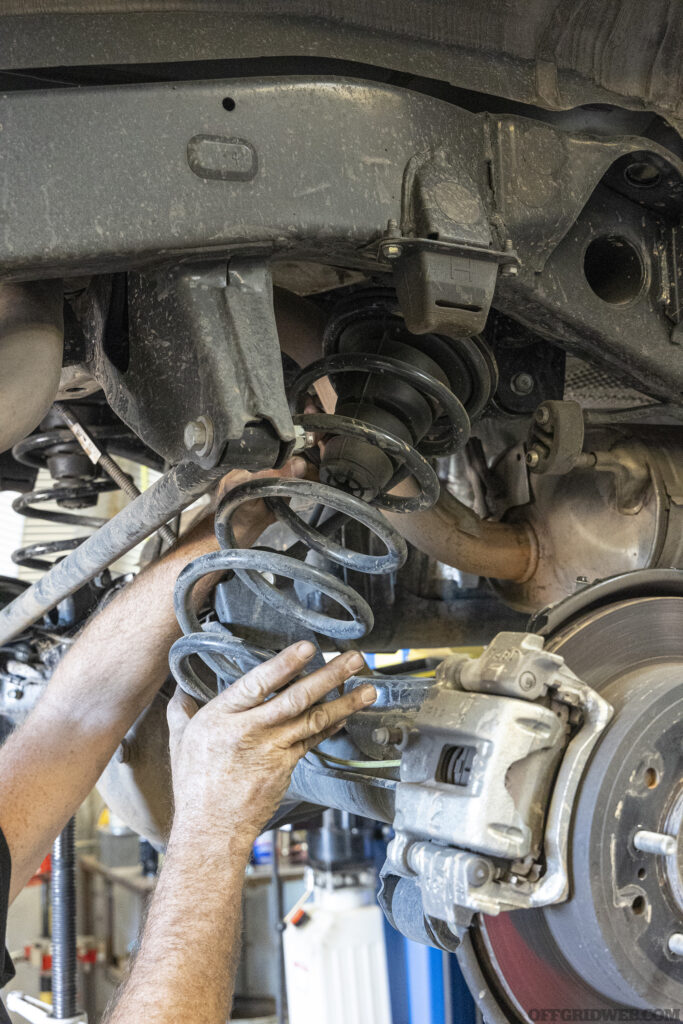
Above: Once the truck was up on the lift at SL3 Customs and the wheels were removed, the first order of business was to remove the original rear springs, shocks, and bump stops.
Speaking of which, many trucks can accommodate tires at least one size bigger than the originals without any modifications, or two to three sizes bigger with a mild suspension lift. Larger tires provide increased ground clearance and more cushioning against potholes, rocks, and other obstacles. My 4Runner came with 265/70R17 tires, and after reading about tire fitment on the forums, I decided to go up to a 285/70R17 (two sizes larger). This would require a slight lift and some other modifications I’ll discuss later.
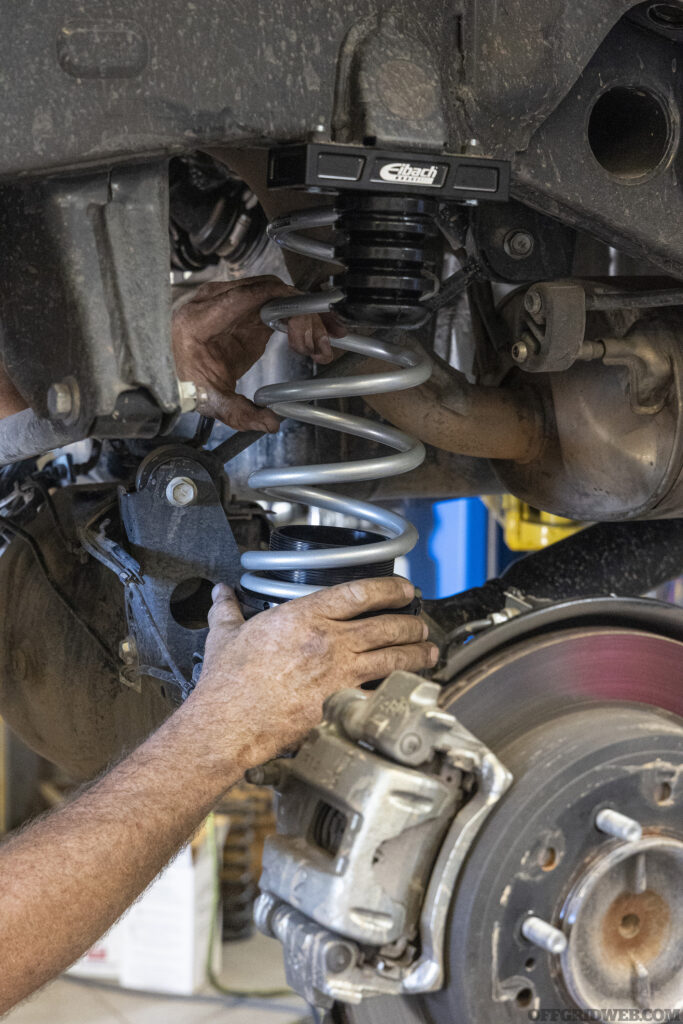
Above: The +200-pound springs, load-leveling collars, and bump stops were installed above the rear axle. Bump stop positioning was checked to ensure they were in the right spot to make contact with the axle at full compression.
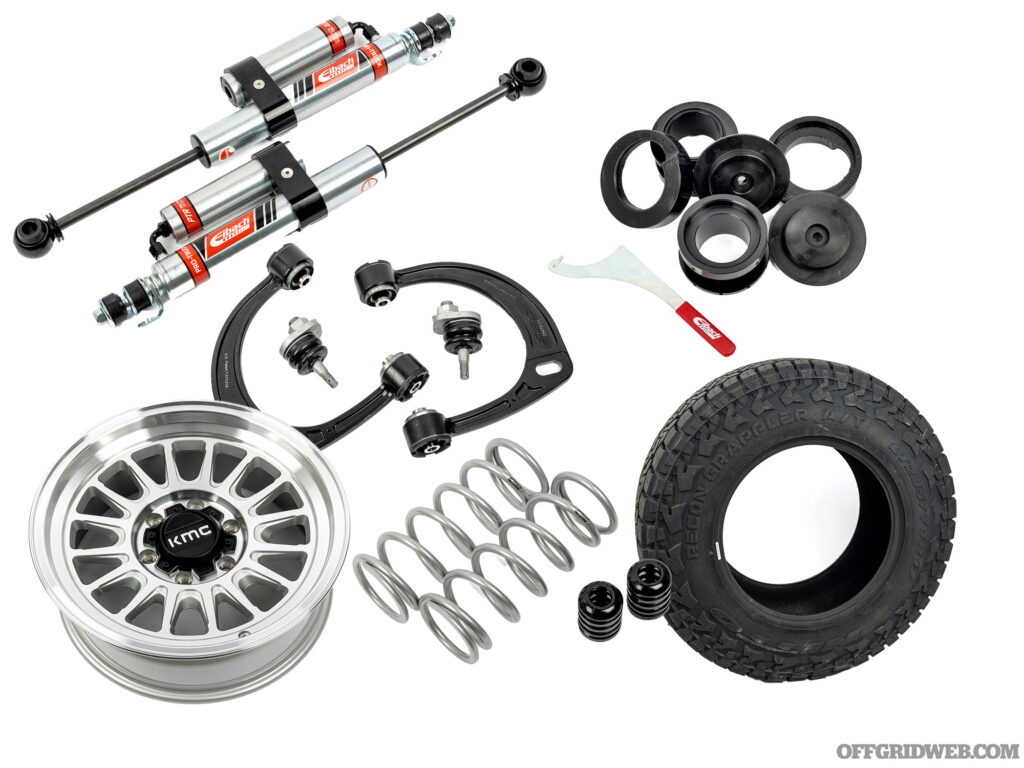
My tire of choice was the Nitto Recon Grappler. It features a relatively aggressive tread pattern for an A/T tire, but it’s not quite as deep and blocky as a full-blown M/T — in my opinion, that’s the sweet spot for an overland vehicle. Unlike a rock-crawler or dedicated trail rig, an overland truck still has to be capable of driving hundreds if not thousands of miles on the highway before heading out on the trails, and many of them (including mine) are also driven around town every day. The Recon Grappler offers a nice compromise between off-road capability and on-road manners, and it even comes with a 55,000-mile treadwear warranty.
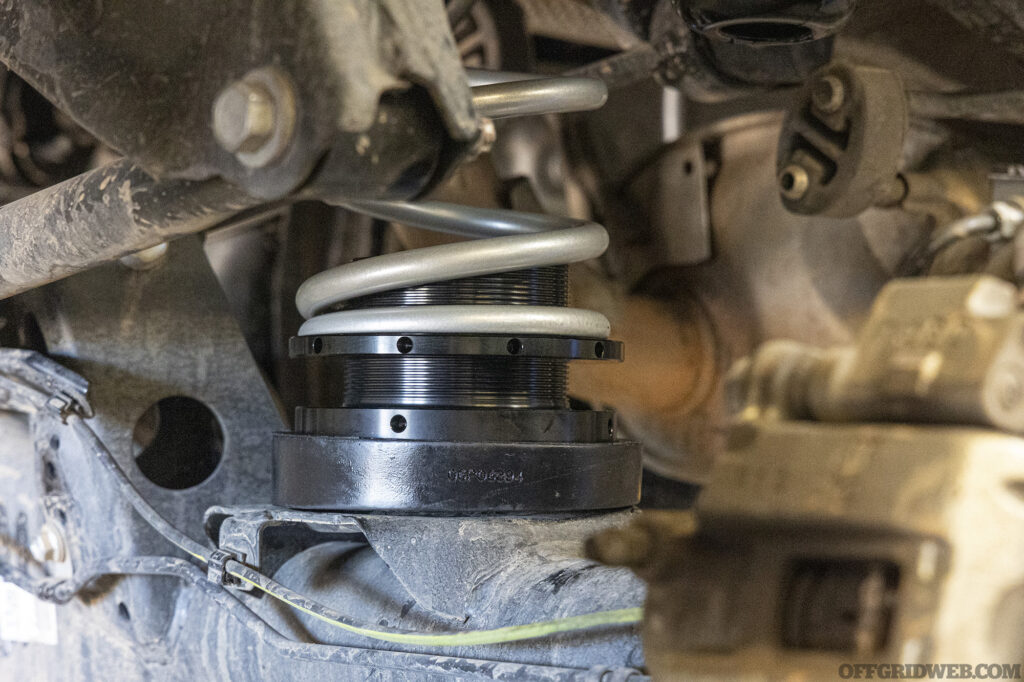
Above: Both collars were measured and set to roughly 1 inch of lift. Later, once the truck was on the ground, the included adjustment tool could be used to rotate the collars and fine-tune the rear ride height.
Since I was already swapping tires, I decided to pick up a new set of KMC Impact OL wheels at the same time. Their silver machined finish looks awesome and feels reminiscent of the early ’90s Toyota trucks I grew up around. They’re also roughly 5 pounds lighter per wheel than the 4Runner’s original wheels, which reduces the side effects of adding heavier tires. Swapping wheels allowed me to sell the original wheels and tires on Craigslist as a complete set, effectively reducing the cost of the upgrade by a few hundred dollars. The 17×8.5 KMCs are slightly wider than the stock 17×7.5 wheels. Their 0-millimeter offset also creates a slightly wider stance, but not so wide that it rubs on the body when the steering is turned to full lock.
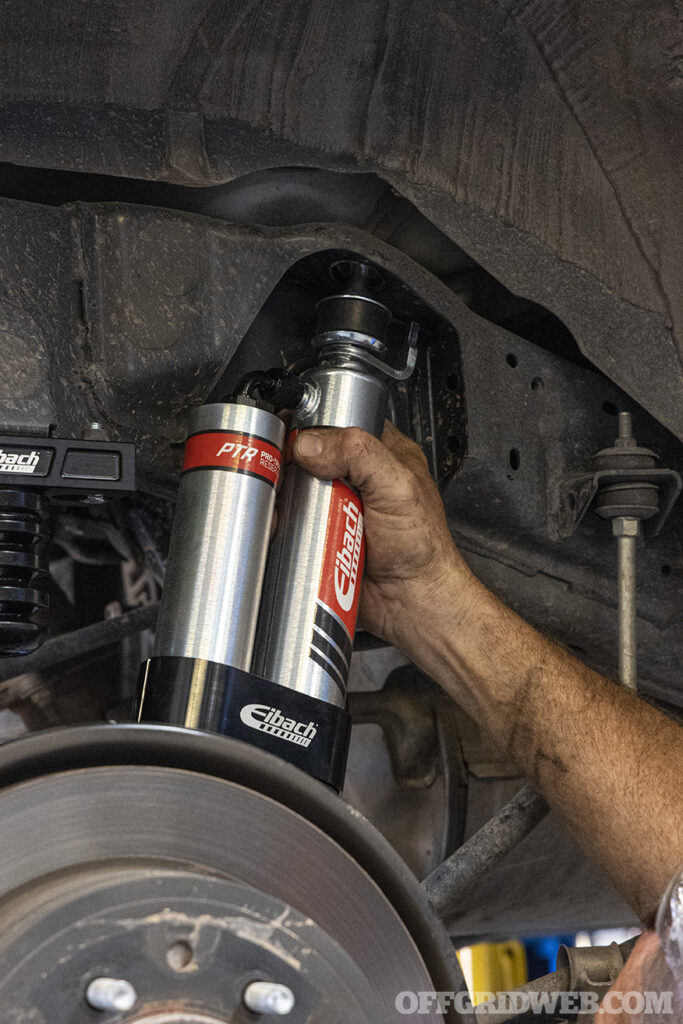
Above: The Eibach Pro-Truck reservoir rear shocks were bolted on to complete the rear suspension. These are an optional upgrade over the shocks that come with the standard Pro-Truck kit.
Suspension Upgrades
The fifth-generation 4Runner has been around since 2010 with minimal changes, and more than 1.3 million of these SUVs have been sold in the United States since then. This means that just about every possible modification has already been tried and documented on the internet. A bit of quick research told me that in order to clear my chosen wheels and tires without any rubbing, I’d need to lift the front end about 2.5 inches, remove the front mudflaps, slightly trim the bottom edges of the front bumper, and possibly cut a small portion of metal out of the body mount (known as a “body mount chop” or “BMC”).
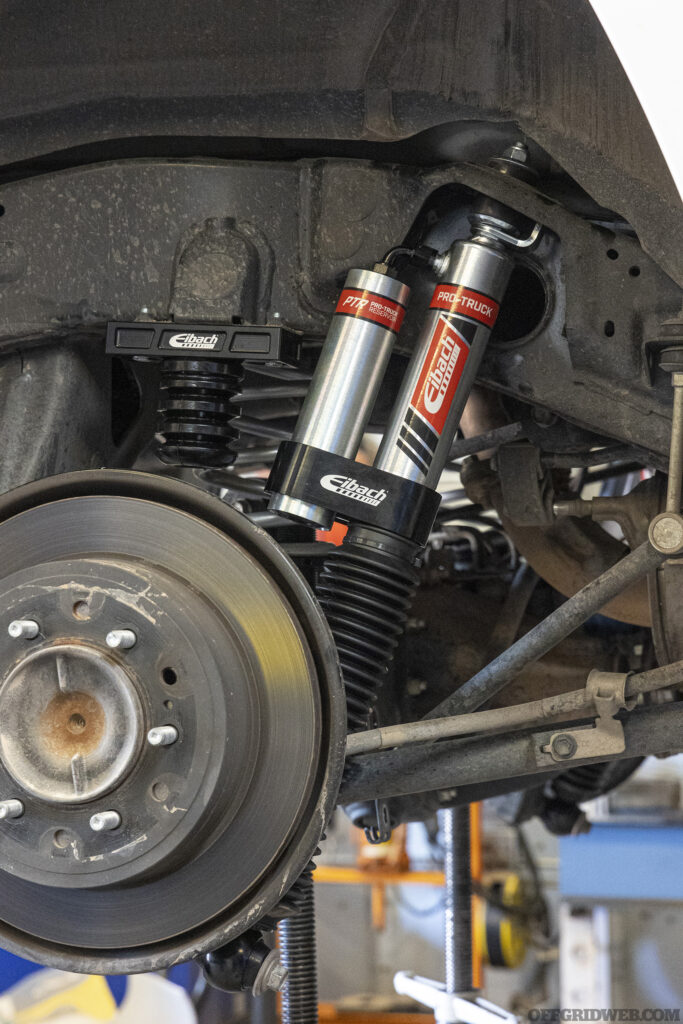
Above: Remote reservoirs — the smaller cylinders attached to the shock body — contain more shock oil. During prolonged high-speed driving over rough roads, the oil inside shocks heats up, leading to lack of dampening performance and a bumpy ride, but more oil reduces this effect. It also offers slightly longer suspension travel and reduces wear, leading to longer shock lifespan.
That might sound imposing if you’re not mechanically inclined, but it’s the type of work custom truck shops do all day long. So, I headed to one such local shop, SL3 Customs, in Queen Creek, Arizona. Scott, the owner, said he’s done this work to many 4Runners, so I knew he could handle the labor much better than I could in my own garage.
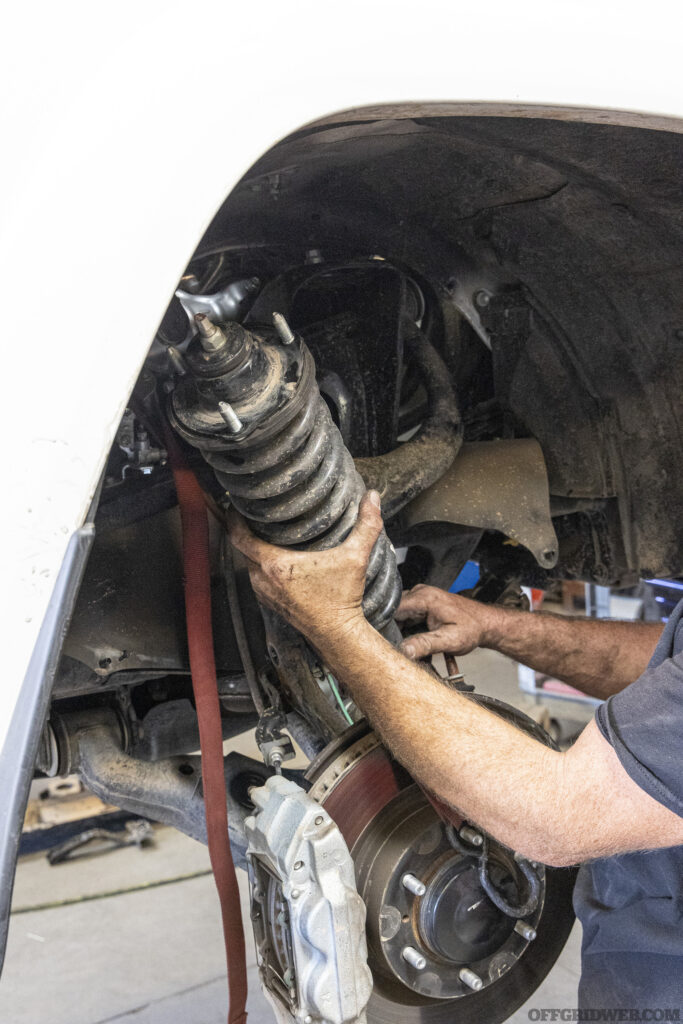
Above: Moving on to the front suspension, Scott unbolted the swaybar end links and removed the old coilover shocks and upper control arms. A ratchet strap was used to hold the hub up temporarily.
For parts, I turned to one of the biggest names in the suspension business, Eibach. I started with their Pro-Truck Lift Stage 2R system, which includes adjustable front coilover shocks and reservoir rear shocks. I added Eibach’s optional Load-Leveling System, which comes with rear springs, bump stops, and height adjustment collars. This combination offers height adjustments on all four corners of the truck, with 2 to 4 inches of lift in front and 0.5 to 2 inches of lift in the rear. This adjustability ensured I got an even ride height and the exact amount of lift I needed to clear the tires.
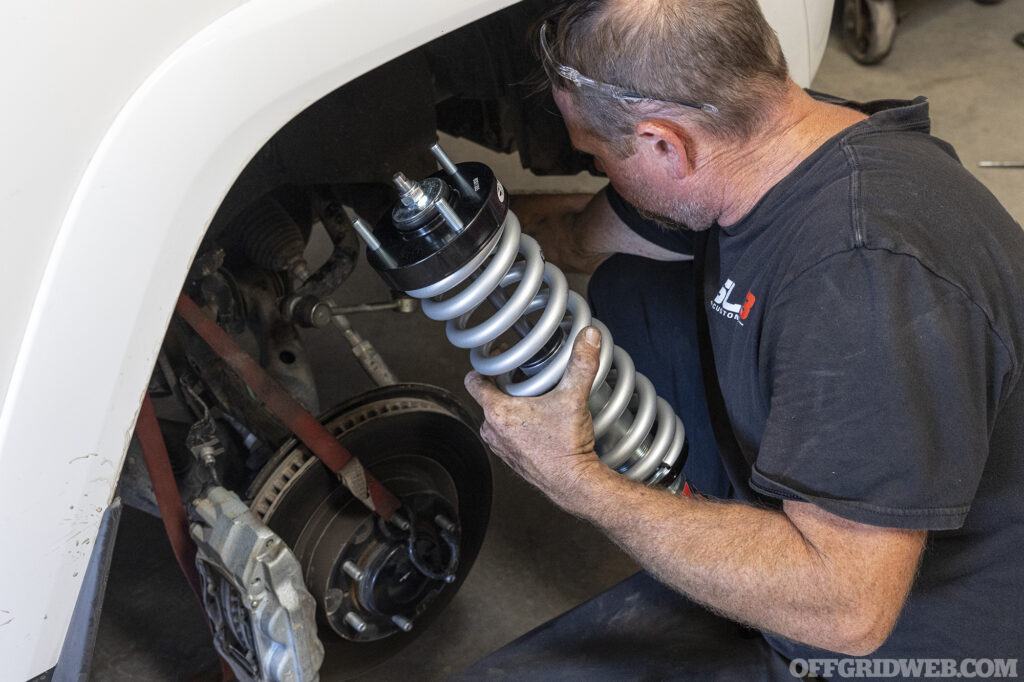
Above: Eibach’s Pro-Truck 2.0 coilovers feature anodized billet aluminum mounts, a monotube design with 46mm piston, and nitrogen-filled variable-force valving. They’re engineered, individually dyno tested, and manufactured in the USA. Scott set the adjustment collars to about 2.5 inches of lift.
The Load-Leveling system also offers three different spring choices — 0, +200 pounds, and +400 pounds — to support truck builds that are carrying added weight over the rear axle. On road trips, my 4Runner usually has a Dometic fridge full of food, a Goal Zero battery, 5 gallons of water, and a bunch of other gear in the back, so I selected the +200-pound spring option. Lastly, I added a set of Eibach Pro-Alignment upper control arms with factory-style sealed ball joints. These made it easier to get the camber and caster alignment settings dialed in to appropriate specs after the lift was installed.
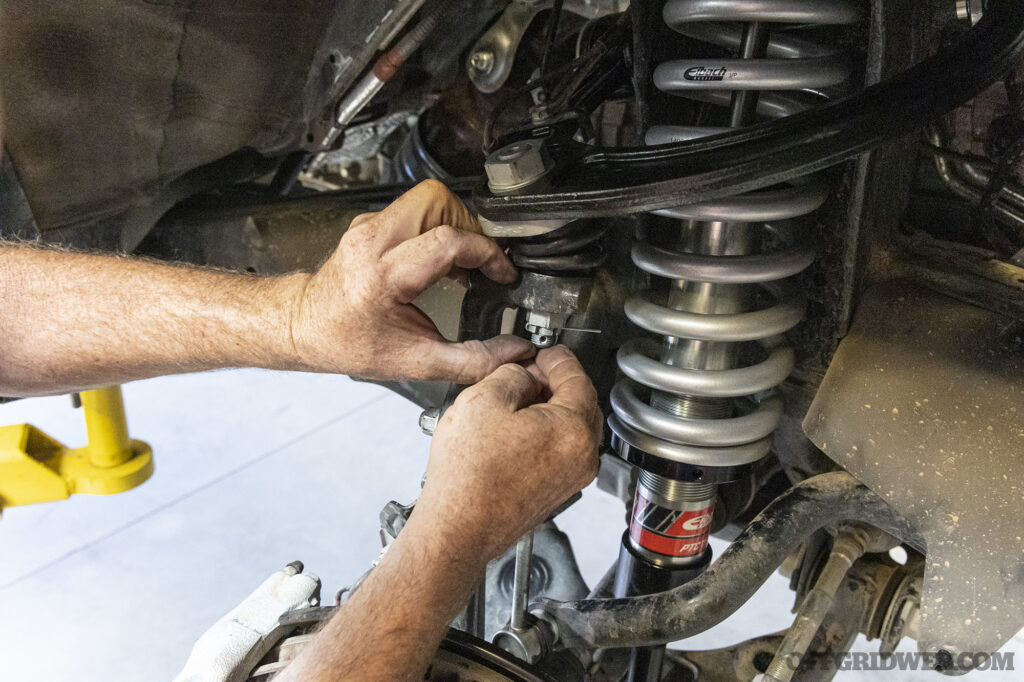
Above: The new Pro-Alignment upper control arms weren’t strictly necessary with the amount of lift we were going for, but they’ll make getting the correct alignment specs much easier. After attaching the ball joint to the spindle, don’t forget to pass a cotter pin through the upper hole and bend it to secure the castle nut in place. You don’t want it falling off on the trail!
On the Road Again
I’m a firm believer that good tires might be the single best modification for any vehicle, but strong, lightweight wheels and a properly tuned suspension system aren’t far behind. These three modifications completely transformed the 4Runner, both visually and in terms of on-road and off-road performance. I no longer have to worry constantly about losing traction on rutted or muddy trails, or about puncturing a sidewall on sharp rocks in the desert (but as always, it’s wise to air the tires down to reduce the risk further).
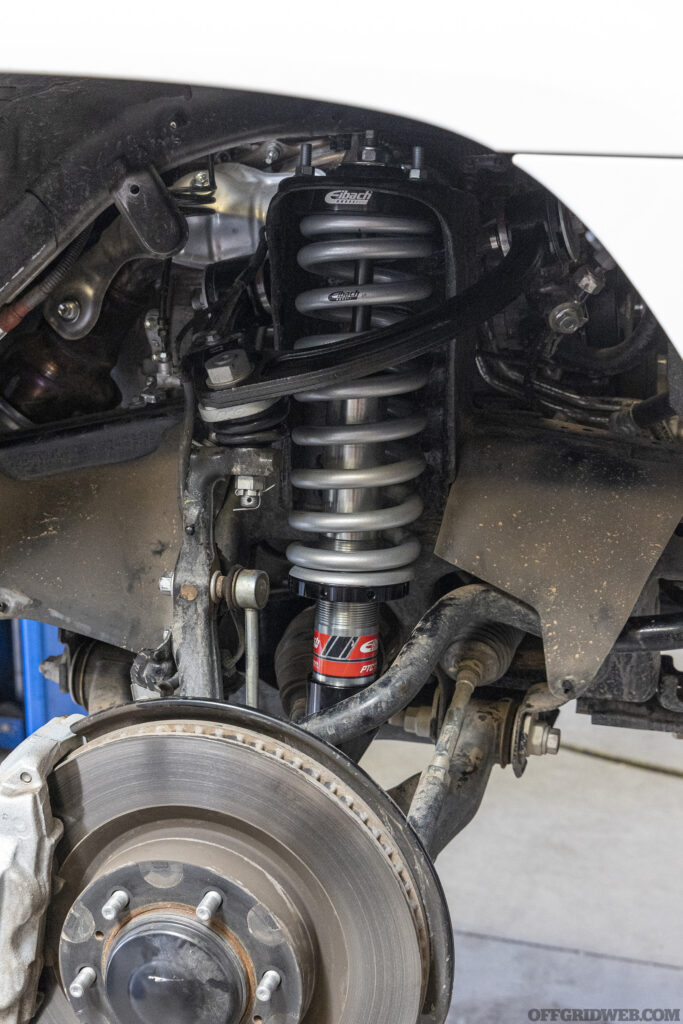
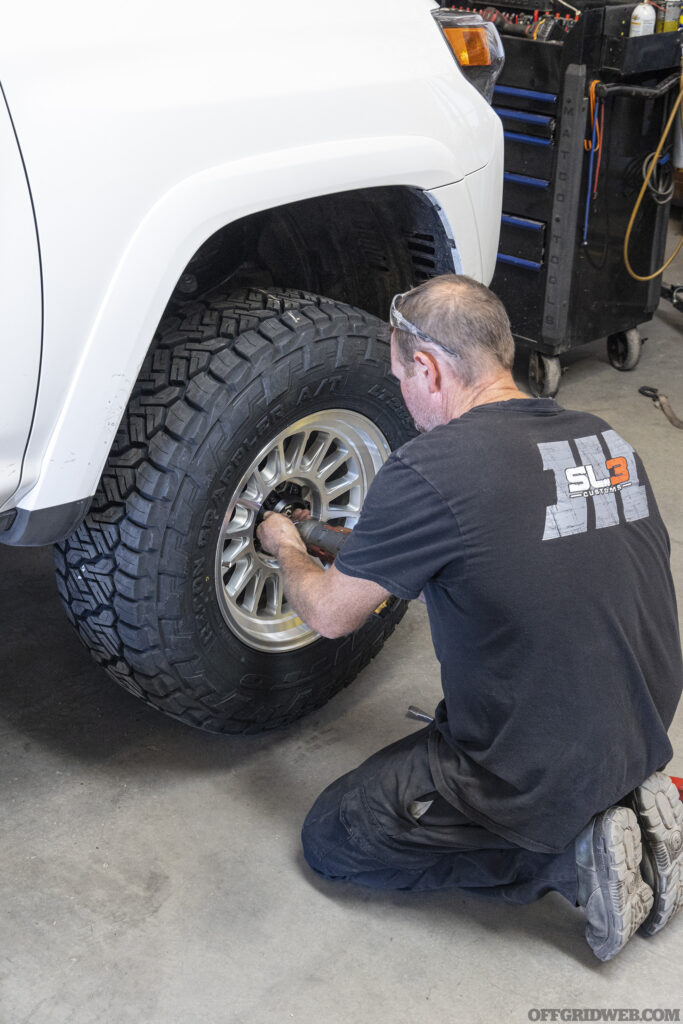
Above: After re-attaching the swaybar and making sure everything was reasonably tight, Scott could finally put the wheels and tires back on. All hardware was tightened fully with a torque wrench once the truck was on the ground and the suspension was under load.
On the highway, the Recon Grapplers are very comfortable and relatively quiet — certainly nowhere near the obnoxious hum of an aggressive mud terrain. Fuel economy took a hit, as will always be the case with a lift and larger tires, but it averaged out to only about 2 to 3 mpg. I consider this a small price to pay for the increase in capabilities, and even in stock form, it was never going to sip fuel like a Prius.
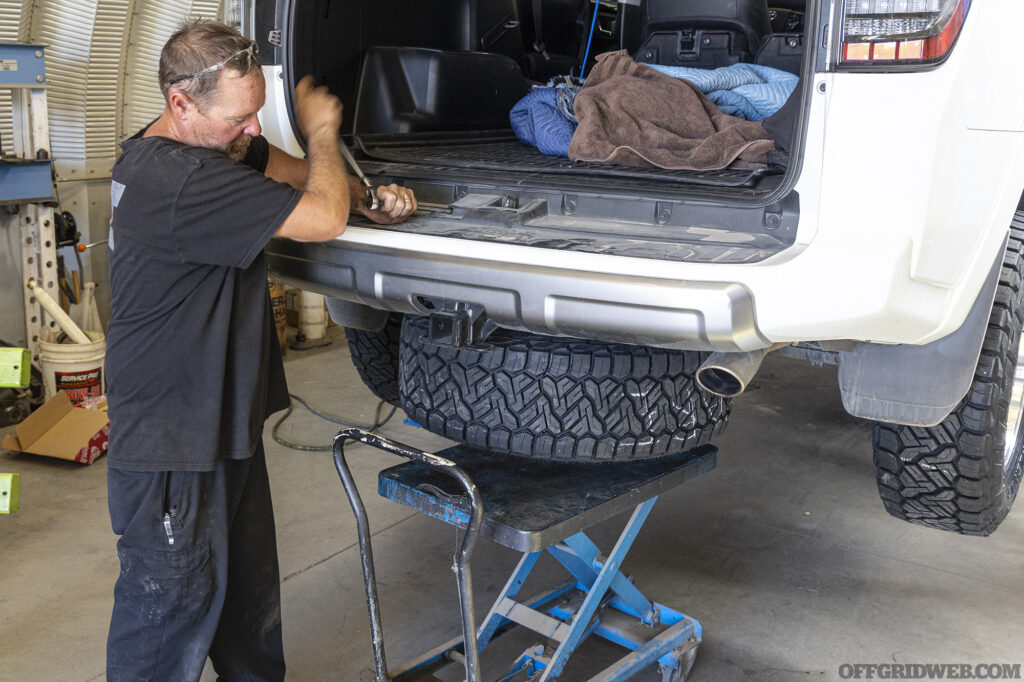
Above: I made sure to get a full set of five wheels and tires so that I’ll have a matching full-size spare if I ever need it. The forums were helpful yet again, since they informed me that a 285 tire will still fit in the original location under the rear end.
I anticipated that I might need to have the body mounts cut to prevent rubbing against the tires, but Scott at SL3 Customs convinced me to wait and see after the alignment. I’m glad he did, because it turns out that the tires don’t rub at all, especially after the alignment shop was able to dial in 4 degrees of caster using the added adjustability of the Eibach upper control arms. This changes the angle of the wheels very slightly and gives a little more breathing room at full steering lock.
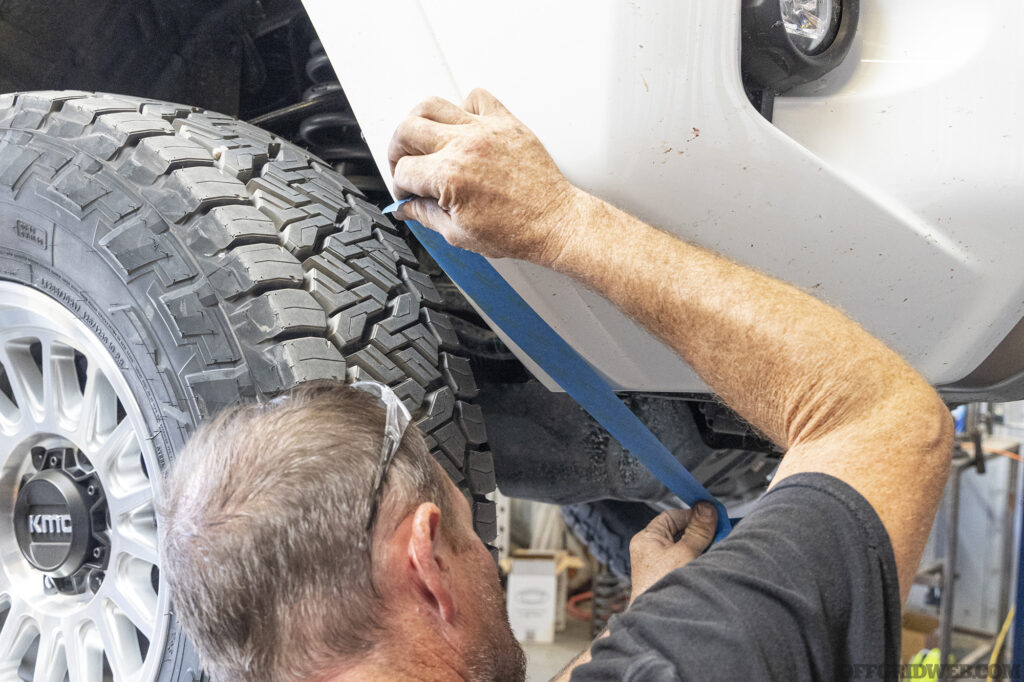
Above: After a quick test drive, Scott noticed that the front tires were making contact with the lower edges of the bumper at full steering lock. He taped off the area that needed trimming and used an angle grinder and sander to carefully remove the excess material.
As for the suspension, the 4Runner rides much smoother, feels more planted, and doesn’t nosedive as much under heavy braking. With the stiffer rear springs, it also doesn’t sag once I’ve loaded a bunch of gear into the cargo area. I’m glad I went with a 4-wheel-adjustable setup, since it allowed me to even out the ride height front-to-back and side-to-side. The driver-side rear corner of the fifth-gen 4Runner tends to sag a little due to the fuel tank placement, and this was easily corrected.
I’m really happy with the current state of the 4Runner, and it has served me well on many road trips and trail excursions throughout the last year. In the next part of the build series, I’ll discuss the items I’ve added to the Westcott Designs roof rack, some of which are already visible in these photos. Stay tuned for more!
Sources
Read More
Subscribe to Recoil Offgrid's free newsletter for more content like this.
Editor's Note: This article has been modified from its original print version for the web.
The post Overland 4Runner: Part 3 appeared first on RECOIL OFFGRID.
https://www.offgridweb.com/transportation/overland-4runner-part-3/
 CampingSurvivalistHuntingFishingExploringHikingPrivacy PolicyTerms And Conditions
