Turn on your go-to news source, talk to your neighbor, or simply look outside, and you will discover that the weather is always an important topic most people have become concerned about. Extreme weather is quickly becoming normal weather, as old meteorological patterns and cycles seem to have become disrupted, and storms have become more intense. That's why training, such the winter survival training offered by Corvus Survival, is so important.
Recently in the United States, we have experienced numerous winter storms that stretch across the entire continent. Places that typically do not deal with frozen precipitation find its inhabitants shoveling gobs of white powder off of sidewalks and out of driveways.
All of this climate chaos is making many aware that they may lack the necessary skills to stay healthy and safe in environmental conditions they are not used to. Which is why people who live in the northern regions of North America have a lot they can share with our southern brethren.
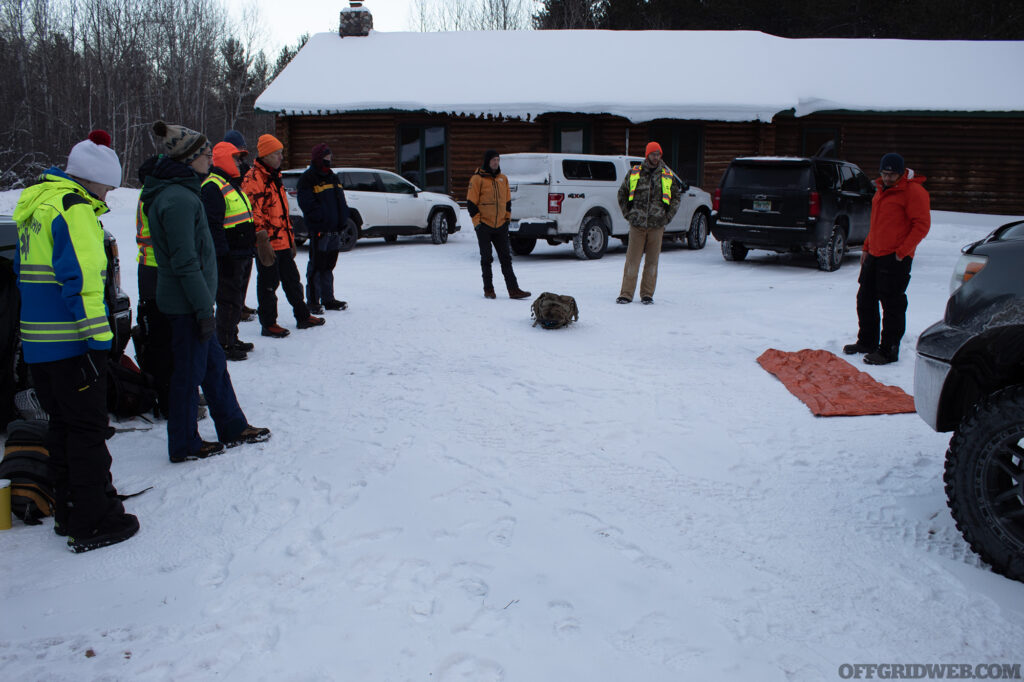
Above: After introductions, students of discuss gear loadouts, and why normal mylar blankets won't cut it in the cold weather.
Beyond the common knowledge most northerners practice, such as dressing warm and sealing drafts in your window, there is a contingent of folks who know the techniques that will allow one to thrive in more remote wintery places. Jerry Saunders, founder of Corvus Survival is one of those people, and I was able to tag along during a training session he put together for Superior Search and Rescue (SAR) volunteers in Upper Michigan.
Our training location, the Lake Linden School Forest, is even further north than Toronto, and the 8am start time is still forty minutes until sunrise. Over one hundred inches of snow has fallen by this time in the year, the forest floor and surrounding trees are blanketed in sound deadening powder.
It is a brisk morning, close to zero degrees fahrenheit, and we emerge from the warmth of our vehicles to the greetings of grey wolves howling from the surrounding forest. The setting seems ominous, but this is a typical morning for the inhabitants of the U.P., and the SAR volunteers arriving to hone their winter survival skills are enthusiastic about getting started.
Introductions
Jerry starts the session by sharing with us his background and experience, and it is quite extensive. After spending over a decade in the Marine Corps, where he established their current winter survival program, he went on to train both law enforcement, and SAR teams in Yosemite National Park. After consulting for participants and crews on several survival shows, he decided to run his own business, training anyone willing to learn a wide array of survival skills.
The SAR crew is a mixed bag of age and experience. Some are in their early 20’s, students at their local universities. A few in their 50’s and 60’s, from all walks of life and backgrounds. We all have one thing in common though, we want to level up our survival skills so we can help keep missing persons, and ourselves, alive during a SAR operation in an unforgiving wilderness. With initial formalities out of the way, we begin by discussing some winter basics.
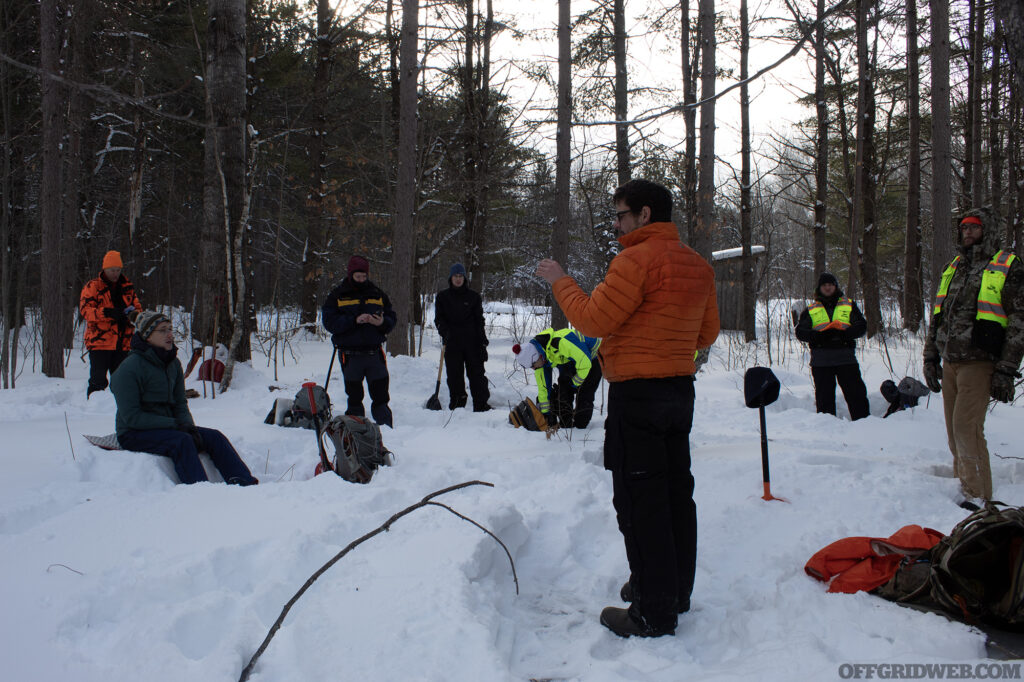
Above: Instructor Jerry Saunders discusses several effective ways of starting fire in winter conditions.
Dress to Stay Warm
Common sense like this may seem like a no brainer, but there is a lot more to it than most people realize. Before we dive into the nuances of clothing, we are reminded of a phrase uttered by many cold-weather outdoorsmen, cotton kills. Properties of cotton give any clothing made from it terrible insulative properties. Cotton traps moisture, and wet clothing has a profound cooling effect on the body in the form of conduction.
Most have probably experienced conduction on a hot day when we cool ourselves by standing in front of a fan. Sweat on our skin conducts heat away from the body, and the air forced past the moisture speeds up this heat transfer. When this happens outside in the winter, it cools the body too rapidly, which can lead to hypothermia and even death.
The solution to this dilemma is to adopt a strict no-cotton policy when dressing for the cold. Wool is often a reliable and inexpensive substitute, but there are a myriad of synthetic fibers out there, such as acrylic, that accomplish the same task. Sometimes referred to as technical clothing, they will trap heat and allow moisture to evaporate through, keeping the wearer dry and toasty.
There are still some folks who roll their eyes at the idea of wearing wool, but modern wool is light, affordable, and does not itch like its predecessors.
Dressing in layers is the next step to successfully staying warm, starting with a base layer, which should fit snugly against the skin, but not so much that it compresses. This base should cover the entire body from neck to ankles. Socks are a part of this as well, but we are reminded that if we decided to wear two pairs of socks, the outer sock should be a size bigger so as not to compress the fibers.
What makes a layer insulative is the amount of airspace between the skin and the next layer, and when you compress a layer of clothing, you are reducing those little pockets of air.
Depending on how cold it is, the next layer is typically just for insulative purposes. This could be loft jackets or pants, or just another looser fitting article of clothing as the base layer. Determining how many insulative layers to wear is a personal choice, which depends on an individual's metabolism and how much heat their body produces.
For example, my body tends to run on the warmer side, so my insulative layers are either thin, or non-existent. A final outer layer is added to break the wind, or prevent precipitation from soaking through. It is not uncommon on days above 20 fahrenheit for some outdoorsmen to wear only a base layer and outer layer. Especially if intense physical work is being done.
The idea behind all of this is to adjust the layers to suit the work you are doing, so that moisture from sweat or from the environment does not soak your clothes, preventing too much heat loss via conduction.
Boots are another topic of discussion, which catches many of us by surprise. We all think that we have footwear that is appropriate for our environment, but it seems the temperature ratings manufacturers claim can be misleading. It turns out that there is no regulatory policy that prohibits a company from stretching the truth about what their boots can stand up to.
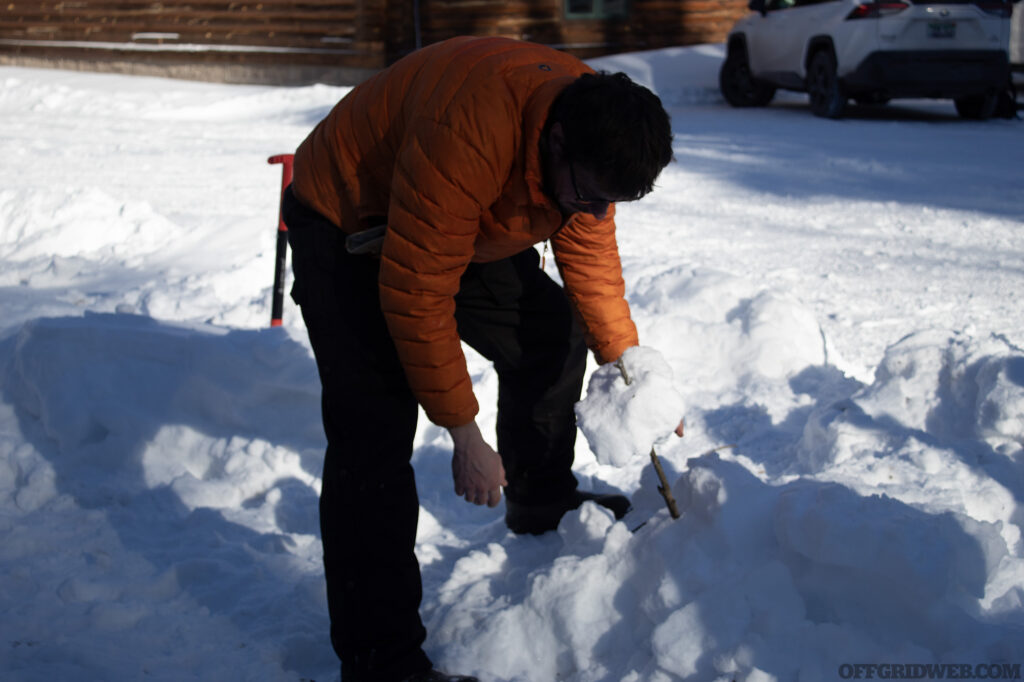
Above: A method known as the “Finnish doughnut”, is a way to create liquid water from snow as long as it is close enough to a heat source.
A boot may say that it is rated to -20, but that does not mean that it is comfortable to the wearer, or a guarantee that your feet will stay warm. Other than testing a boot out in cold conditions, or doing research on product reviews, a good way to tell if a boot is suitable for extended durations in the cold is to find out if it comes with a liner. As with layering clothes on the body, a liner acts as an insulating layer between your sock and the outer layer of the boot.
To demonstrate the effects of heat loss through clothing, and perhaps point out where our clothing may be failing to keep us warm, Jerry pulls out a thermal camera. By using the camera, we are able to see hot zones on our body. These regions that are dramatically warmer than the ambient temperature indicate that what we are using as an insulative layer is either insufficient, or too compressed to be efficient at trapping heat.
Cold Considerations
Unless you hit the slopes on vacation, you may not be familiar with some tricks of the cold weather trade. One such tip that makes life easier is the use of a mat to stand on. Mats to stand on can be what you might put under a sleeping bag, a simple rug, or a chunk of a yoga mat. The idea here is utilizing something between your feet and the frozen ground that you can use to change clothes or socks, without worrying about frostbite on your toes.
An example of its use is when you get out of your car, throw the mat down before taking off your shoes and putting your cold weather boots on. It is meant to make life a little easier, more comfortable, and prevent cold weather injuries.
Remember the movie, “A Christmas Story”? Then you may also remember when Flick is triple-dog-dared into sticking his tongue to a frozen pole. This example highlights what contact freezing is all about. When metal items are cold enough, they will instantly freeze any water that touches it. Using a knife, multi-tool, or touching a metal zipper with bare skin can lead to potential cold weather injuries.
Sweaty fingers, moist skin, and tongues are susceptible to this. Also, beware of alcohol gels that are commonly used for sanitary purposes. Alcohol has a freezing threshold many times higher than water, so a bottle of hand sanitizer that has been left in freezing conditions could instantly freeze any skin that it touches.
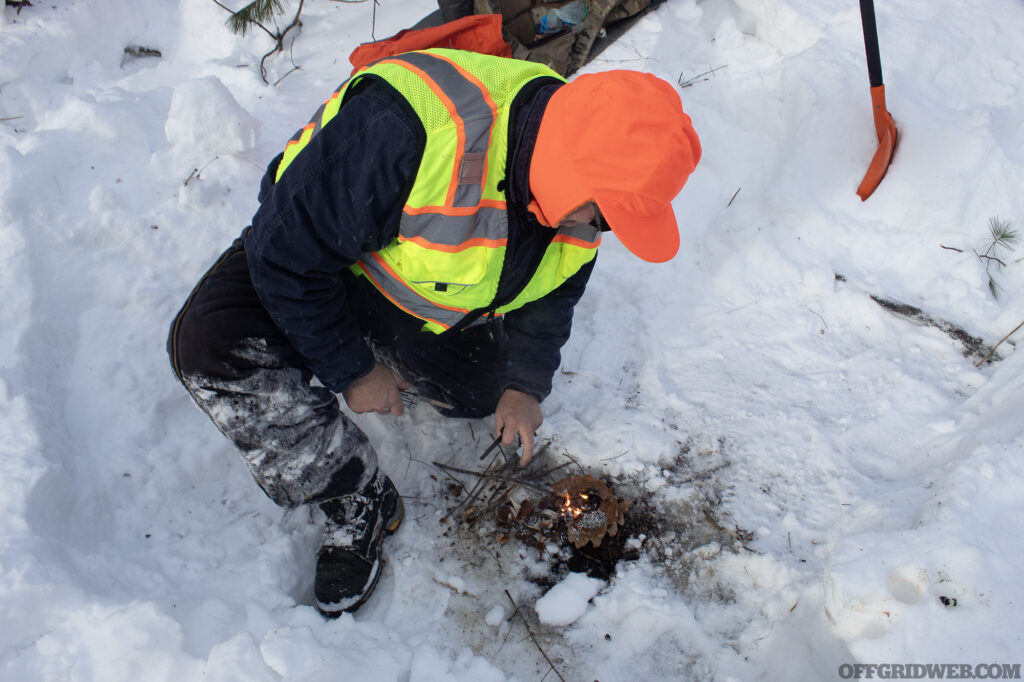
Above: Fire starting principles are the same in the snow as they are in dry conditions; however, the base of the fire should be as close to the ground as possible and sheltered from the wind.
Frozen metal, as Jerry points out, is not the only thing to worry about. Many people carry lighters as a quick way to start a fire in an emergency. But when the temperature drops below freezing, the vaporization of butane can slow or stop all together, rendering it useless until it warms up. Similarly, any devices with batteries will rapidly lose their charge in the cold.
To prevent these problems, it is advised to keep important or sensitive items as close to the body as possible. If the pocket space of a jacket is insufficient, wearing a tactical harness with an admin pouch over your base layer and under the jacket, is a useful way to keep those items nearly as toasty as your core temperature. It is also recommended to keep those items essential to survival as close to your person as possible.
This could include your compass, knife, fire starting kit. If these items are kept in an outside pocket or kept on a pack, it increases the chances that they may fall out undetected, or detach moving through thick brush.
Snow and ice over the landscape could make slips and falls inevitable, and unless your items are para-corded to a tactical harness or backpack, those items could disappear in the powder forever. This scenario suggests it is always important to consider implementing some form of redundancy. For example, instead of relying on the only lighter you have to start a fire, pack a ferro rod, some waterproof matches, or both.
Keep a few utility knives in different places instead of counting on that one singular multitool. Having backup tools is also useful when something breaks or fails. A tip Jerry shares with us is to buy two of an item we bring regularly to the field. One to test out and use, and another kept back in case it needs to be replaced. This will ensure that the items used most will always be available when it is needed.
We are reminded that it is important to test our gear before heading out on any type of operation or excursion. Getting a new piece of gear or equipment is exciting, and it is easy to simply toss it in a pack and head out the door without giving it a second thought. But using the item or gear first allows the user to catch issues that may arise in a low-stakes environment versus on an operation when every second counts.
To highlight this point, we are asked about the emergency thermal blankets we carry to treat hypothermia. These are common items found in most camping sections, and many look like aluminum foil blankets. The problem is, since we do not unfold them until there is an emergency, we are completely oblivious to the fact that freezing temperatures cause the blankets to become extremely brittle.
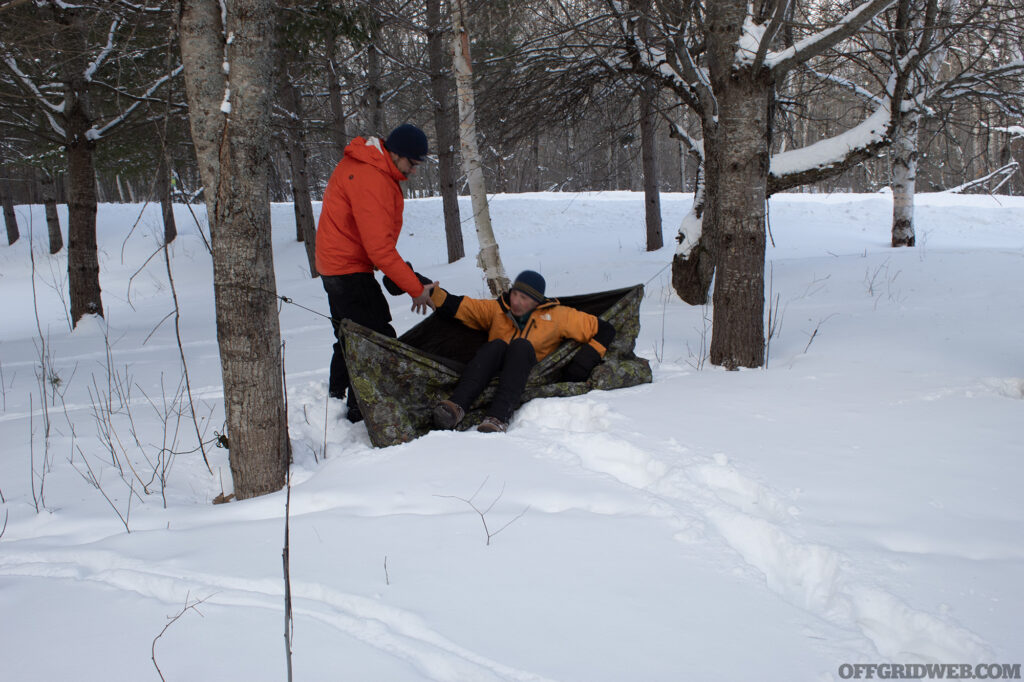
Above: A thermal cloak is an insulated tarp used by Scandinavian military units to sleep in and stay warm in the snow.
Hypothermia blankets designed for cold weather do exist, but we most likely would have never looked into it if it was not for this important learning lesson.
As SAR volunteers, we can spend many hours at a time in the field during operations, and Jerry asks us how many calories we could potentially burn doing so in the cold. One volunteer suggests that it could be as many as 3,000. Jerry points a finger to the sky indicating it was higher. The next volunteer suggests 5,000, and is answered with another finger to the sky. 6,000? No, the correct answer is north of 9,000 calories.
This is because, not only are we burning hundreds of additional calories because of the additional activity, our bodies are also burning hundreds of more calories staying warm enough to maintain its core temperature. It is not uncommon in cultures in cold climates to maintain a diet that is high in fats and sugars to keep up with the additional calorie needs of the body, and Jerry states that nothing hits the spot quite like buttered hot chocolate when it's cold outside.
Shelter from the Storm
Snow has many forms, ranging from wet and heavy, to soft and powdery. Surrounded by the latter, Jerry talks about how it can be manipulated into building one of the most iconic winter shelters, the Quinzee hut. When liquid precipitation freezes, it takes on the crystalline structures we call snowflakes. By applying pressure to break these structures into smaller pieces, a small amount of heat is temporarily released.
This heat melts a small amount of the crystal into water before refreezing again. The result is a harder, more dense snowpack, more similar to solid ice than of powdery snow. It's the reason why, when the snow plow pushes a berm of white stuff into the end of your driveway, it feels like you are shoveling concrete when an attempt is made to clear it. We will use this property to create our shelter.
Two items exist that everyone who operates in the snow should bring with incase of an emergency, one is an avalanche probe, and the other is a collapsible snow shovel. Both are typically carried by alpine and backcountry recreationalists, but they are an important addition to any cold weather kit. Jerry uses the avalanche probe to circumscribe a circle on the ground. This outline will be the circumference of our Quinzee Hut.
Next, half of our group is instructed to shovel snow into the circle, while the other half steps on it to break down the structure of the snowflakes and create a more dense product. This process continues until we have a circular mound of compressed snow approximately five feet in height. The work is tough with a group, and we talk about how much longer and how much more effort would be required to build a Quinzee Hut alone.
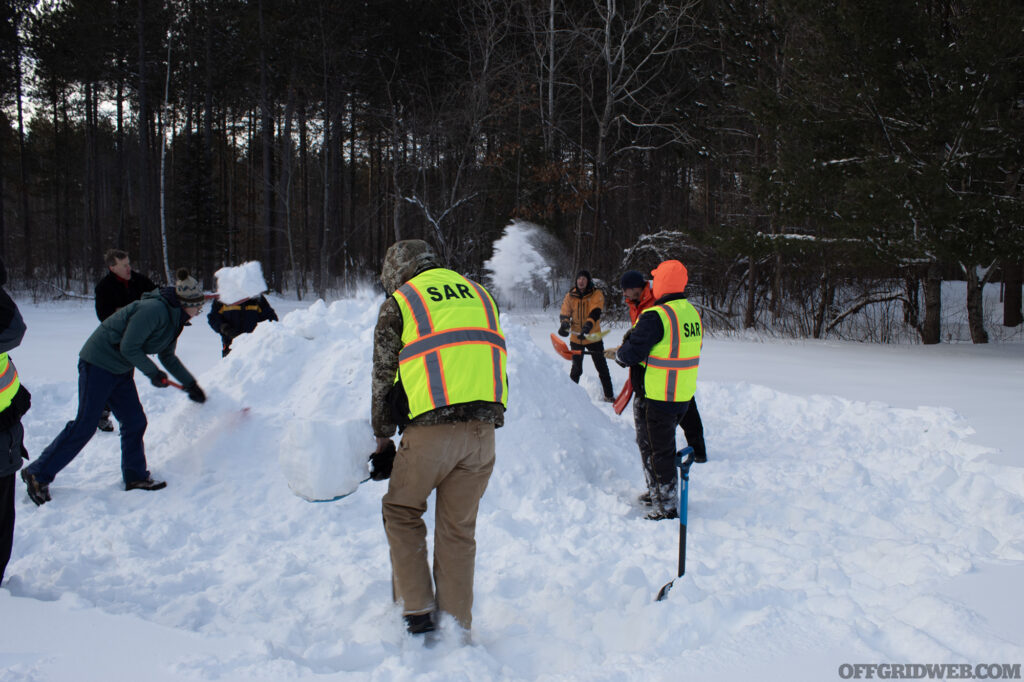
Above: Piling snow into a large mound is the first step to building a successful quinzee hut, and goes a lot faster when there are many people helping.
The next stage of the building process is to let the snow sit for a few hours so the compressed snow has time to freeze and solidify.
Since the Quinzee Hut is more of a long term solution to shelter, we are shown a type of shelter that can be put in place immediately. A hasty shelter can be made using a 10×10 tarp, insulated tarp, or better yet a thermal cloak. By folding the tarp into a taco shape and stringing it up between two trees so the bottom of the “taco” is resting on the ground, it becomes a windbreak style of tent that can be used by climbing inside.
This method keeps the inside surprisingly warm, and allows moisture to escape through the top. Making a shelter such as this, is preferable to finding something natural like a cave, due to the fact that wild mammals, including bats, overwinter in caves. Living and sleeping in areas that have accumulated animal waste will eventually make most humans sick.
Staying warm in a hasty or long term shelter can be made easier by sleeping with gear. Extra clothes, boot liners, socks, hats and gloves, can all add to the insulative properties of a sleeping arrangement. Another factor involved with staying warm while one sleeps, is the choice to get out of the relative comfort of a shelter and relieve oneself.
The human body has to work extra hard to keep a full bladder warm, and emptying it is a way to stay warmer for longer. It may seem unsavory, but if a bladder is relieved into a spare water bottle, the heat from the liquid through the bottle can be tucked nearby as an additional item to help stay warm through the night.
Fire and Signaling for Help
Preventing exposure and shielding the body from the negative effects of the elements is the first step to success in any survival situation. The next step is staying warm, and attracting the attention of search parties. Starting a fire is a skill that predates human history, and up until modern times, it was a task most were proficient in. Now it is less common, but it is fairly simple to pick up. To sustain a fire, three things are required: fuel, heat and oxygen.
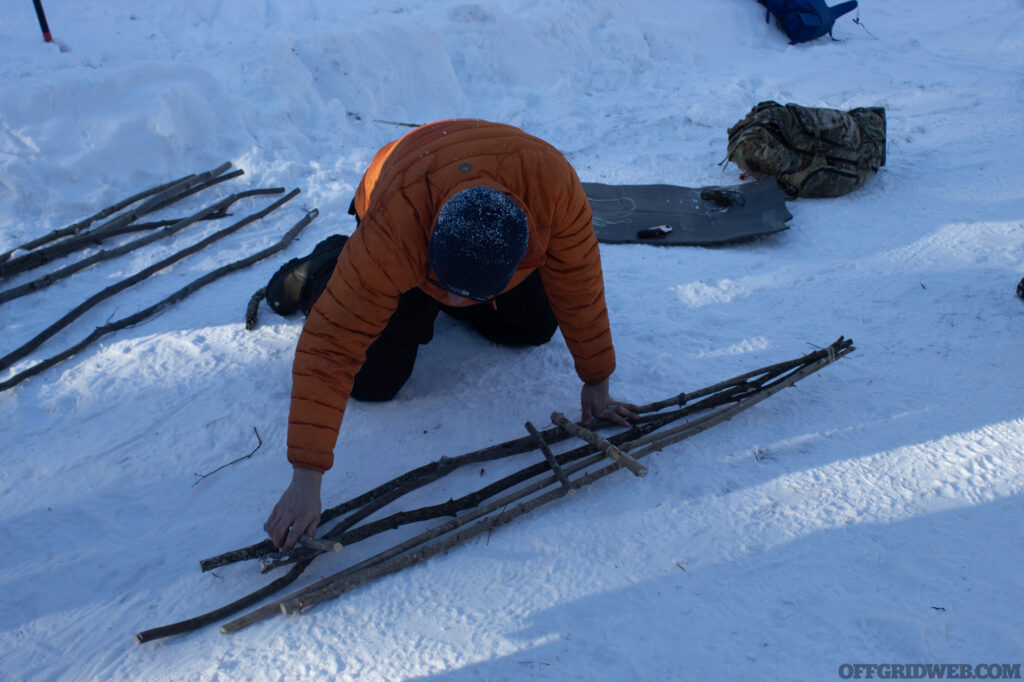
Above: Improvised gear, such as these Canadian snowshoes, can make traveling over deep powder much easier.
Before we start looking for fuel, we need to prepare a place to start a fire. Using a collapsible snow shovel is the easy way to clear a space that accommodates a person and room for a fire, but anything with a long flat surface can be used, including the face of a backpack pocket. Jerry emphasizes the importance of improvisation if the perfect tool is missing.
By clearing the snow as close to ground level as we are capable of, we are also making a depression that shields the fire from the wind and reflects heat back to the person within. Fire site established, we head out looking for fuel.
Tinder is the finest combustible material we need to look for. It needs to be dry and as close to the consistency of wood. There are a myriad of commercial tinders that can be purchased like fire plugs or cubes, but a homemade tinder can be made by mixing petroleum jelly with cotton balls. If comercial products are unavailable, chances are nature can provide what is necessary.
Here in the U.P., we have one of the best natural tinders around, Paper Birch bark. The bark of Paper Birch is resinous, can light even if it is wet, and is easily identifiable by its white paper-like appearance. Having one full handful of tinder is the recommended amount before starting a fire.
As tempting as it is to put the tinder to light, we also need two full handfuls of kindling. Kindling is dry combustible material roughly between the diameter of a toothpick and a pencil. It is important to note that kindling must be dry. An easy way to tell if kindling is dry or not is simply to bend the twig, stick or branch that has kindling potential. If it is dry, it will crack and break off easily.
If not, it will bend without breaking, in which case it should be left alone. Both the tinder and the kindling should be kept dry and placed close together so that the fire starting process will be more efficient.
One last element is needed to get a fire going, and that is fuel wood, this is anything than a pencil in diameter. Enough fuel wood should be gathered to keep the fire going for as long as required. The amount of wood required varies by need. Much less wood is required to stay warm, and much more wood is required if there is any cooking going on.
But a safe place to start is to gather enough fuel wood to fill a space five feet wide by four feet high for a night's worth of warmth. When gathering fuel wood in the winter, only saws should be used for cutting. When moisture in the wood freezes, it can send the axe of an inexperienced wielder flying dangerously in random directions.
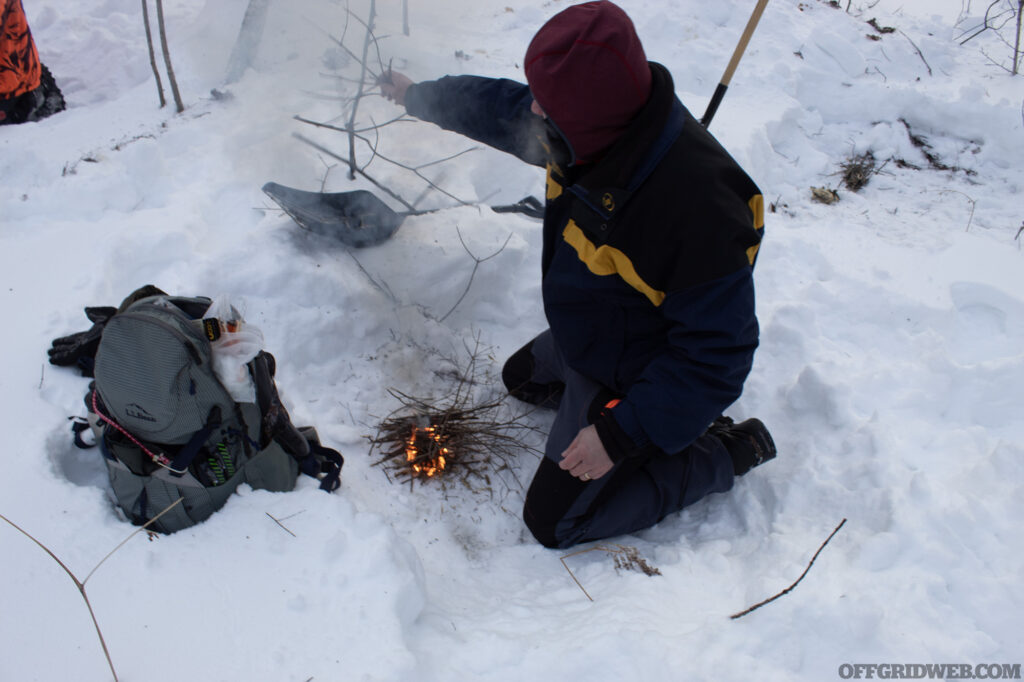
Above: It takes a lot more wood to stay warm through the night than most people realize. Preparing an ample supply before its need is crucial.
Not only does this put the axeman at risk, it will most likely be an inefficient waste of energy, as the wood is likely to remain uncut. Using a portable saw, like a Silky folding saw, is a much safer and more effective option.
With all the tinder, kindling and fuel wood carefully prepared, it is now time to start the fire. Instead of easy to use fire starting tools like lighters or fire cubes, we are given ferro rods. If we can start a fire with a spark, anything else will be that much easier in the future. Our ferro rods are given to us with a warning, do not drop them in the fire, as this will cause the entire rod to ignite and become useless.
Using a sharp 90 degree edge of a knife or other piece of metal, we send sparks into our tinder, which has been crushed between our hands to be as fibrous as possible. Once the spark ignites the tinder, we place our two handfuls of dry kindling loosely over the top, and it does not take long before the flames are hot enough to get our fuel wood burning.
Flames in the snow keep us warm, but it is also a great contrast for searchers to locate or position, especially at night. In fact, three fires in a row is a signal for help that aerial SAR personnel are trained to identify. Outside of fires, signal mirrors can be a useful tool during the day. Light from the sun can be reflected and aimed at passing aircraft to catch their attention.
Araning logs or stones in the shape of an “X” is also a distress signal, but in a heavily wooded area, X-shaped placements can become difficult to distinguish from other items that have fallen over naturally in the shape of an X. Jerry explains that other useful items to use for signaling during the day can include anything that contrasts with the white of snow, like kool aid powder, mounding snow to create deep shadows, or colored smoke flares.
Quinzee Hut Part II
Several hours have passed since we compressed our dome of snow, and it is now time to hollow it out. Before we dig in Jerry asks each of us to grab a handful of sticks about a foot long, and stick them into the sides of the Hut. By doing so, we will have an idea of where to stop digging out the inside of the shelter.
Instead of boring a small entrance and trying to remove all of the inner snow through a small point, Jerry shows us a more simplistic method. By using our snow shovels to remove cubes from one side of the shelter, we can open a broader space to carve out the rest of the inside.
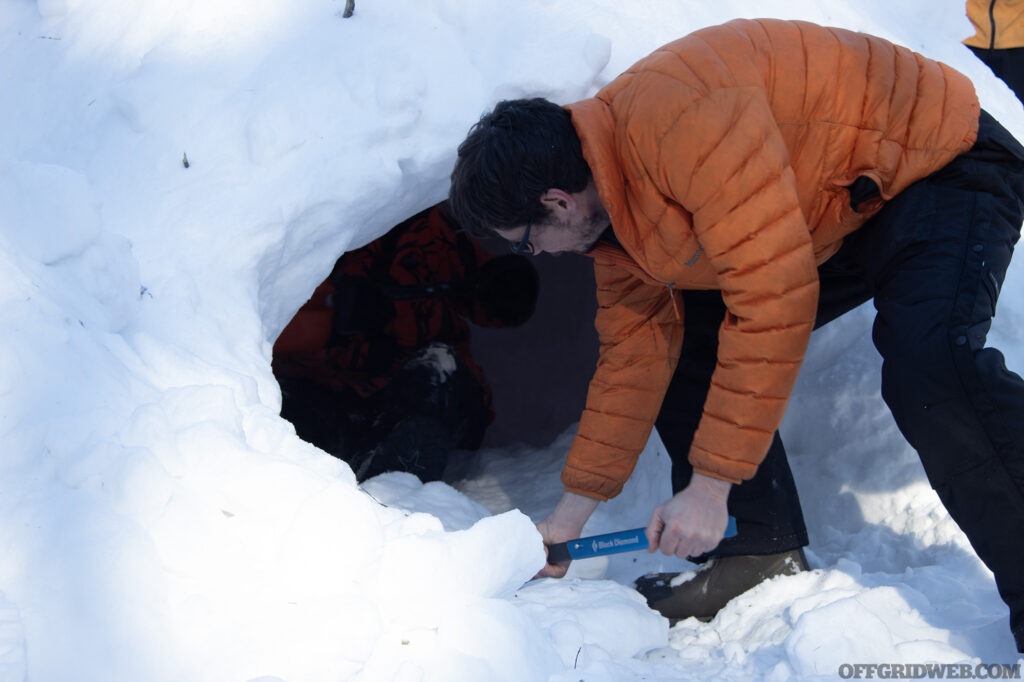
Above: Using teamwork, snow being removed from the inside of the quinzee hut, can be shoveled further away by others who are outside completing other survival tasks.
Moisture from our breath quickly creates a humid environment inside the dome, and Jerry recommends keeping a hood up, and removing any insulative layers we are wearing. Wearing only a base layer and waterproof outer layer is the most effective way of staying dry while finishing the last of our shelter. With the inside cleared out, Jerry takes the blade of the shovel and smooths the inner wall.
The smoother the inside of the shelter is, the more evenly breath moisture will freeze to ice, preventing water drips from falling on any inhabitants.
To complete the Quinzee Hut, we replace the cubes we cut out from the side, and fill any cracks with powder to create a finished wall. A small door, only large enough for one individual to squeeze through, and small enough to plug with a backpack, is cut into the side facing away from prevailing winds. The final part is to create a small ventilation hole to allow excess moisture and carbon dioxide to escape.
We are warned not to light any fires on the inside of the Hut, as this will cause the inside of the dome to melt precipitously and ultimately destroy it.
The Journey Comes to an End
Winter, by its nature, is cold and dark. To those who have not had to experience a trek through a frozen wilderness, or be subjected to the wrath of a blizzard, be aware that surviving these things is not an insurmountable task. In fact, with a little practice, living in the cold can be a comfortable and enjoyable experience.
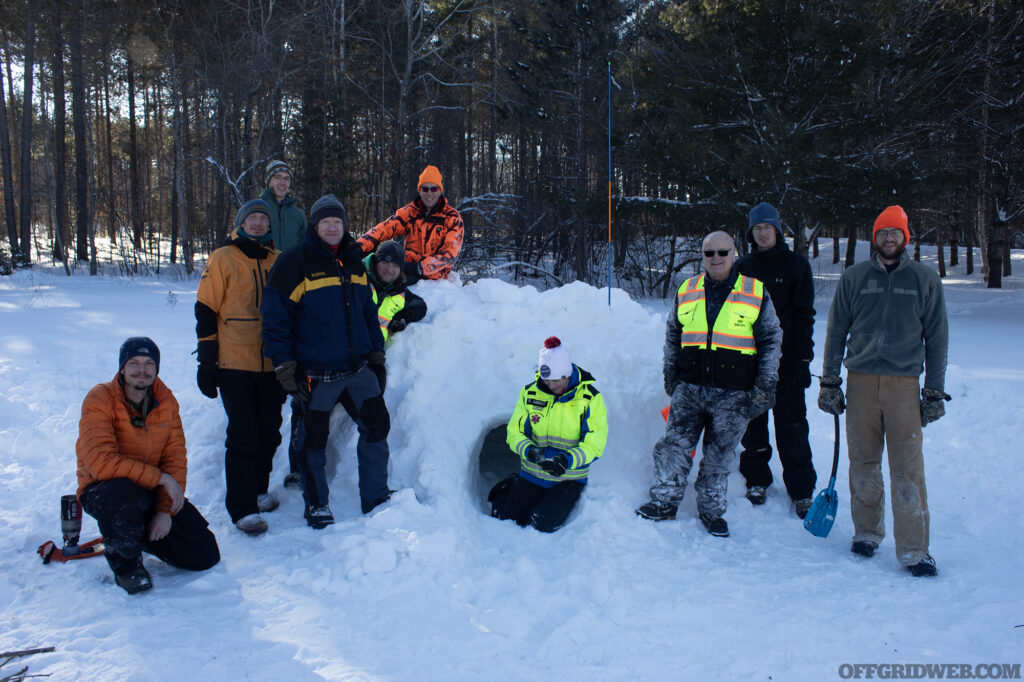
Above: After a long day of learning to build a winter shelter, signal for help, and stay warm in extreme cold, the quinzee hut is finally complete.
Spending over seven hours with Jerry, our group of SAR volunteers was inundated with tips and advice that could fill a small book. Things like keeping your water bottle upside down so the tip doesn’t freeze first, melting water via Finnish doughnut, how to make Canadian snowshoes, or using a sock to make an improvised sling. Having a true cold weather legend to learn from was truly an honor.
Read More
Subscribe to Recoil Offgrid's free newsletter for more content like this.
The post Corvus Survival: Winter Survival Training appeared first on RECOIL OFFGRID.
https://www.offgridweb.com/survival/corvus-survival-winter-survival-training/
 CampingSurvivalistHuntingFishingExploringHikingPrivacy PolicyTerms And Conditions
