RV doors and windows ensure easy access and comfortable ventilation for your RV. But, like all RV components, there’s a chance they’ll be broken or damaged and require replacement sometime during your ownership.
If you need to replace damaged RV doors and windows, your nearest Camping World Service Center is your best resource. Our service advisors can help you find compatible replacements, and our certified RV technicians can complete the removal and replacement. But if you decide to tackle a repair or replacement on your own, below are the steps we recommend to effectively and safely replace windows and doors and their related components.
How to Replace an RV Window
The most common reason you’d replace a window in your RV is likely because the glass is broken or the seal is compromised. But windows may also need to be removed to perform larger structural repairs.
Due to the risk of water damage that comes with an improper window installation, we highly suggest entrusting this kind of repair to a certified RV technician. If you attempt to remove and replace an RV window at home, there are a few pitfalls to consider:
- Voiding your RV’s component warranty. Consult your warranty documentation to ensure you don’t void your coverage by attempting a DIY window removal and installation.
- Creating collateral damage. There’s always the risk of damaging additional components and making more work for yourself, but a DIY installation that voids an existing components warranty can also compromise your coverage for future collateral damage that can be attributed to an improper installation.
- Not achieving a tight seal and a secured fit. A replaced window must meet these two criteria to avoid water damage, damage to the newly installed window, and other issues.
- Improper window sizing. While there are standard sizes for RV replacement windows, each manufacturer has what they call an “acceptable variation range.” Major issues can result from installing a window that is too large or too small, but certified RV technicians are trained to work with that acceptable variation range to ensure a safe, secure installation.
If you’re aware of the potential issues and are still interested in replacing a window in your RV, your first step is to find a replacement RV window. To do this, measure the height and width of the window opening, not the window itself. Note the type of window being replaced:
- Sliding, fixed, or egress?
- Single or double-pane?
- Tinted or non-tinted?
- Driver’s or passenger’s side?
- Left or right opening?
- Special shapes?
- Type of sealant required?
- Manufacturer?
These are the specifications you’ll need to find a suitable replacement window. From there, here are the steps for removing and replacing an RV window:
1. Remove all interior window coverings and trim the silicone bead around the window so it is less likely to pull on and damage decals, paint, or gelcoat. The butyl sealant behind the outer mounting flange may need to be carefully cut with a thin putty knife before the window can be pushed out of the opening.
2. Remove all but one screw on the trim ring on the window’s interior, working from the bottom to the top.
3. Before removing the final screw, slide the screen and open the window (for sliding windows) to provide a better gripping surface for removal. For all window types, enlist the services of a helper positioned outside of the RV to assist with the window removal. The removal may look easy, and you may think, “I’ll just use a bit of tape to hold it in place while I move outside.” DON’T! Get a helper outside your RV to prevent a bad outcome.
4. Remove the final trim ring screw and push on the frame to ease the window out of the rough opening. Never push directly on the glass!
5. Note the type of seal used for the original window installation. This will either be butyl or foam tape. Butyl tape typically leaves behind residue, which will require cleaning before installing the new window. Foam tape is more likely to remain adhered to the window frame. Use whichever type of tape was utilized in the original installation to seal your new window when the time comes.
6. Use a plastic putty knife to remove excess cap sealant on the RV’s exterior wall. You may need a suitable cleaning solution like denatured alcohol and some elbow grease to remove all residue around the rough opening.
7. Do a dry fit (i.e., without tape or sealant) to ensure the new window fits properly in the rough opening. The window should slide into the rough opening easily and have minimal play in any direction once in place. Verify the direction of installation: up, down, left, and right, as well as where it is centered in the opening with no gaps around the edges.
8. Remove the window and add new butyl or foam tape to the inside frame of the new window. For butyl tape, start at the bottom in the middle of the frame and work your way around, applying tape so it’s flush with the inside edge of the frame. For foam tape, you’ll also start at the bottom in the middle of the frame and work your way around, applying the tape flush with the frame’s inside edge. Remove the foam tape’s paper backing as you go to smoothly curve the tape around the window’s corner. Overlap the ends and cut to the length recommended by the tape’s manufacturer, usually ⅜” to ½”. If you’re reinstalling an old window after completing adjacent repair work, you’ll need to clean off as much of the original tape as possible before adding new tape.
9. Place the window frame into the rough opening with the weep holes at the bottom, ensuring you press on the window’s frame (not the glass) to guide it into place.
10. Reinstall the interior trim ring working from the bottom to the top. Start all the screws but don’t torque any down on the first pass. Go back to tighten all the screws before reinstalling all window coverings. Always use both hands to control the driver tool. The driver bit can bounce from the screw head and damage the new window or the wall. Never use an impact driver, as the aluminum window frame strips out easily.
11. On the exterior, trim any excess butyl tape that is squeezed out when pressing the window into place if using butyl tape.
12. Seal as the original window was sealed. Some use a silicone-based sealant to create a waterproof barrier. Some are cap-sealed (running a bead of sealant along the top edge and halfway down each side of the window). Others are fully sealed. With silicone-based sealant, it helps to smooth it with your finger (a slightly wet finger works best) and remove excess sealant quickly. Time is of the essence, as this sealant sets up quickly.
13. Let your sealants cure for at least 24 hours before moving your RV.
An optional final step is to use a sealant rated for interior RV use to seal around the inside edges of the window. This final step seems to be popular among full-time RVers looking for a minor improvement in their RV’s insulating capabilities. Just recognize that doing this will create additional work if you ever have to remove that window again in the future.
How to Replace an RV Door
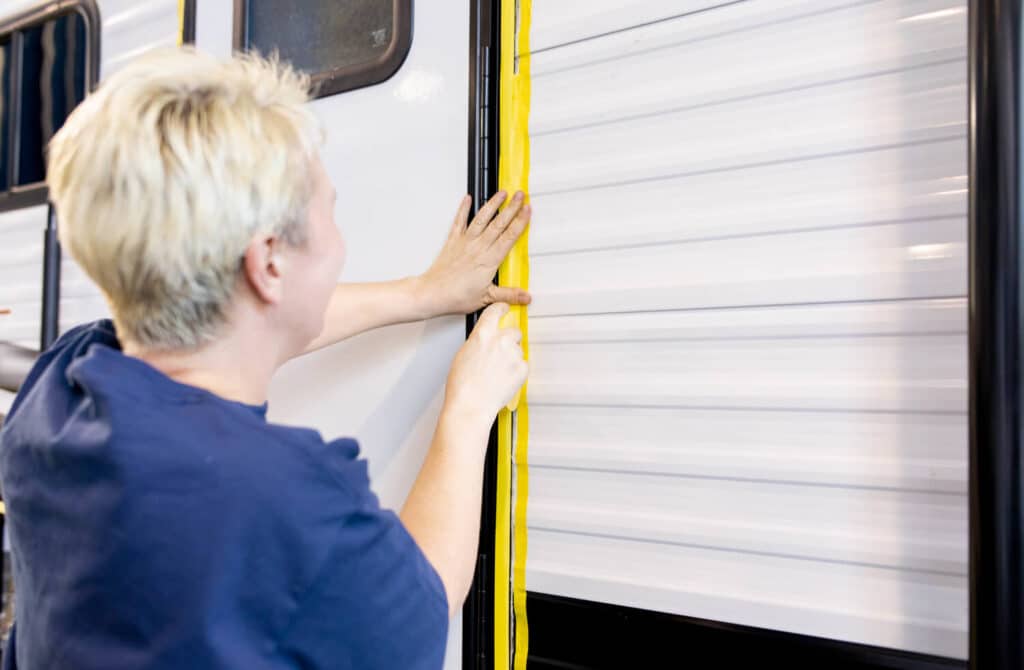
Photo by Camping World
Here are some of the most common causes of damage to RV doors:
- Failing to secure the door before operating the awning (could result in awning damage as well).
- Inadequate door seal maintenance (can lead to water damage).
- Warping due to prolonged sun exposure or heavy use.
- Rust formation leading to a weakened metal structure (usually results in the door being difficult to open or close).
- Dents from opening into curbs or other unforeseen objects.
Of course, there are other potential reasons you might replace an RV door. Yours may have suffered damage in another way, or you may simply wish to install an upgraded RV door with friction hinges and a sleeker exterior finish.
Shop our selection of RV replacement doors to find a compatible match for your RV.
Due to the weight of an RV door and the importance of a proper installation to keep water out of your RV, we recommend trusting this kind of replacement to a certified RV technician. That said, here are the basic steps required to replace your RV door:
1. Remove the retaining screws for the drip cap above the door and use a razor blade to break the silicone seal between the doorway’s frame and the wall. Use a non-marring trim removal tool to pry it free of the snap trim and remove it from the assembly.
2. Use a plastic trim tool to remove the snap trim along the vertical sides of the door, if applicable.
3. Remove the screws holding the door in the doorway’s frame and break the caulk seal between the door frame and the exterior sidewall. A very thin metal putty knife with the corners sanded round may be required to break the caulk seal. Just be careful to avoid damaging the exterior finish. The door should be free when this seal is broken, allowing you to carefully remove the door and set it aside. We recommend having at least two people to handle the door’s weight.
4. Remove any old putty tape or adhesive and clean the doorway frame. Depending on the manufacturer’s instructions, a bead of silicone may be called for along the floor side opening before setting the new door into position.
5. Apply new putty or 1” wide PVC foam tape around the inside of the screw track frame on the new door. Use ⅛” thick tape for laminate sidewalls and ¼” thick tape for stick-and-tin sidewalls.
6. Ensure the deadbolt lock is retracted and the door is sealed along the bottom before setting the door in the opening and adjusting it to be flush against the exterior wall and the floor. Some use tape to hold the door in the opening before installing the screws.
7. Install the first four screws at the four corners of the door (top and bottom). Install the remaining screws to secure the door into the frame and remove the excess tape, if used. Ensure that the door is centered in the opening before installing screws. It should match the position of the original door in the opening, but the screw holes for the new door may not line up precisely with the screw holes in the door opening.
8. Check that the door operates correctly by opening and closing it several times before using a rubber mallet to reinstall the snap trim. Then replace the drip cap.
9. Apply a bead of RV exterior sealant above the drip cap and along the bottom edge of the door. Run another bead along the remaining edges of the door frame.
10. Install the trim sweep behind the baseboard threshold using wood screws.
Contact your local Camping World Service Center to schedule an appointment for an RV entry door replacement if this process is out of your comfort zone.
How to Replace an RV Screen Door
RV screen doors can take a beating, especially if you’re camping with kids or pets. My Husky once ran straight through my screen door when she saw a squirrel running by outside, requiring an RV screen door replacement.
Fortunately, screen door repair kits aren’t hard to come by, and replacing a torn screen is an easy DIY project. Here are the basic steps for replacing an RV screen:
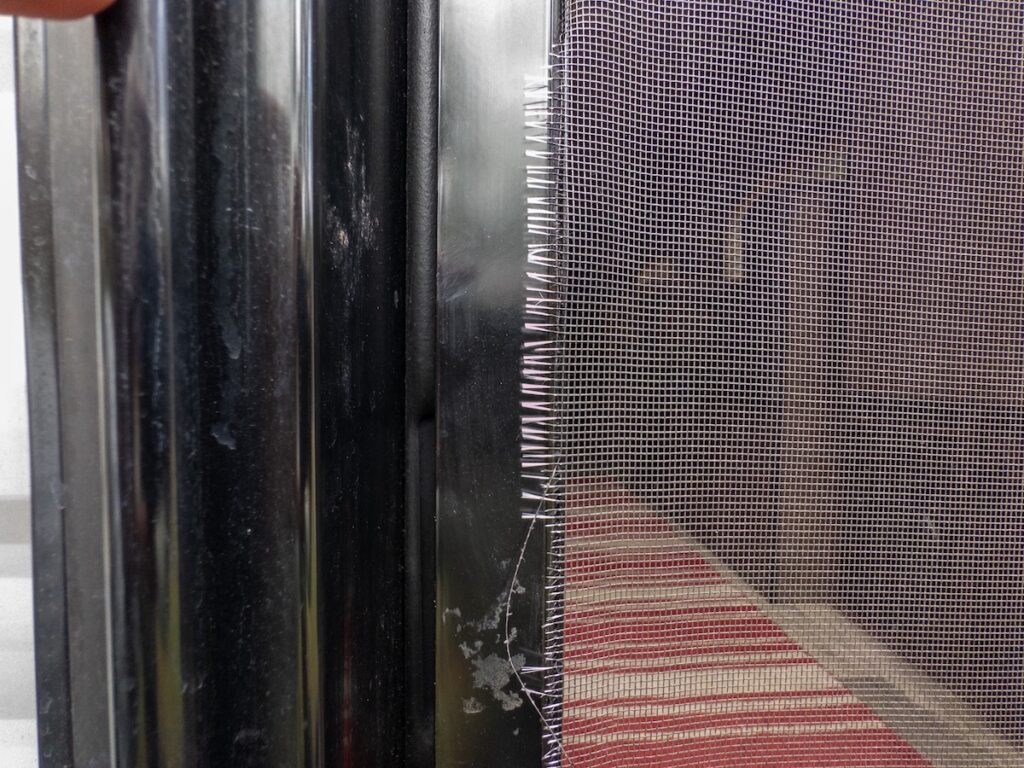
1. Locate one end of the screen spline and use a dental-style pick tool to pull it out to free the screen material.
2. Remove and dispose of the torn or damaged screen material.
3. Stretch the replacement screen material across the opening and secure it with masking tape. It should extend two or more inches beyond the opening in all directions.
4. Starting at the top of the opening (either corner works), push the screen spline into the door crevice at the top of the opening, leaving the sides and bottom unsecured. Using a spline roller makes this easier and prevents damage to the new screen cloth. Using makeshift tools for this task almost always ends in frustration or failure.
5. Stretch the screen material tight across the opening and push the spline into the door crevice at the bottom of the opening to keep the material taught from top to bottom before securing the spline on the sides.
6. Cut any leftover spline ends and excess screen material extending beyond the secured door crevices. Using a sharp razor knife held at a 45-degree angle, gently set the tip of the blade against the outside of the groove and against the spline. Using the groove wall and spline as a guide, carefully draw the blade along while pulling gently on the excess screen cloth.
Technician Tip: You can also remove the entire screen door to complete this installation. Most doors are held by six screws with a Philips or #2 square head. If you choose to remove the door, do this as Step 1 and lay the door on a flat, stable surface before completing the steps above. You’ll also need to add the final step of replacing the door when finished, so don’t lose those screws!
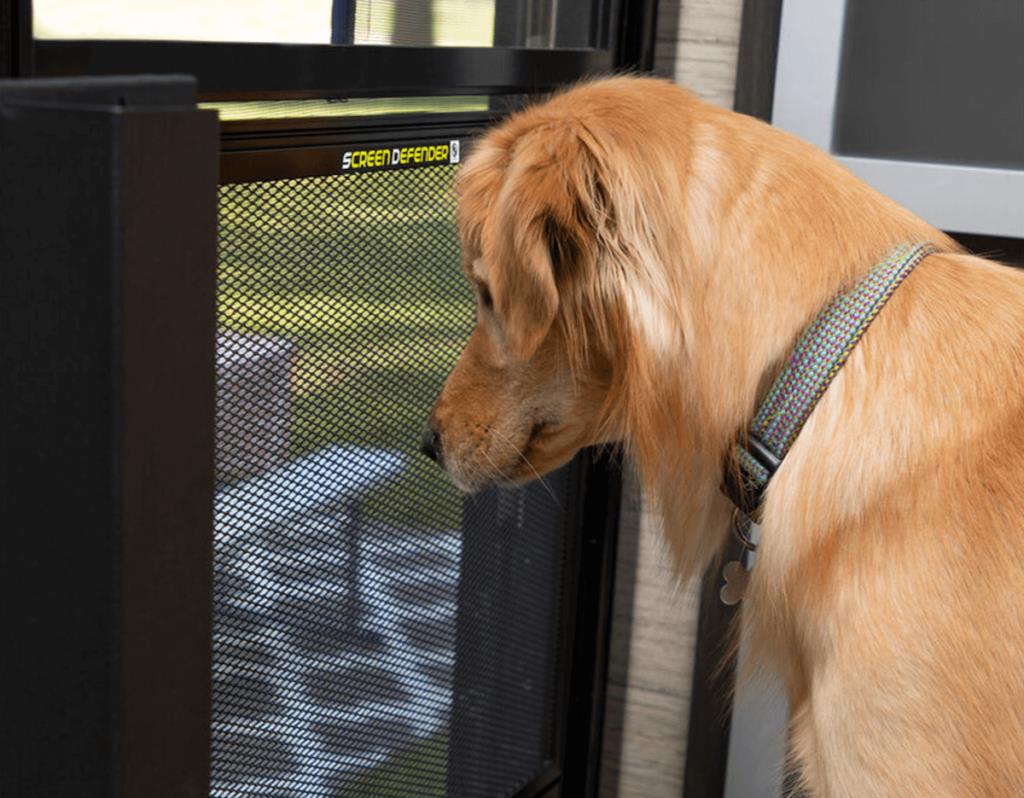
To minimize the chances of your screen door being damaged again, install a grille or screen door protector. Here are a few options:
- Lippert Screen Defender, 20.5” W
- Lippert Screen Defender, 22.5” W
- Lippert Screen Defender, 24.5” W
- Camco Screen Door Grille, Black
- Camco Screen Door Grille, Silver
- Camco Screen Door Grille, White
If you only need to fix the door slide on your RV’s screen door, you can find our selection of replacements in our collection of RV screen door accessories. If your RV screen door frame has been bent or damaged, you’ll likely need to contact your RV manufacturer to inquire about an OEM (original equipment manufacturer) replacement.
How to Replace an Exterior RV Door Catch
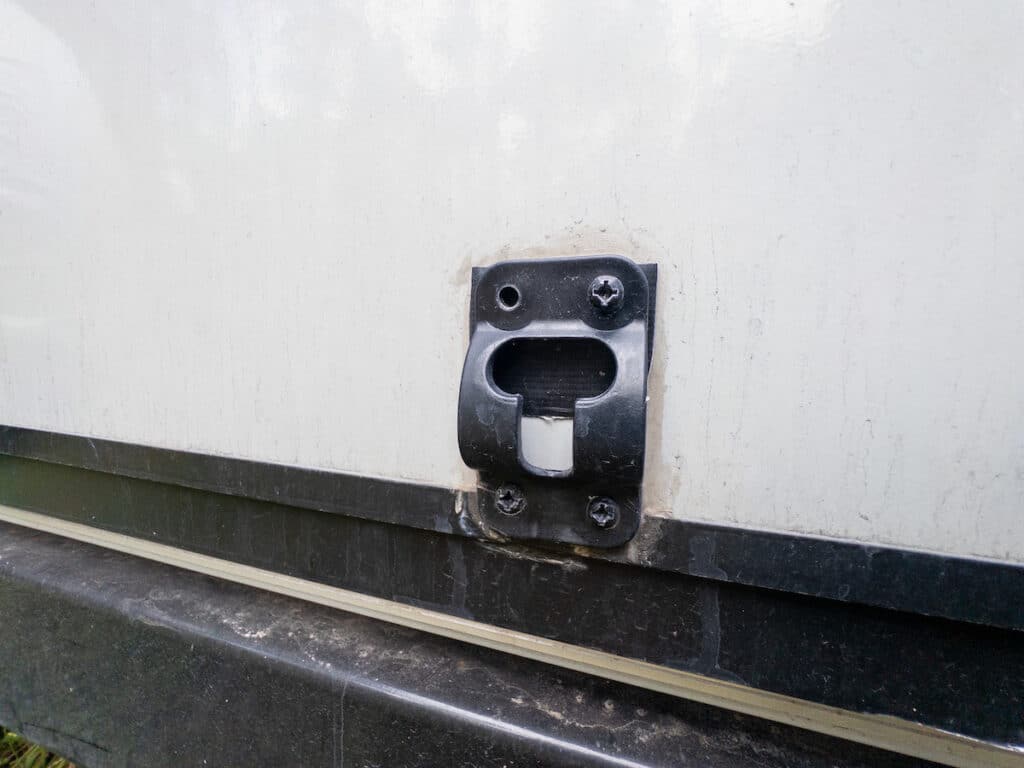
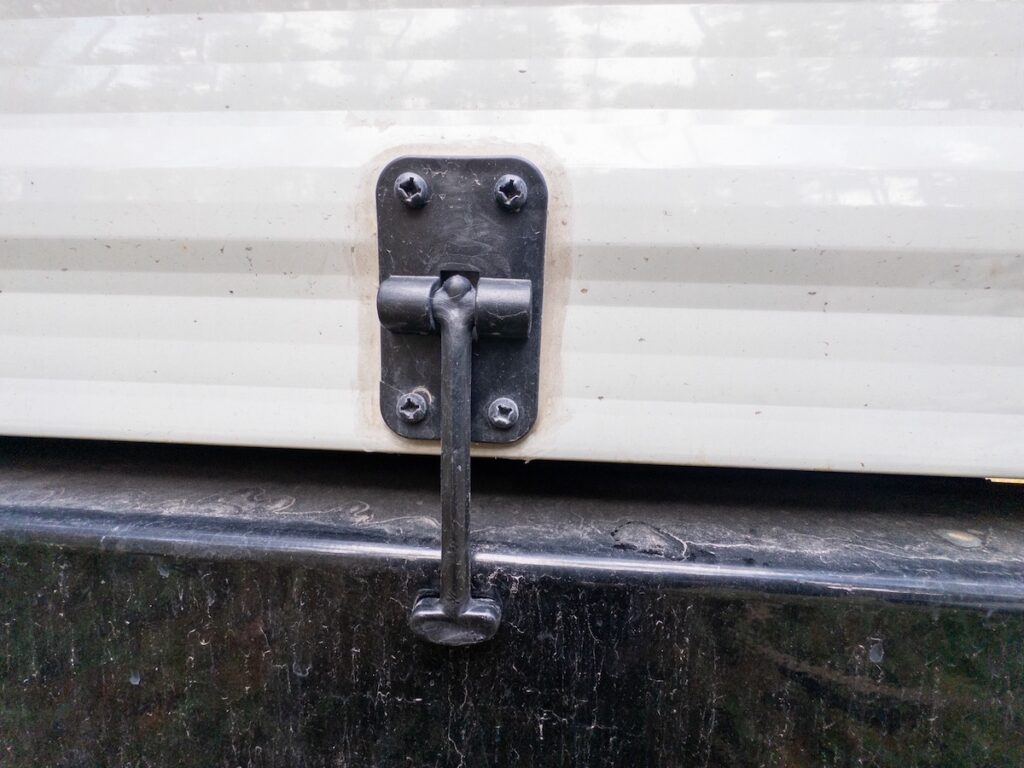
Many newer RV doors are built with friction hinges that don’t require a catch (or hold back) to keep them open when you’re using your screen door to let air in. Those with doors that do require a catch sometimes find that they aren’t the most durable part of their RV.
All it took was a strong wind to pull the door catch from its housing on my trailer, leaving me with holes in the door and the exterior wall of my trailer. I needed to complete an RV door catch replacement to prevent water damage in both locations.
The steps for your replacement will depend on the extent of the damage. If the damage was limited to the catch or its housing, you can likely remove the old and screw the new hardware into place. But if damage spreads to your RV door or the exterior wall, I’d recommend contacting our service department, as you may need a more extensive repair before a new catch can be installed.
For those who simply need to replace a broken door catch on the exterior, it’s generally as simple as removing the old hardware and securing the new hardware. Explore our full selection of RV door catches for replacements for your entry, screen, or storage compartment doors.
How to Adjust RV Door Hinges (On Doors with Friction Hinges)
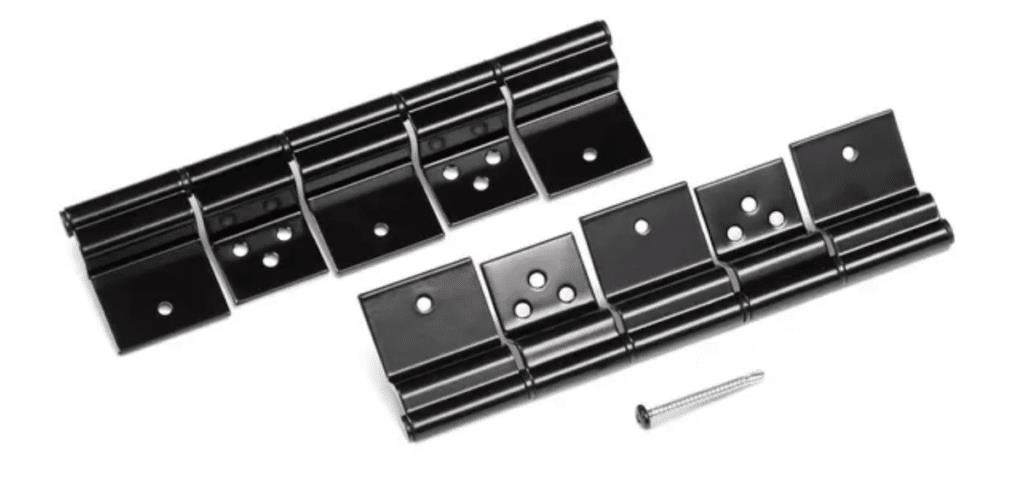
Photo by LCI
Many modern RVs have entry doors on friction hinges. This eliminates the need for a door catch but can also make the door more difficult to open and close. These doors typically have a label indicating they have a friction hinge, but an obvious giveaway is the lack of a door hold-back (or catch) apparatus.
For those interested, you can adjust the amount of friction in the hinges, but remember that reducing it too much will compromise the hinge’s ability to hold your door open against high winds. Some will also try to lubricate the hinges, which simply causes the door to swing more in the wind or on uneven surfaces. We don’t recommend this.
Depending on the manufacturer, your friction hinges may have hex set screws on each hinge. If this is the case, you can use an Allen wrench to tighten or loosen the friction, making your RV door harder or easier to move.
Without those hex set screws, some users have reported gently using a flathead screwdriver to open the jaws of the hinge to reduce friction. As you should guess by now, this is highly likely to void any existing components warranty, so we don’t recommend it.
Are you looking for additional advice on RV repairs or renovations? Here are a few resources you might enjoy:
- This Simple Tool Will Improve the Performance of Your RV Air Conditioner
- The 25 Best RV Upgrades by Price and Value
- How to Install an RV Roof Vent Fan
What questions do you have about replacing RV doors and windows? Let us know in the comments below.
The post How to Replace RV Doors & Windows appeared first on Camping World Blog.
By: Tucker Ballister
Title: How to Replace RV Doors & Windows
Sourced From: blog.campingworld.com/learn-to-rv/how-to-replace-rv-doors-windows/
Published Date: Wed, 18 Oct 2023 08:00:00 +0000
---------------------------------------------
 CampingSurvivalistHuntingFishingExploringHikingPrivacy PolicyTerms And Conditions
