One of many luxuries of modern RVs is the ability to create shade with a button. RV awnings protect you from light rain and sun and create an outdoor patio space perfect for grilling, relaxing, or hosting tailgate parties.
RV awnings aren’t complicated, but you must know how and when to use them correctly. Otherwise, you could wake up in the middle of the night to the sound of your awning ripping off your RV because you forgot to retract it before bed.
Here’s everything you need to know about RV awnings.
How to Open and Close an RV Awning
Before you operate an RV awning, it’s important that your RV is parked, leveled, and stabilized properly. Check out this video to learn how to level and stabilize your RV:
Like this video? Subscribe to our YouTube Channel to receive notifications when we create new videos like it!
In addition to setting up your RV before operating your awning, you should check to ensure no obstructions will impede the awning as it opens. Common obstructions include tree branches, signs, and other RVs.
Once you’ve completed the pre-checks, open your RV awning using these steps:
- Locate the awning switch inside the RV on your control panel.
- Push the ‘Extend’ side of the switch to roll the awning out.
- Watch the awning to ensure it extends evenly and doesn’t make contact with obstructions. This is when it’s helpful to have a spotter outside your RV.
- Extend until the awning fabric is completely rolled out and you can see the awning roll tube.
- Don’t overextend! Overextending could cause the awning to start winding up backward, which creates issues you want to avoid.
How to Manually Open an RV Awning
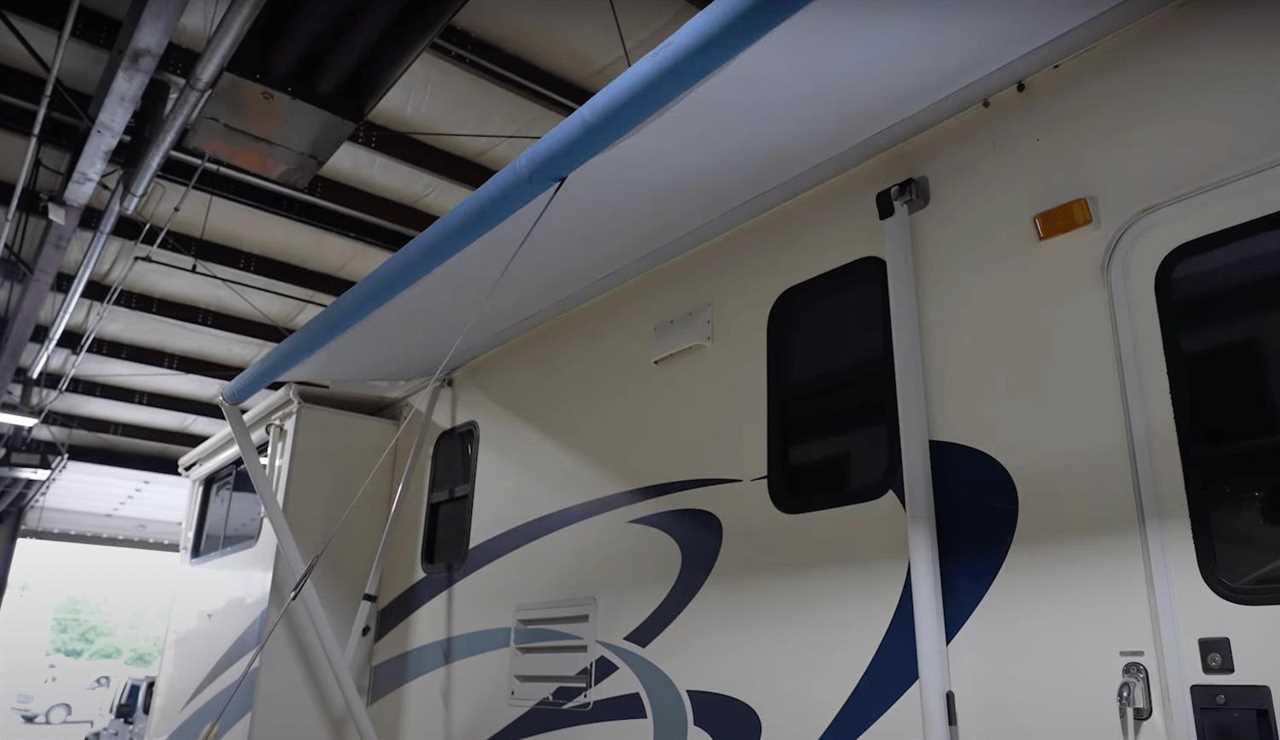
Photo by Camping World
Most modern RVs are equipped with power awnings, but older RVs may still have manual awnings. The video above details the manual operation procedure, but here’s a written overview:
- Make sure the awning has clearance and the door is closed.
- Loosen knobs on awning arms (2-3 turns will do).
- Open tabs to separate the inner arm from the outer arm.
- Use the awning rod to engage Roll up/Roll down switch to the ‘Roll Down’ position. This switch looks like a small lever on the forward end of the awning tube/barrel.
- Use an awning rod to pull the awning strap and extend the awning. You may need to pull one side 1-2 feet out and then pull out the awning arm on the opposite end to even the awning up before pulling the strap to extend completely.
- Extend completely until the flap at the front edge of the awning fabric unfurls.
- Slide vertical arm pieces forward to the ends of the horizontal arms.
- Make sure they are latched in place.
- Tighten the knobs that you loosened to begin.
- Open the handle on the horizontal arm closest to your RV to extend the awning upward.
- Move to the other end and extend the opposite arm until the awning is even.
- You may need to go back and forth until your awning is at the height you want it.
- Make sure both arms are extended evenly.
Technician Tip: On older awnings, you can leave one side slightly lower to allow for rain and moisture to run off on the lower end. Just ensure it’s high enough to clear the entry door when it opens.
How to Clean an RV Awning
Start each camping season by opening your awning and visually inspecting it for damage. This can be done from the ground, but you should also use a ladder or climb onto your RV’s roof (if it’s fully walkable) to inspect the top.
This is also a great time to conduct a full RV roof inspection.
During your awning inspection, look for tears, holes, or accumulations of mold and mildew. When you store your RV in a humid climate, the risk of mold increases. To help prevent mold growth, open your awning completely at least once a month. This allows it to dry if moisture has accumulated on the fabric.
At the end of your camping season, clean both sides of your awning and let it dry completely before retracting it. Follow these steps to clean an RV awning:
- Open the awning completely.
- Spray the top and bottom with clean water using a clean garden hose and spray nozzle.
- Use an approved cleaner and soft-bristle brush gently scrub the top and bottom.
- Rinse the awning to remove the cleaner and debris you’ve loosened.
Safety tip: A soft brush with an extension is best for reaching the full extent of your awning, whether you’re cleaning it by standing on your RV’s roof or a ladder. Be careful not to place much downward force on the awning to avoid damage.
How to Remove Stains from RV Awning
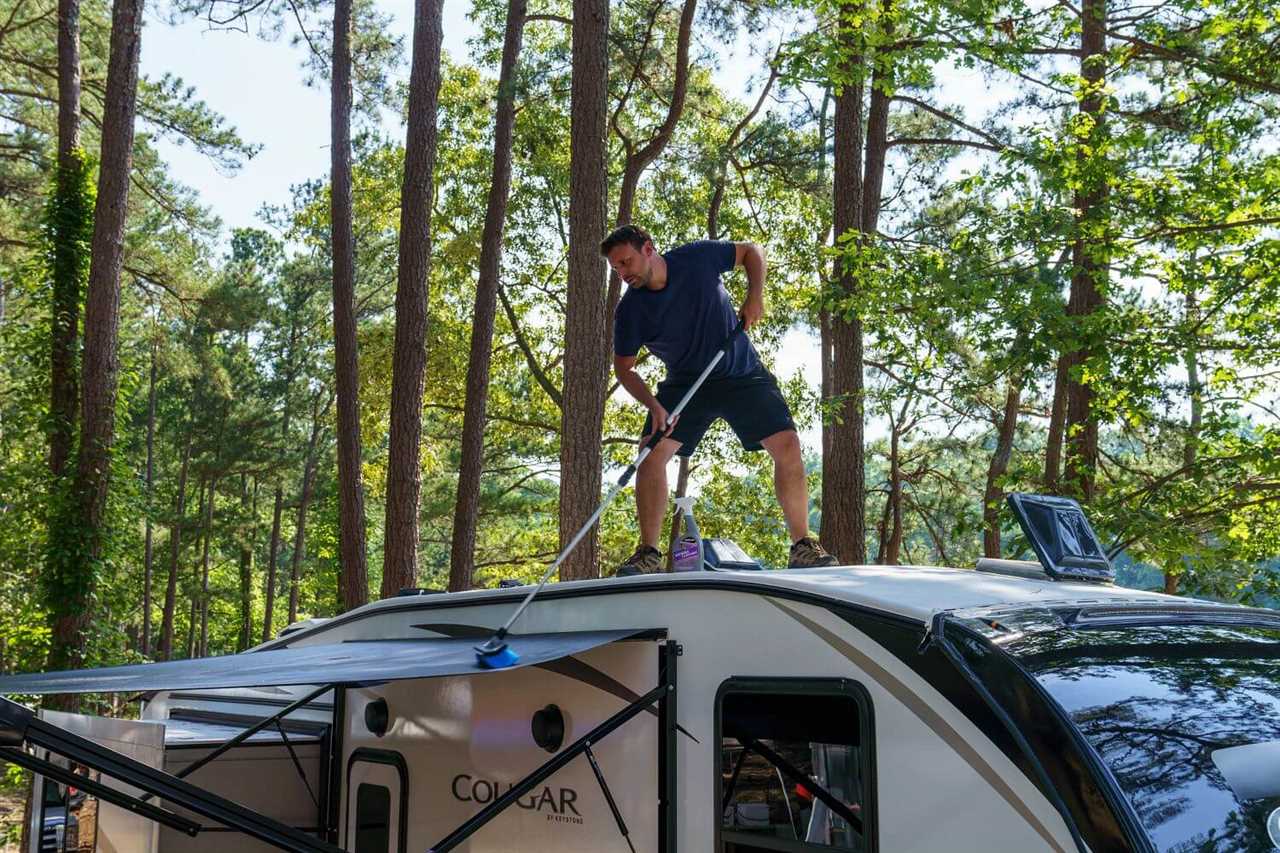
Photo by Camping World
Many things can cause unsightly RV awning stains – bird droppings, tree sap, decaying plant life, and more. An approved RV awning cleaner should remove most of the residue from your RV awning.
If it doesn’t, try using isopropyl alcohol. It’s relatively affordable, easy to find, and won’t remove your awning’s color. Mix one cup of isopropyl alcohol with one gallon of water. Apply that solution to stains and scrub with a soft brush. Then rinse the spot to remove the stain. Repeat the process for particularly hard-to-remove stains.
How to Replace an RV Awning
Replacing an RV awning requires removing the old awning, finding a suitable replacement awning, prepping for installation, and securing the new awning properly for your RV’s substructure.
All of that can be tricky, especially the last part. Fortunately, you can contact trained RV technicians at your nearby Camping World to help.
Whether you’re proceeding independently or contacting professional help, these tips will aid your RV awning replacement mission.
How to Measure RV Awning Size
Checking your RV specs is a great place to start. Most RV owners’ manual contains information on the awning length. But this information can be more difficult to find than you might like.
So another way to determine awning size is to measure. Find a tape measure and a partner. Place one end of the tape measure in the center of the forward awning arm and extend the tape to the center of the rear arm. Your measurement is the length of your awning.
How to Measure for RV Slideout Awnings (aka Slide Toppers)
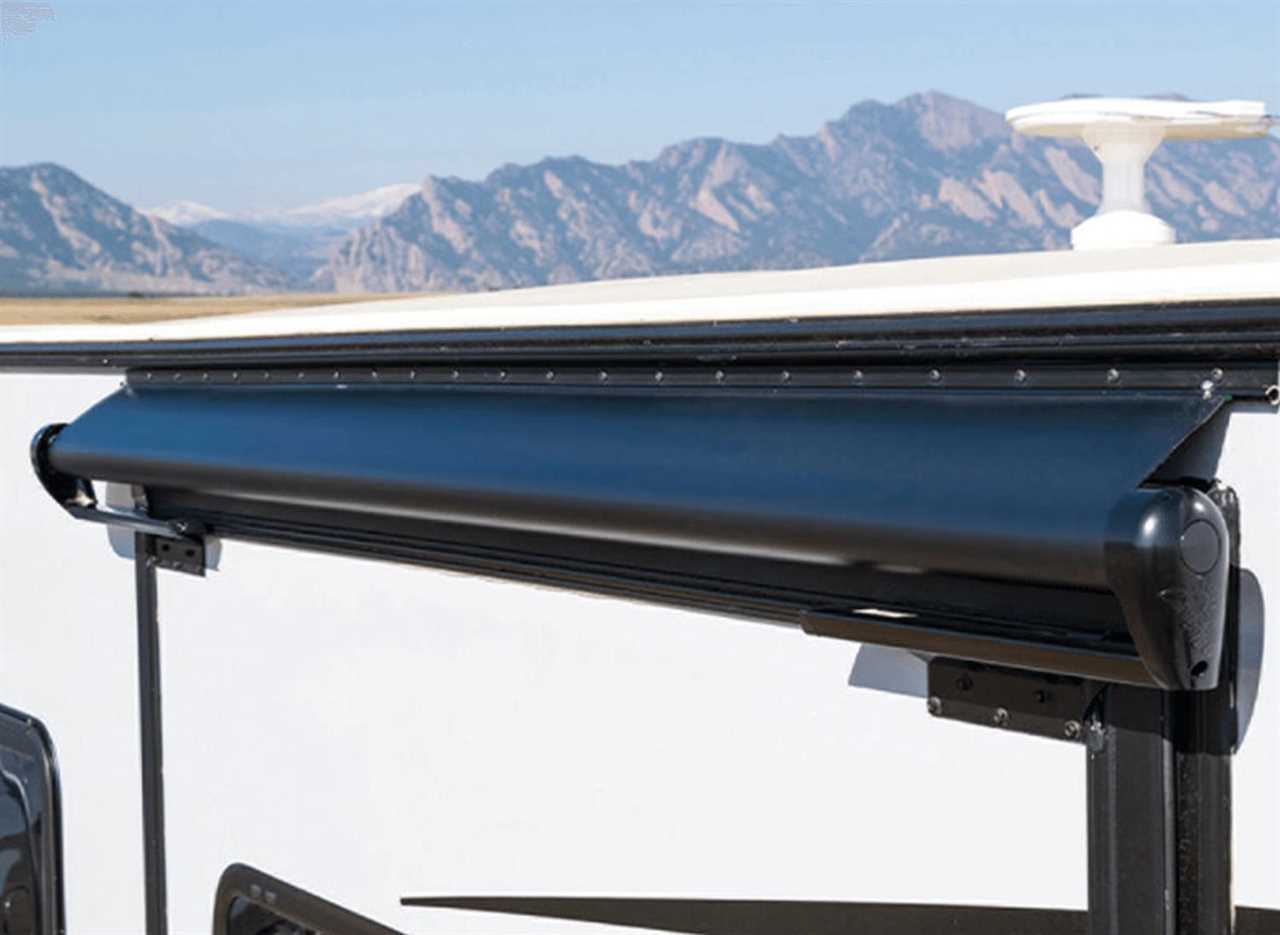
Photo by Camping World
When measuring for awnings that cover your RV slide-outs, you’ll measure across the slide-out from flange seal to flange seal. But what is a flange seal?
On a slide-out, the flange seal (also known as T-molding or trim) extends past the edge of the frame. When the slide-out is retracted, it rests flush against the RV’s body to seal the unit from dust or moisture.
So don’t measure from one edge of the slide-out frame to the other. Measure across the slide-out’s length, including the flange seals. This measurement matches the fabric width for your slide toppers, but the length of the full assembly will be slightly longer.
In addition to measuring awning length, you’ll need to verify how far your slideouts extend. Slide-out depths vary from model to model, but this measurement is vital to choosing a replacement slide topper that will work for your RV.
How to Remove an RV Awning
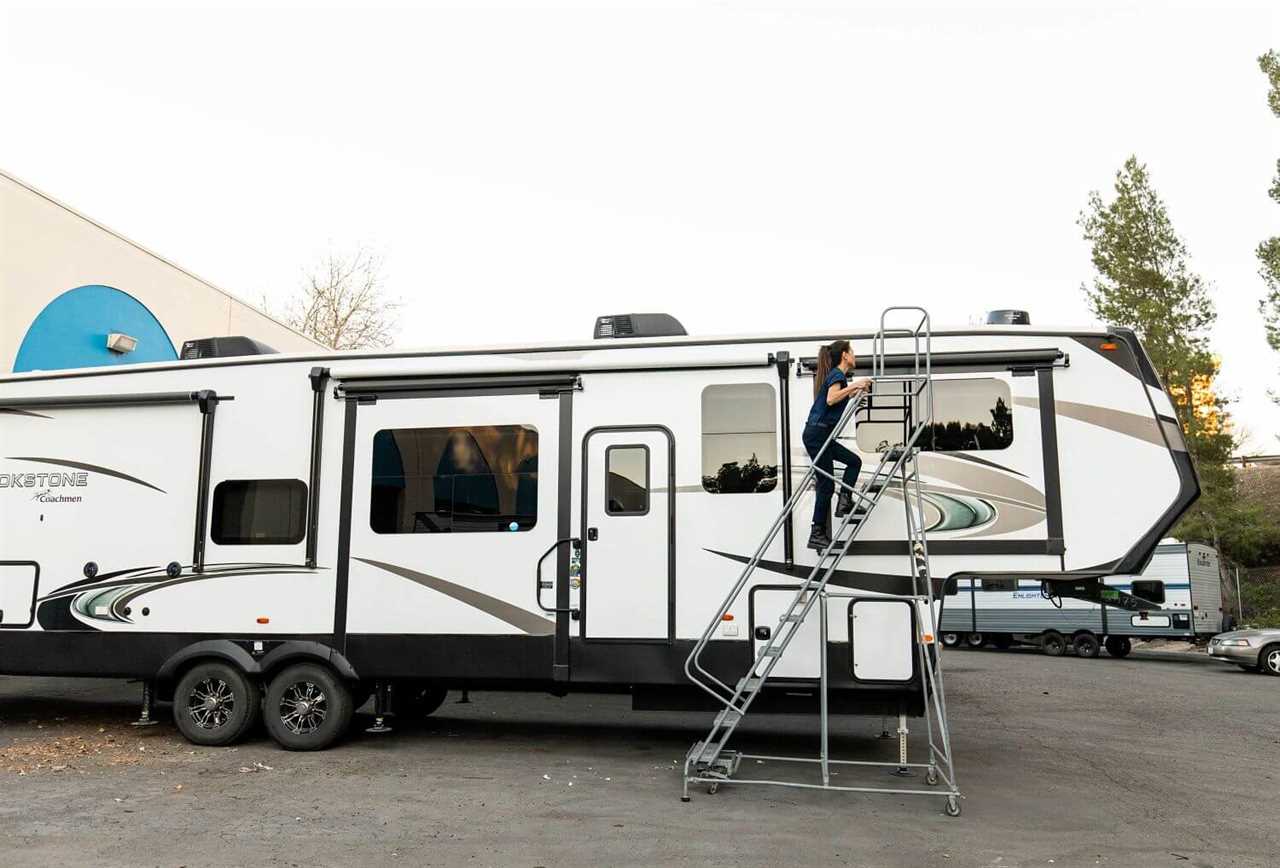
Photo by Camping World
Due to the weight and awkward nature of awning assemblies, you’ll need 2-3 people to help you remove an awning. Awning arms can easily be bent if you’re not careful, which may necessitate a larger fix than you need.
If you’d rather not risk damaging the assembly or another part of your RV, contact your local Camping World Service Center to schedule a service appointment.
If you want to remove your awning on your own, consult your owner’s manual for removal instructions and safety precautions. These are the general steps to remove most RV awnings:
- Roll out the awning about one foot (12 inches).
- Remove the polycord screws holding the awning fabric in the awning rail.
- Secure the roll tube to the head assemblies using cotter pins.
- Have two helpers hold the weight of the assembly while you remove the lag bolts holding the assembly to the rafters of the RV.
- Remove any remaining hardware holding the awning to your RV. It may be necessary to remove rain gutter extension if present.
- Have the helpers walk the assembly toward the front or back of your RV as you slide the awning fabric out of the rail extrusion.
- Set the awning assembly down gently to reduce the possibility of damage.
- Remove the awning rail extrusion if replacing it.
How to Install an RV Awning
Putting a new awning on your RV must be done carefully, but it can be a DIY task if you’re up for the challenge. Your first choice will be deciding whether to install a manual or electric awning.
- Manual awnings are durable, easy to adjust, don’t require a power source, and are typically more affordable. The downside is that they require more work to open and close.
- Electric awnings are easy to deploy, and some newer models retract automatically when high winds are detected. The downsides are less durability, higher cost, more difficult installation, and the requirement for power to operate (unless you override them manually).
With your choice made, you’ll need to purchase an awning kit that comes with the following parts:
- Wall bracket
- Outer arm
- Inner arm
- Pitch arm
- Roller tube
- Awning fabric
If you choose a kit for a manual box awning, it should also come with a crank wand. Regular manual awnings come with an awning rod to flip the lever and hold the strap as you retract the awning. For manual and electric awning installations, you’ll need to purchase a compatible awning rail extrusion separately.
From there, your best path is to follow the installation instructions that come with your kit. But here are the general steps:
- Place butyl tape on the back of the awning rail extrusion.
- Install the awning rail extrusion so it is perfectly level across the top of your RV.
- Use your silicone spray to lubricate the awning rail.
- Use self-tapping screws to secure the rail extrusion.
- Install wall brackets according to the manufacturer’s specifications.
- Attach the awning roll tube to the awning arms and secure it with screws.
- FIND SOME HELPERS!
- Hold the awning against the side of the RV (2 people) and walk it from front to back or back to front (whichever is easiest, depending on the awning location) while you feed the awning fabric through the rail extrusion. Keep the awning arms parallel to avoid damage to the arms and fabric.
- Level the arms and place one screw into each side to hold it in place. Then add another screw to each side for additional security.
- Extend the awning and install the remaining hardware on the awning arms.
- Use butyl tape or silicone sealant to prevent leaks around screw holes.
- Secure the awning arm mounting locations.
- Retract the awning and ensure the fabric doesn’t wrinkle or bunch.
- Place polycord screws at both ends of the awning fabric to keep it in place.
How to Replace RV Awning Fabric
Reasons to replace RV awning fabric include fraying, tearing, sagging, or faded coloring. For this procedure, it’s important to note that the awning fabric length differs from the total awning length. You’ll need a new roll of awning fabric that matches your awning’s existing fabric length.
Find the right replacement fabric for your RV awning.
Consult your owner’s manual for fabric recommendations and replacement instructions.
There are eight basic steps to replacing the fabric on most RV awnings.
Step 1: Partially Extend the Awning and Secure the Head Assemblies
Photo by Camping World
Extend your RV awning roughly one foot (12 inches). Using zip ties, attach the head assemblies on both awning arms to the vertical assembly on the side of your RV. Then remove the polycord screw on both ends of the awning assembly. These screws are located roughly one inch from the awning fabric.
Step 2: Remove the Roll Tube
You’ll need a partner for this step, as maneuvering an awning roll tube can be heavy and awkward. The roll tube should easily detach from the head assembly on both ends. But you’ll need to feed the awning fabric through the awning rail to remove it completely.
This requires moving the roll tube safely toward the front or rear of your RV as you slide the fixed side of the awning out of the rail. Two (or even three) people should help with this process, and you should set the roll tube on a clean, level surface once it’s removed.
Step 3: Remove the Old Awning Fabric
To get rid of your old RV awning fabric, you’ll need to remove one end cap from the roller tube. You can choose either one, but only need to remove one before you proceed. To do so, remove the three screws holding the end cap.
Technician Tip: Some models utilize rivets, which must be drilled out. Assemble with new pop rivets if this is the case.
With the cap removed, unroll the tube to extend the old fabric completely. Again, it’s good to have a partner’s help for this step.
With the fabric rolled out, remove the polycord screws attaching the fabric to the roll tube (on both ends). To remove the fabric, one person should hold the awning fabric while the other pulls the roller tube away.
Technician Tip: Often, the polycord will be wrapped or folded over the end of the tube, and the end cap of the motor or torsion assembly will be installed over it. In these cases, both end caps must be removed.
Step 4: Prep for New Fabric Installation
Congratulations! You’re almost ready to install your new RV awning fabric. Your old fabric should be disposed of according to local waste disposal regulations, but consider whether you can cut and repurpose certain sections that are still in good condition.
Lubricate the fabric track with silicone spray to prep for a new fabric installation. Roll out your new fabric and thoroughly inspect it for tears or rips before installing it. It’s easier to send it back for a replacement now than after you proceed with the full installation.
Step 5: Install the New Awning Fabric
When ready to install, find the polycord on the end with the valance. This will be the fabric end installed into the awning tube first. Ensure that the bottom of the awning fabric faces the roll tube to install it correctly.
With the valance end and the bottom identified, feed the polycord on the valance end through the roll tube track until it is centered on the tube. Attach it to the polycord on both ends using the original screws.
Technician Tip: Most new awning assemblies didn’t utilize screws on the awning tube to center the fabric since they folded the polycord into the tube ends. Upon reassembly, the choice is yours.
Now, roll the fabric completely onto the tube as tightly as possible. Ensure it does not telescope out on either end. You’re better off unrolling and restarting if the fabric isn’t tight and in line as you roll.
Step 6: Replace the Roll Tube End Cap
Now, you can replace the three screws you removed to secure the end cap that keeps the awning on the roll tube.
Technician Tip: Setting the roller tube assembly atop two fully extended jack stands padded with shop towels makes this step smooth and easy. It also minimizes the chances of damaging the new fabric.
To prep for the next step, find a flathead screwdriver and slightly open the awning rail on the side of your RV. This makes it easier to slide the new awning fabric into the rail as you reinstall the roll tube.
Step 7: Reinstall the Roll Tube and Ensure the Fabric is Centered
Use your silicone spray to lubricate the awning rail (just like you did with the roll tube track). Get a helper on either end of the roll tube to take the weight as you slide the polycord tube into the awning rail until the tube is located between the head assemblies.
Reinstall the roll tube into the head assemblies. Before replacing the polycord screws, it’s a good time to operate your awning (extension and retraction) to ensure the fabric is centered on the roll. Remove the zip ties holding the head assemblies before operating your awning.
Step 8: Replace Polycord Screws and Enjoy!
Now you can replace the polycord screws on both ends of the awning rail, and you’re ready to start enjoying your new awning.
RV Awning FAQs
Photo by Camping World
Let’s conclude by answering some common RV awning questions asked by new RVers.
How Much Wind Can an RV Awning Withstand?
The threshold for most RV awnings is 20-25 mph (32-40 km/h). The risk of awning damage increases significantly if your campground experiences sustained winds above this threshold.
That said, “wind speed” and “wind gusts” are two important factors. When your trusty weather app tells you wind speed is below that threshold, there’s always the possibility of a stronger wind gust damaging your awning.
To be safe, retract your RV awning whenever the wind begins to bounce or shake your RV awning. Luckily, RV manufacturers have innovated to create “smart” awnings that retract when wind speeds over a set limit are detected.
Can I Leave My RV Awning Out in the Rain?
Most RV awnings are built to withstand light rain – with an emphasis on the word “light.” To be safe, retract your awning when the rain begins. Consider investing in a pop-up canopy if you need additional shelter for your RV’s outdoor patio.
Learn how to choose the best canopy tent for your RV needs.
Technician Tip: Never leave your RV unattended with the awning deployed. Weather, neighbors moving their RVs in or out, and other factors can damage your awning. Anything can happen in the campground. If you are out hiking, shopping, sightseeing, etc., and something goes wrong at the campsite, you will not be there to respond.
Can You Replace Just the Fabric on an RV Awning?
Absolutely! If the fabric is the only damaged component, that’s all you’ll need to replace it. As always, check with your awning manufacturer to ensure you get the right fabric to fix your RV awning.
Does RV Insurance Cover Awning Damage?
The short answer – it depends on your level of coverage. If you choose Good Sam’s Permanent Attachments Coverage, for example, your awnings, tow kits, levelers, antennas, and other permanent RV attachments are covered for the full amount it would cost to replace them – not a depreciated amount.
Enjoying on-demand shade is one of the many benefits of RV life. Discover Camping World’s selection of RV awnings and awning accessories!
Is there anything else you want to know about RV awnings? Let us know in the comments below.
By: Tucker Ballister
Title: A Complete Guide to RV Awnings
Sourced From: blog.campingworld.com/rv-basics/maintain-rv-awning/
Published Date: Fri, 02 Dec 2022 15:00:54 +0000
---------------------------------------------
 CampingSurvivalistHuntingFishingExploringHikingPrivacy PolicyTerms And Conditions
