Disconnecting from the digital world is one of my favorite parts of bikepacking. I like to pretend I’m returning to a simpler time, before smartphones existed, when life was mostly just about playing outside (yes, I am actually old enough to remember that).
Yet ironically, keeping electronics charged is one of my biggest bikepacking challenges. News feeds may be mercifully unavailable, but I still find myself schlepping a pile of USB-rechargeable devices into the backcountry, all of them hungry for electrons in the middle of nowhere.
Between my phone, InReach Mini, bike lights, headlamp, ear buds, and occasionally a Kindle if I’m in the mood for luxury, a lot of electrons are needed. When wild camping for several days in a row, and/or doing a lot of night riding (as in bikepack racing), keeping everything charged can be a losing battle.
This post shares the most important battery-related techniques and products I’ve discovered during 20,000+ miles of bikepacking and touring. I’ll cover battery-saving tips, my favorite power banks and wall chargers, ideas for diversifying power needs, and the basics of solar and dynamo setups.
When you buy through affiliate links in this post, I may earn a small commission. Thanks for your support! I always offer unbiased opinions based on real experience from the road and trail. Learn more.
Power Needs Vary
Before I get too deep into the weeds, let me acknowledge that your bikepacking power challenges depend on your route and riding style.
Sleeping in a motel or developed campground most nights, and stopping at restaurants during the day? All you really need is a wall charger and a small power bank just in case.
Wild camping for several nights in a row between resupply stops? You’ll need to be more careful about battery usage and may want a couple power banks, and perhaps a way to recharge on the go (solar or dynamo).
Bikepack racing, with lots of night riding and super-efficient resupply stops? A fast wall charger, lightweight power bank, and ideally a dynamo-powered light are key parts of your setup.
Always Be Charging
If your bikepacking route includes resupply stops, the single best way to keep your batteries topped up is to dial in your resupply recharge routine.
ABC: always be charging. That’s what you should think whenever you roll up to a place with grid power where you’ll be staying for more than ten minutes. Keep your fast-charging wall charger (recommendations below) and cables handy at the top of your bag.
Quick convenience store stop for snacks? Plug into that grungy outlet behind the soda machine. Burger and beer stop at lunch? Find an outlet near the table or ask the staff if you can plug in somewhere else.
I’ve become an expert at tracking down outlets in unlikely places, but if I can’t find one, I’ll ask. I’ve never been turned down, and sometimes they’ll even offer to plug in my stuff behind the desk or other secure place while I do my shopping.
Other tips:
- Plug in right away when you arrive. Yes, even before you head to the restroom.
- Fast-charging chargers, devices, and cables make a big difference (more on this below).
- With limited time, plug in whatever charges fastest. Usually this is a phone, but quality power banks are pretty good too.
- If you don’t feel comfortable leaving your phone unattended, plug in a power bank instead.
Power Banks for Bikepacking
Power banks (also called cache batteries, battery packs, portable chargers) are the most common way to keep electronics charged while bikepacking, and I recommend every bikepacker carry at least one. Technology has improved quickly and power banks continue to get smaller, lighter, faster, and cheaper.
What to Look For in a Bikepacking Power Bank
Everyone likes a quality power bank, but we bikepackers have some especially critical needs. Here’s what to look for.
True to stated capacity: Cheap power banks often don’t live up to their specs.
Small and light for a given capacity. All else being equal, newer and more expensive power banks usually excel here.
Fast input charging: If you only have an hour to recharge at your resupply stop, you want a power bank that charges quickly. Your power bank’s input charge speed is only part of the equation; you’ll also need a comparably fast wall charger and cable. Having two different types of input ports (MicroUSB and USB-C for example) is a nice touch in case a cable gets lost or damaged.
Note: Power banks have both an input charging speed (for charging the bank from the wall) and an output speed (charging your device from the power bank). For bikepacking, usually it’s the input speed that matters most. We have all day and all night to recharge our devices from our power banks once we’re away from civilization.
Multiple output ports of varied types. USB-C is popular now, but many bikepackers carry older devices with MicroUSB ports. I like to have have a mix of port types on my power banks for flexibility, and more than one so I don’t need to think about swapping devices in my tent in the middle of the night.
Trickle charge output / no auto shutoff for low-current-draw devices: When a low-draw device (some headlamps, tail lights, Bluetooth earbuds) is plugged in, some power banks will “helpfully” shut off because they see this as a transient load. Not having this feature is a feature for some bikepackers.
Less critical in general, but especially important for dynamo hub users:
Pass-through charging, the ability to charge another device from the battery at the same time the battery is being charged. This offers more flexibility for recharging and can be important for some dynamo setups.
Accepts trickle charge input: If you’re charging from a dynamo hub or solar panel, this feature will increase the amount of charge you can generate.
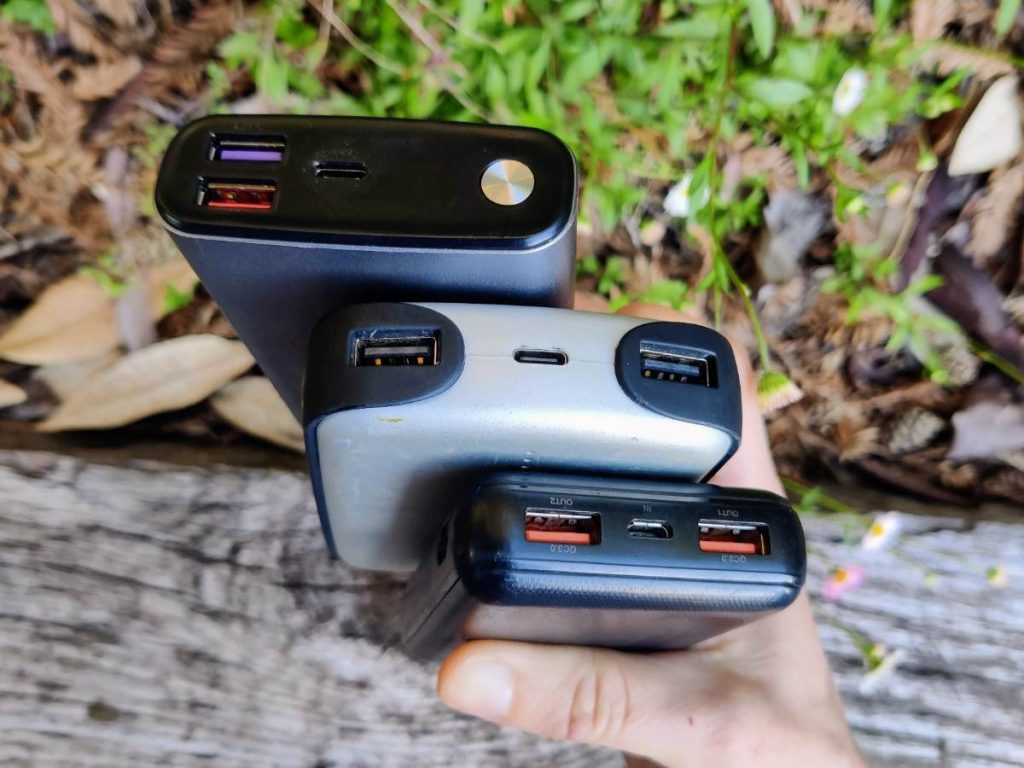
Three of my favorite bikepacking power banks (see below), all with 2 USB-A output ports.
What Size Power Bank?
These days I wouldn’t bother with less than 10,000mAh. They’re small, light, and can charge a phone somewhere between 1.5 – 3 times (depending on your phone battery).
Larger power banks in the 15,000 – 20,000 mAh range are now quite reasonable in price and size. If you’re out for a few days you’ll probably use the capacity. Anything bigger than 20k mAh is, in my opinion, too big and heavy to be practical for bikepacking.
I prefer to carry several small power banks instead of a single large one. Small ones are easier to stash in tight spots on my bike, less conspicuous when recharging in a public place, and most importantly, redundant in case one of them fails or gets damaged (like if you spill coffee on it while it’s in your stem bag – don’t ask me how I know).
Your total capacity obviously depends on what you’re using and how long you’ll be out for. In my experience, heavy smartphone usage (screen on a lot) and headlights are the biggest power guzzlers. When I’ve had 2 – 4 day gaps between resupplies without any solar or dynamo, I’ve carried two 10,000mAh banks. Now that I have my dynamo hub, I carry only one.
Physics for bikepackers: mAh stands for “milliampere-hour” which is a unit of electric charge. Power banks with bigger mAh numbers can charge more devices, and/or charge the same device more times.
My Favorite Power Banks
Power bank tech continues to improve, so it’s important to check the latest options. I’ve refreshed this section as of spring 2024 to include both my older favorites and the latest-and-greatest, all of them quality power banks that I recommend for bikepacking.
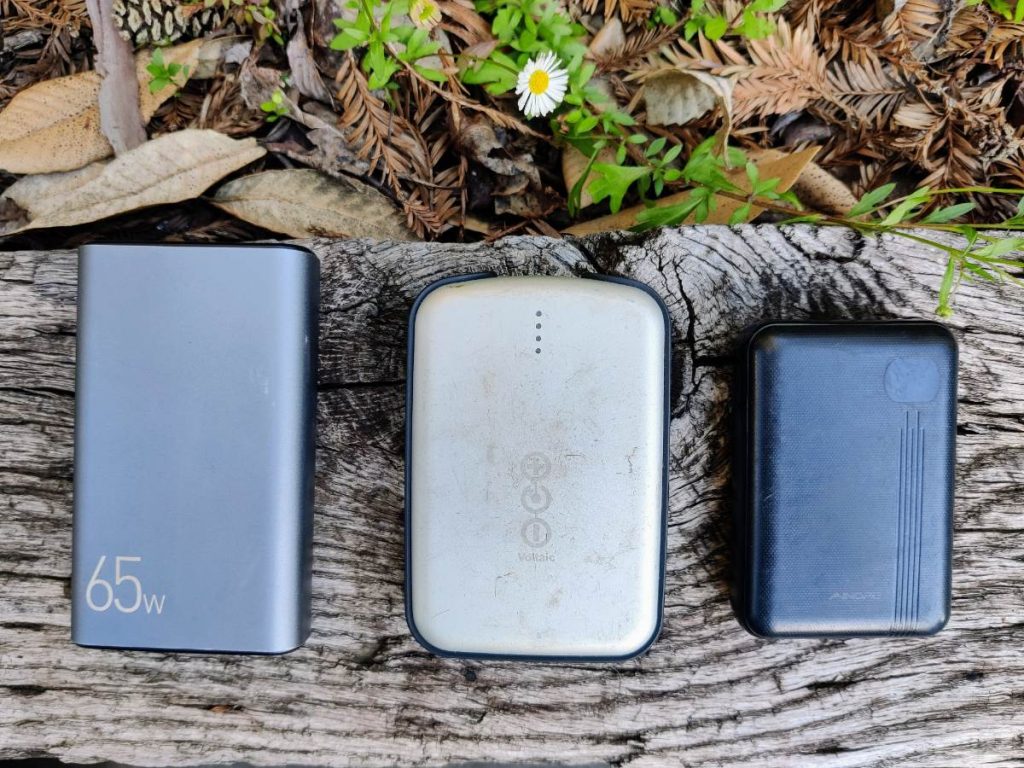
My current bikepacking power banks (left to right): 65W 15000mAh, Voltaic Systems V50, Ainope 10000mAh
Ainope 10000mAh 3.0 ($30): I bought this a few years ago and it’s still my favorite power bank for bikepacking, mainly due to its impressively small size and light weight (7 oz). It supports fast input and output charging, has input ports for both micro-USB and USB-C, and output ports for 3 devices at once. The numeric capacity display takes the guesswork out of knowing how much juice is left for the miles ahead.
Anker PowerCore 10k ($18): Anker is always a safe bet when it comes to power banks, and this one comes at a hard-to-beat price with slim form factor and light weight (around 7 oz). The downside is only one output port, but it supports both MicroUSB and USB-C input.
Anker PowerCore Essential 20000mAh ($60): This larger 20,000mAh option offers a good weight-to-capacity ratio at 12.2 ounces. It supports both quick input and output charging, and specifically mentions trickle charge output for low-draw devices.
Voltaic Systems V50 ($80): Weighing 9.6 oz for 12,800 mAh, this power bank is a bit heavier and bulkier than others in this list. However, it has several important features for dynamo hub or solar panel users: pass-through charging, accepting a trickle charge, and not shutting off automatically with devices that draw very low current. Like the Ainope above, it has both micro-USB and USB-C input ports in case you lose or break a cable. Also available in 6400 and 19200 mAh sizes.
65W 15000mAh Portable Charger ($50): An interesting new option with all the latest charging technologies, this thing can actually charge a laptop (not that I’m recommending this for bikepackers) with its 65W USB-C output port. With the right cable and wall charger it can be recharged super fast too. It’s a bit beefy (11 oz) but offers a numeric capacity display and two USB-A output ports. In my testing it did not accept a trickle charge, so dynamo hub users should avoid it.
Tip: Avoid charging your phone from a power bank (or dynamo hub or solar charger) while riding, especially on rough ground. I only have anecdotal evidence for this, but several cyclists have told me this damaged their charging ports. If you must charge a phone on-the-go, try to do it on smooth pavement.
Wall Chargers
If you’ll be setting foot in civilization at any time during your bikepacking trip, carry a small wall charger so you can top up during town stops.
Here’s what to look for in a wall charger for bikepacking:
- Small and light, ideally with prongs that fold in for packability
- Two or more output ports for simultaneous charging
- Support for fast charging protocols used by your phone and power bank
If you’re just stopping briefly in town, charging speed matters. Unfortunately this gets complicated because there are many different standards, and usually all the links in the chain (device, cable, wall charger) need to support the same standard to get the fastest charging performance. I can’t possibly go over them all here, but this is something to keep in mind depending on your specific collection of devices.
Physics for bikepackers: “Watt” is a unit of electrical power, i.e. the rate of energy transfer. A higher-wattage charger can, if all the components support it, charge more devices at the same time or charge a single device faster than a lower wattage charger.
Here are a couple wall chargers that I use and recommend for bikepacking:
Anker PowerPort Mini: Very compact with foldable prongs, two USB-A ports, and reasonably fast 12W total charging with Anker’s PowerIQ tech. I’ve been bikepacking with this little guy for years and never had an issue.
Flat 65W USB-C GaN Wall Charger: A more expensive option using relatively new gallium nitride transistors for super-fast and high-capacity charging. Of course your device and cable need to support the same wattage, but if they do (for example the 65W power bank mentioned in the previous section) you can enjoy some seriously fast charging. Also and more simply, it’s small and the prongs fold in.
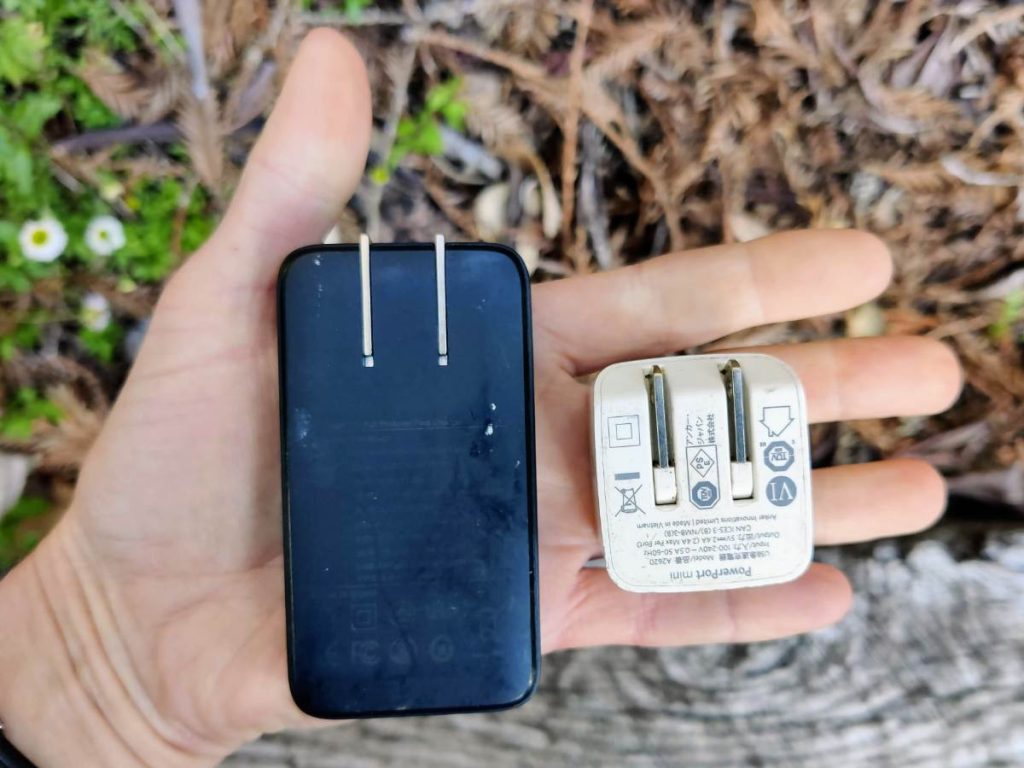
The two wall chargers mentioned above (65W on left, Anker Powerport Mini on right) are both compact and have foldable prongs.
Charging Cables
We often don’t give much thought to charging cables, but if you want an efficient system your cable can’t be the weak link. Here’s what bikepackers should consider.
Charging speed / wattage: If you’ve gone to the trouble of buying a fast-charging power bank and wall charger, make sure your cable isn’t the slow link in the system. Here’s a fast-charging USB-A to USC-C cable from Anker that supports up to 15W. If you have one of those fancy 65W chargers and power banks mentioned above, this 100W USB-C cable will unleash their full potential.
Length: I like to carry a few different cable lengths. Short ones are nice for charging phone from power bank in the tent, while long ones (say 3 or 4 feet) are key for reaching that power outlet waaaay behind the soda machine.
Number and type: We all have different cable needs these days. Some of my devices take USB-C while some still take MicroUSB, so I carry a mix (and iPhone users need yet another type). For my absolutely mission-critical devices (phone, power bank) I carry two of the same type so I have a backup. If your devices need a variety of cable types and you want some redundancy, one of these multi-type cables is handy to have in your collection.
Durability: I’ve killed a few charging cables on bikepacking trips, usually from too much bending at the end where the cable attaches. Look for cables that are high quality, strong, and flexible. Sometimes a right angle cable works best in tight spaces, like charging a power bank inside your top tube bag from a dynamo hub.
Battery Saving Tips
Even a top-of-the-line charging setup can struggle to keep up with the power needs of a remote bikepacking trip. Here’s what I’ve learned about how to stretch your battery life further.
Smartphones
A smartphone is the biggest power hog most of us carry. We may use it for navigation, pictures and video, route research, pairing with our satellite devices, and perhaps a bit of entertainment. Here’s how to stretch your smartphone battery further.
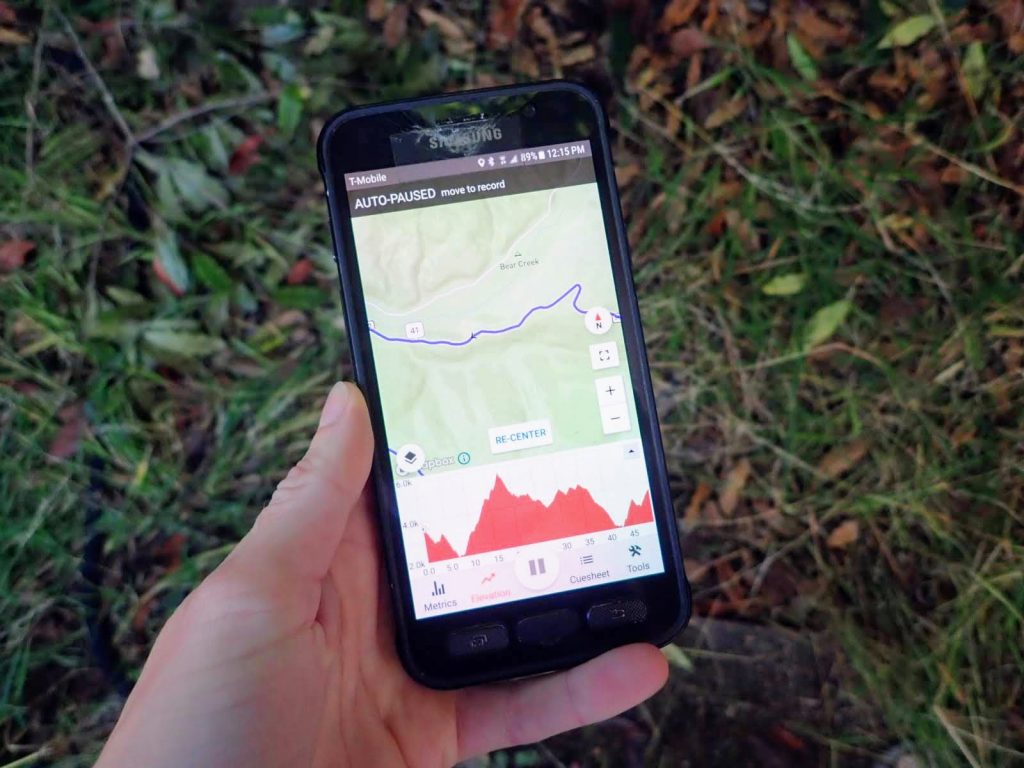
I love RideWithGPS for navigation, but it does drain my phone battery faster.
Use airplane mode as often as possible, especially in areas with spotty coverage. Assuming you already have your route cached for offline use, which you always should, this isn’t much of a limitation.
Keep the screen off as much as possible. Resist unnecessary map checks, turn on audio cues for navigation, and set a short screen timeout. When you do use the screen, turn down the brightness as much as you can.
Keep it warm in cold weather. This is less of an issue in newer phones, but some phone batteries lose charge quickly if exposed to near- or sub-freezing temperatures. Keep your phone in a pocket or inside your sleeping bag at night when temperatures dip.
Turn it off when you can. If you don’t need your phone for a few hours – maybe you have a dedicated navigation device, the route is obvious, or you’re trading off nav duties with a riding partner – power it off. This can be especially helpful overnight.
Consider a dedicated GPS navigation device. Navigation is a very battery-intensive phone activity due to all the screen checks and GPS tracking. This is one of the biggest reasons I eventually switched to a GPS device for long or rugged routes. In my case the Garmin eTrex is powered by AA batteries which diversifies my power needs nicely (easy to carry spares). Even if you have a USB-rechargeable GPS unit, it probably uses less power than your phone.
Lights
If you do a lot of night riding or run safety blinkers all day, lights can be another source of battery stress. The full lighting topic is too big to cover here, but this is what I’ve learned about battery management for lights while bikepacking.
Use the least battery-intensive setting appropriate for the riding conditions. Flashing mode (both headlights and tail lights) generally uses less battery and is more eye-catching for drivers – win win. If riding at night, use the lowest brightness setting that allows you to ride safely. For example, I can ride uphill on a gravel road with low brightness, but for singletrack or fast downhills I crank my headlight up to full power.
Diversify charging methods. Though there’s an appealing simplicity to having USB-rechargeable everything, I find variety less stressful. For example, a combination of USB-rechargeable handlebar light and smaller AA-powered helmet light is less likely to leave me in total darkness (assuming I remembered to pack spare AA’s!).
Consider dynamo lighting. Though dynamo hubs are a big investment and not a great fit for every bikepacker, they are really really helpful when it comes to lighting. If you’re riding for hours in the dark each night, a dynamo-powered light setup is game-changing. I use a kLite system for bikepack racing and though it’s pricey, I adore it.

Dynamo-powered lights are very helpful when riding through the night (shown here, a long-awaited sunrise during Idaho Smoke ‘n Fire 400).
Satellite Trackers
Satellite tracking and messaging devices like the Garmin InReach Mini are essential bikepacking electronics in my opinion, especially for solo riders in remote places. They typically aren’t a big factor in battery management, but here are a few quick tips.
Keep it turned off: If you’re just carrying it for the SOS button or a nightly message from camp, keep it turned off in an easy-to-reach place during the day.
Live tracking, like sending position data to Trackleaders.com during a race or to your family at home, uses battery life much faster. To conserve, use the longest tracking interval you can get away with (3 minutes will use more battery than 10 minutes – note that some races have specific requirements) and turn it off when you’re not moving for awhile.
Bluetooth: If you have a Garmin InReach Mini or other device that connects to your phone via Bluetooth, keep this function turned off except when you’re actively using it. This goes for the smartphone too.
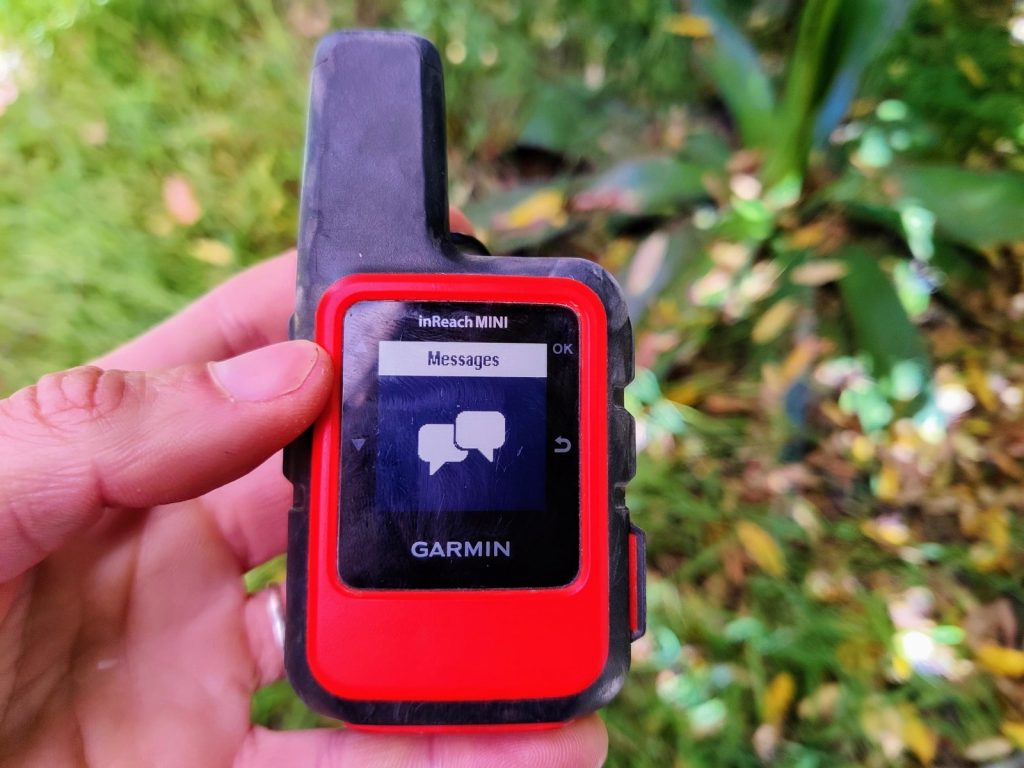
Satellite communication devices, like the Garmin InReach Mini, generally don’t chew through too much battery unless you run them in tracking mode for days.
Solar Chargers
Sometimes all the battery-saving tricks in the world aren’t enough. When I bikepacked the Tian Shan Traverse in Kyrgyzstan there was a 5-day stretch between civilization of any kind. Bikepacking with a solar panel was the only way I could count on having enough battery.
Not too long ago I would have said a portable solar charger isn’t worth the weight, but panels continue to get more efficient. I use the Big Blue 28W Solar Charger, which does a great job even on partly cloudy days. On a sunny day it provides more power than I know what to do with (see my review here).
Solar chargers like the Big Blue are affordable compared to a dynamo setup, but they’re bulky. The Big Blue works best with a rack and pannier setup; I’ve never managed to attach it to bikepacking bags. It’s not light either, but at 20oz it’s no heavier than a couple medium-capacity power banks, which is what I would have needed to carry through Kyrgyzstan if I didn’t have the solar charger.
The BigBlue 28W solar panel on my rear rack while bikepacking in Kyrgyzstan.
Tip: To protect your phone and its charging port, don’t charge it from a solar charger while riding. Plug in your power bank instead and charge the phone from that at camp.
Dynamo Hubs
If the other methods in this post still aren’t meeting your bikepacking battery needs, you may enjoy a dynamo hub. They’re especially popular among endurance bikepack racers, for whom long days and nights of riding generate plenty of charge, but they’re also used by long-distance bike travelers and a few weekend warriors.
A dynamo hub is a nifty gadget that replaces the hub in your front wheel and generates electricity when the wheel spins. A magnet rotates inside a copper coil, physics works its magic, and boom, you have electrons flowing to your thirsty electronic devices.
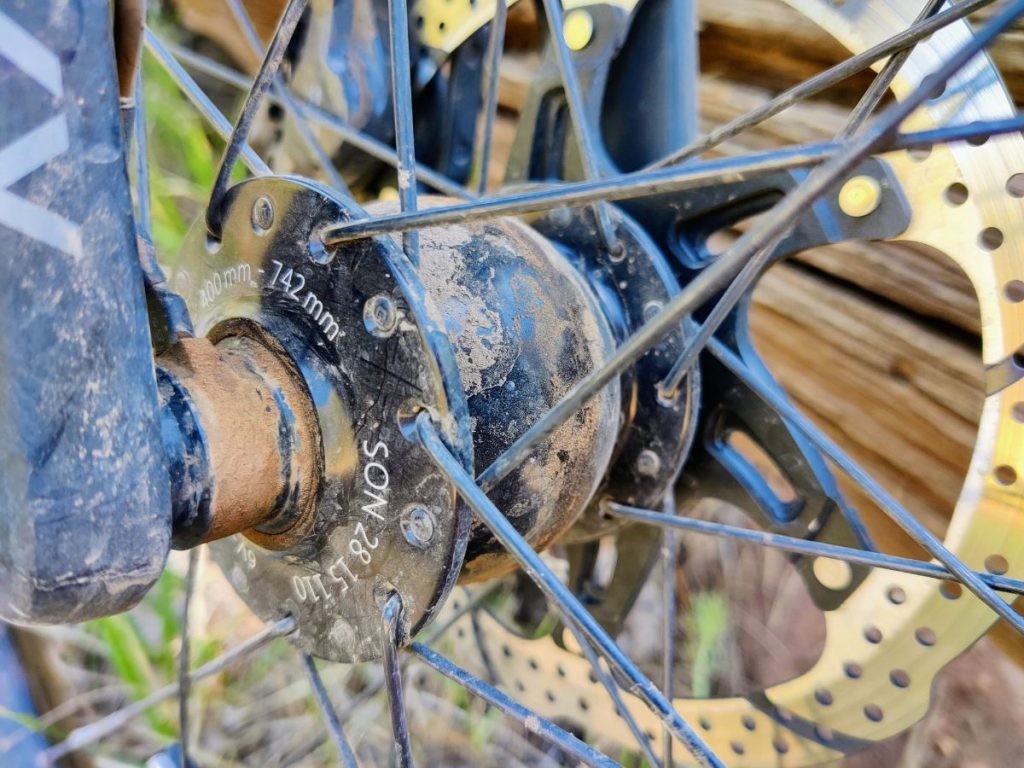
A dynamo hub (shown here: my SON 28) is a nifty device that generates power from the spinning of the front wheel.
The upsides of dynamo hubs are substantial. They generate power on-the-go like nothing else, and under some conditions (enough fast miles per day) you can ride forever without needing to stop and charge. You can run bright lights directly off them, and/or charge a cache battery. They work at night, unlike solar panels, and don’t add the extra weight and bulk of a stack of power banks.
Cost is the biggest downside of dynamo hubs. They can run a few hundred dollars just for the hub, which needs to be installed in your wheel by a mechanic (unless you’re good at wheel building). For folks who ride several bikes or swap wheelsets regularly, dynamo hubs can’t easily be switched between wheels. The hub and light combo adds complexity to your setup, and on shorter days or at lower speeds you won’t get much juice from it.
Read more: Are Dynamo Hubs Worth the Money?
Examples of popular dynamo hubs:
- Schmidt SON 28 – most expensive premium option
- SP (Shutter Precision) – less expensive, opinions are mixed about reliability
- Shimano – several models at varying prices and weights
- Kasai Dynacoil – the first field-serviceable dynamo hub available
Once you have a dynamo hub, you’ll also want a dynamo-specific light to go with it (again, not cheap) and probably a dynamo USB charger. The two most popular options among bikepackers are the kLite ULTRA (my review) and Sinewave Beacon.
Final Tips
Charging electronics while bikepacking is like everything else about bikepacking: the ideal setup depends on your budget and goals.
If you’re on a budget, load up on power banks. I typically take a single 10000mAh power bank for trips where I’ll find a wall plug every 2 nights, and two for trips where it might be 3-4 days between wall plugs.
For long remote expeditions, a solar charger is a cost-effective way to charge on the go. If you already own your dream bikepacking rig and can spare the cash, a dynamo hub is the luxury option.
Whatever system you choose, I hope it keeps your thirsty devices fed with delicious electrons so you can spend more time enjoying beautiful remote places.
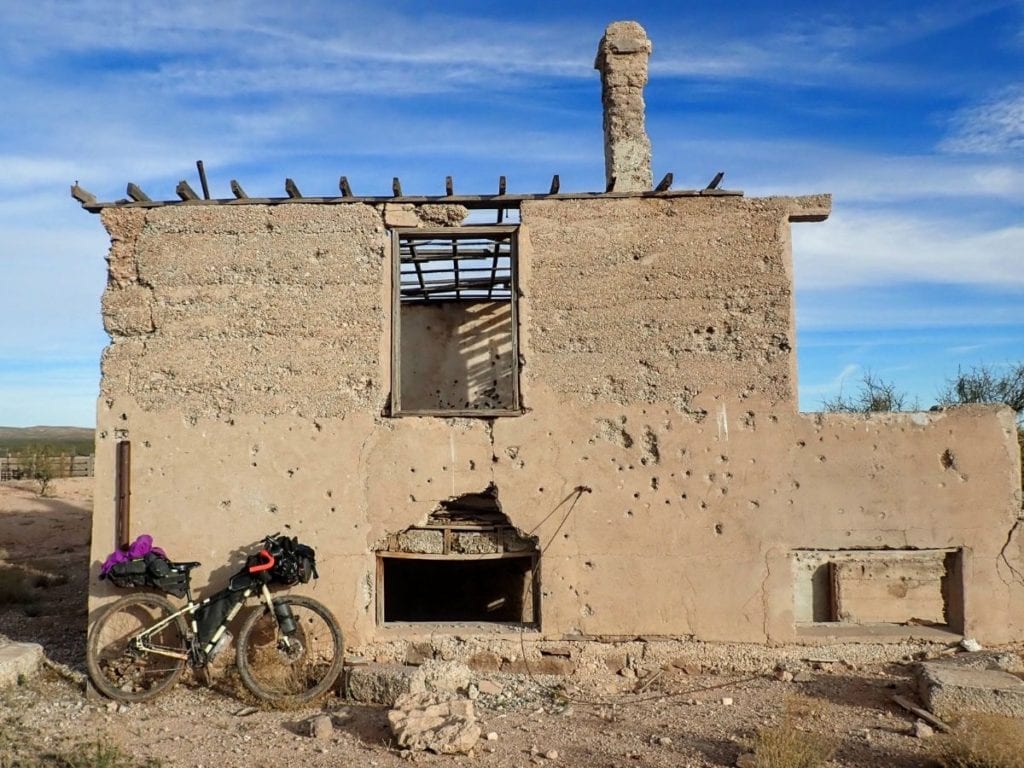
I don’t suppose there’s a power outlet in here somewhere…
More Bikepacking Resources
If you’re wondering how to keep your electronics fueled with electrons while bikepacking, you might also find these helpful:
Or visit the bikepacking section for lots more!
About the Author
Hi there, I’m Alissa, founder of Exploring Wild. I’ve traveled over 19,000 miles by bike and still can’t stop planning my next ride (and helping you plan yours). Pavement and panniers or singletrack and seat bag, I love it all. On my bike I feel free. Learn more about me here.
Shop Bikepacking Resources
Bike resources in your inbox?
There’s more where this came from! Sign up here for occasional emails full of inspiration and information about bikepacking and bicycle touring.
Share the Adventure
If you found this article helpful, please consider sharing so more people can benefit from it:
Pin For Later
The post Charging Electronics While Bikepacking: Power Banks, Battery-Saving Tips, Solar and Dynamo appeared first on Exploring Wild.
https://exploringwild.com/charging-electronics-while-bikepacking/?utm_source=rss&utm_medium=rss&utm_campaign=charging-electronics-while-bikepacking
 CampingSurvivalistHuntingFishingExploringHikingPrivacy PolicyTerms And Conditions
