If you’re interested in bikepacking with a dropper seatpost, it’s probably for one of two reasons: 1) You’re a mountain biker intrigued by the idea of strapping camping gear to your bike and riding off into the sunset, or 2) Your bikepacking escapades have led you to more technical terrain and you want to improve your bike handling.
I’m in the latter camp. I resisted considering a dropper for well over 10,000 miles of mixed-terrain bikepacking. When trails got rough I just scooted or walked. Give me my fully rigid mountain bike and rigid seatpost over a more complicated, heavy, and costly setup any day. It didn’t help that I’m 5’5″ tall and believed I’d never be able to make a seat bag work with a dropper post (only partially true, it turns out).
The breaking point for me was halfway through Bones to Blue, a singletrack-heavy bikepacking race / event around Lake Tahoe. I manually lowered my seat to help with the technical trails but didn’t bother to raise it when needed, and my knees were paying for it. When I finally raised it to the proper height for a long section of road, my knee pain vanished and my legs felt amazing. Wouldn’t it be convenient if there were some fast and easy way to adjust my seat height as often as needed… Oh wait, there is!
I bought my dropper, a OneUp Components V2, in early 2023. So far I’ve used it for about 600 miles of bikepacking and I don’t plan on removing it any time soon. It’s currently on my Stella in hardtail mode, which is my mountain bike, and getting plenty of use on local trails when I’m not on the road.
All this to say, I’m a dropper post convert (mostly) and have learned a lot about bikepacking with a dropper post, including dropper-friendly bags and racks, maintenance considerations, and packing tips. If you’re curious about the combo of dropper posts and bikepacking I hope this article sheds some light on what to expect.
Shop Bikepacking Resources
digital help with planning, riding, and problem solving
When you buy through affiliate links in this post, I may earn a small commission. Thanks for your support! I always offer unbiased opinions based on real experience from the road and trail. Learn more.
Why Droppers Are Awesome
If you already know and love droppers, feel free to skip ahead. If you’re wondering what all the fuss is about, this is for you.
A dropper seatpost allows you to lower your seat (usually by pressing a lever while your weight is on the seat) or raise it (by pressing the lever while unweighting the seat). The seat position is continuous, meaning you can set the seat height wherever you want between the lowest and highest limits and it will stay there until you adjust it again.
Why is this helpful? Two main reasons:
- A lower seat makes it easier to keep your weight low and back when descending something steep. This feels safer and more in control, and makes you less likely to fly over the bars if something goes wrong. With a dropper I’m willing to roll down things I might otherwise chicken out and walk.
- A lower seat gives you more freedom to shift your body weight around to navigate a tricky section of rocks or roots. This goes for climbs and flats as well as descents.
People usually talk about droppers in the context of downhills, like you need to be an aggressive rider to reap the benefits. I definitely appreciate the help on downhills, but I also love my dropper for techy climbing and any kind of switchbacks. When my weight is low and movable I’m much less likely to bounce off a rock or miss my line.
The upshot of all this: more confidence on rough terrain, which means more fun and less stress, and more efficient forward progress. As much as I advocate for shame-free hike-a-bike, there are times when it’s really great to be able to stay on the bike for longer.
Even on smooth ground I sometimes make micro-adjustments to seat height for comfort. If you’ve ever spent a long day on a bike you know how refreshing a small change in position can feel when fatigue and pain set in.
I think droppers can help riders of all levels. I’m not an aggressive mountain biker; I seek relaxation and endorphins on two wheels, not adrenaline. But I do enjoy learning to improve my bike handling skills so I can ride more comfortably in rugged places, and a dropper post has definitely accelerated my progress.
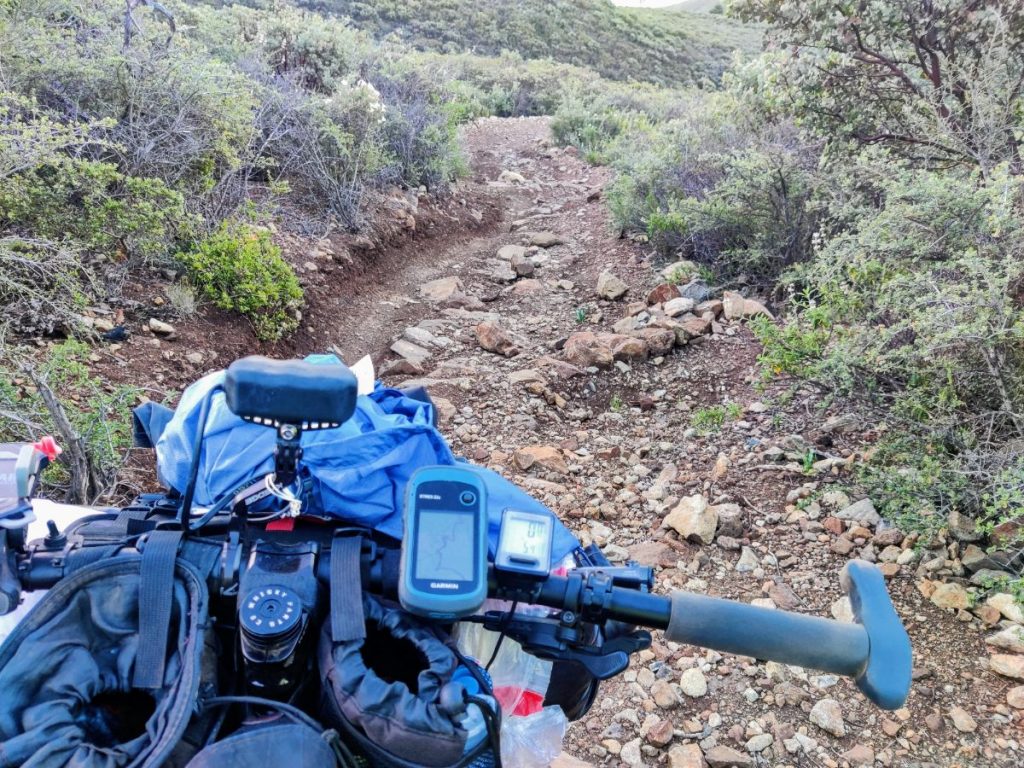
A dropper post would make this descent a bit safer and smoother (steeper than it looks).
Dropper Drawbacks for Bikepacking
If dropper posts are so great, why did I resist getting one for so long? They do have some drawbacks, especially in the context of bikepacking.
Cost: A dropper post certainly costs more than a simple rigid seatpost. My OneUp Components V2, a relatively affordable option, retails for $230 while a simple aluminum alloy seatpost can be had for under $30.
Weight: A dropper post weighs a bit more than most regular seatposts, perhaps up to half a pound. The OneUp V2 weighs 435g (120, 30.9 size), while a nice aluminum or titanium post weighs somewhere around 250g.
Fewer rear cargo options: This is a big one for many bikepackers, especially shorter folks and those riding full-suspension bikes. A seat bag can mostly or totally limit the distance you can drop your seat, making a dropper post much less useful. Even if you’re taller, a typical seat bag with a seatpost strap limits dropper travel by an inch or two. There are solutions for all this (read on…) but a dropper definitely does limit your cargo options.
More moving parts that can fail: Most bikepackers, at least those of us who’ve spent many days and nights in the middle of nowhere, instinctively prefer simpler components with less opportunities for failure. A dropper post does introduce new maintenance concerns and opportunities for mechanical disaster, but there are ways to mitigate the risks (read on).
Periodic maintenance needs: Many droppers should ideally be serviced every 100 riding hours or so, which is easy to surpass on a multi-week bikepacking trip.
Learning curve: Droppers aren’t too hard to get the hang of, but using them effectively is another skill to practice, just like efficient shifting and braking. I started using a dropper post shortly after switching to a 1x drivetrain, and the simplicity of having my left hand free made it easier to get used to my dropper post.
Carrying Gear with a Dropper Post
Herein lies the crux of the dropper post conundrum for many bikepackers: dropper posts don’t always play well with seat bags, and seat bags are a key part of the typical bikepacking bag setup.
The first issue is tire clearance. Seat bag capacity can be limited for shorter cyclists, especially on 29er bikes, and a dropper post can remove whatever space you might have. (Sound familiar? See Bikepacking for Short People.) Even for taller riders the usable range of a dropper post can be limited by a big seat bag, especially in combination with rear suspension.
The second issue is weight. Most dropper posts use air springs or hydraulic systems to raise the seat. They’re not designed to move a lot of weight, so a big heavy seat bag can slow or even stop the seat’s upward movement. The folks at bikepacking.com did some measuring and testing and recommended not exceeding around three pounds for a seat bag on a dropper post.
So what’s a bikepacker to do? You’ll have to be a bit pickier with your gear choices, but fortunately there are some great dropper-friendly seat bags and bikepacking-friendly racks out there to solve this problem.

Many people can still run a seat bag with a dropper post, but it will limit your travel and you’ll want to aim for small and light.
Dropper-Friendly Seat Bags
Some seat bags are designed with dropper posts in mind, but you don’t necessarily need one to use a dropper post. Many regular seat bags can work with dropper posts as long as they have these characteristics.
Smaller capacity, usually, for both weight and space reasons. I’m 5’5″ and am able to use a 6 liter seat bag on my 29er, just barely, while still getting a useful amount of dropper travel. This does require packing light and making full use of cargo space in other places, including a hydration backpack.
Skid plate or other durable material on bottom (optional but more important for shorter riders). If you’re squeezing every last available millimeter of travel out of your dropper post, there’s a good chance you’ll drop your bag onto your tire from time to time. A rigid plastic support helps prevent damage and also prevents drooping and sagging, giving your dropper more usable range.
Stanchion-friendly strap situation: Just like with suspension forks, you want to avoid scratching the stanchion, the smooth upper tube that slides inside the lower tube. There is a very handy gizmo for this, the Wolf Tooth Valais (available in two sizes) that clamps safely around the seatpost. It gives your seat bag strap a safe place to rest and can also limit dropper travel to prevent tire rub. The Valais works best with straps that are narrow (about 1 inch wide) and have some extra length.
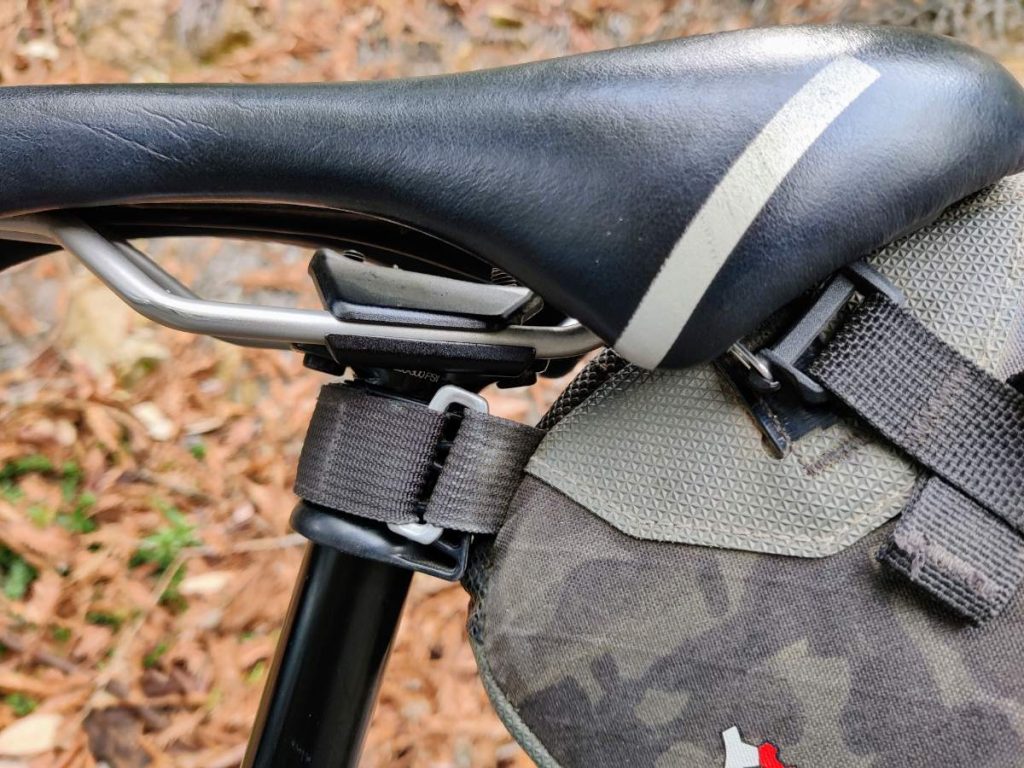
My dropper-friendly seat bag, the Revelate Vole (now discontinued), with a Wolf Tooth Valais.
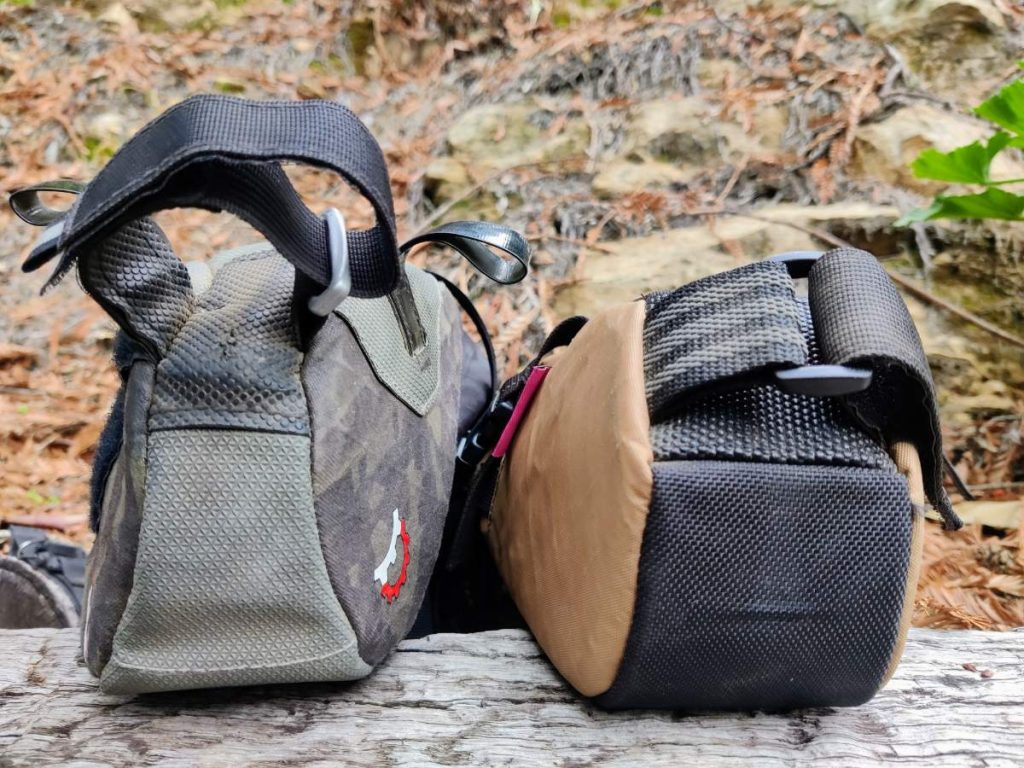
The dropper-friendly seat bag on the left has a strap that works well with the Wolf Tooth Valais because it’s narrower and longer. The seat bag on the right has a strap that’s a bit too wide and short to securely wrap around the Valais.
Tip: When using a seat bag with a dropper, load it with lightweight things like clothing or a sleeping bag to avoid slowing the post’s extension or even preventing it altogether.
If you’re looking for a bag specifically designed for dropper posts, here’s a sampling of dropper-friendly seat bags I’ve heard great things about.
Rogue Panda Ripsey: If you’re a short rider wanting to maximize your dropper travel, the Ripsey is your pack. An astounding 3″ of tire clearance is all you need to carry 8 liters of gear in a stable injection-molded harness.
Wayward Riders Louise: The Louise is a unique affordable harness system designed to offer generous capacity despite limited tire clearance. It’s lightweight, versatile enough to work with a variety of standard dry bags, and has a stanchion-friendly rubber seatpost strap.
Rockgeist Gondola: The Gondola is a little seatbag that doesn’t attach to the seat post at all, so in theory you can still use your entire dropper travel (if you’re tall enough that the bag doesn’t hit the tire). Four straps create a stable attachment to the saddle rails alone.
Bedrock Black Dragon: Another premium dropper seat pack, the Black Dragon was designed to work flawlessly with (and includes) the Wolf Tooth Valais. It’s also totally sway-free on rough trails thanks to the RailWing stabilizer.
Other seat bags: As long as the bag is small enough and can be mounted without scratching the stanchion, you can use any seat bag you want with a dropper.
When measuring your clearance for a seat bag, be sure to compress the dropper post and your rear suspension (if you have one) to understand the lowest position the bag can occupy without tire tub.
Universal Fit Rear Racks
When a small seat bag doesn’t hold enough for a long or complex bikepacking trip, it’s time to consider a rear rack. You may have heard that racks and panniers are not good for bikepacking, but this sentiment is changing (see Panniers vs. Bikepacking Bags).
These days you can find a number of sturdy racks designed specifically for bikepackers who need a bit more cargo space than seat bags can provide. By carrying your cargo on a rack you free up your seatpost to drop all the way down and extend upward without added weight.
Many mountain bikes don’t have rack mounts, but fortunately a few clever gear makers offer creative racks to solve this problem. Here are the standouts:
Old Man Mountain Elkhorn and Divide: OMM’s axle-mounted racks fit nearly any bike thanks to their extensive Fit Kit selection. The Elkhorn is a super-versatile design that works in front or back and has mounts for standard 3-pack cargo cages with dry bags. The Divide is a traditional-style rack that uses the same axle-mount fit kit system, works with panniers, and can carry a heavier load than the Elkhorn. I love the OMM rack systems, and the only negative I can say is that they’re a tad expensive with the axle fit kit.
Related: OMM Divide Rack Long-Term Review
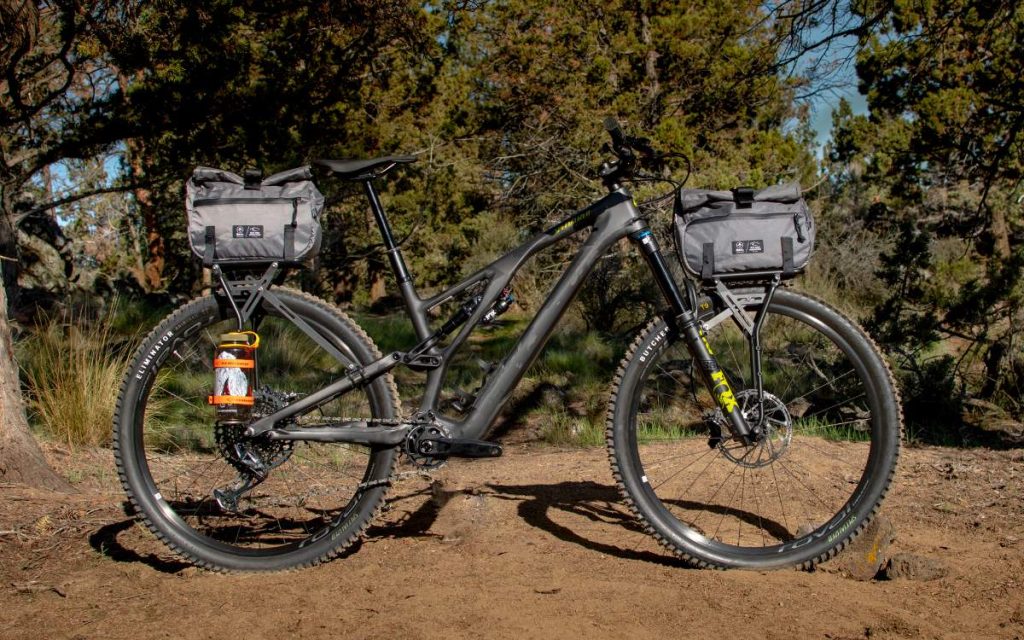
The OMM Elkhorn rack is designed to offer bikepacking-style cargo space that doesn’t interfere with a dropper or suspension fork. (photo: Old Man Mountain)
Aeroe Spider: The Spider is a seat stay mounted rack with a unique modular cradle system. Cradles can be mounted on top and both sides for full capacity. I’ve heard great things about the Spider’s stability and durability, and unlike axle-mounted racks it won’t complicate fixing a rear flat. The downsides: it’s relatively heavy, especially with all the cradles, and the proprietary design is less flexible than the Elkhorn (no mounts for standard cargo cages).
Tailfin AeroPack: The AeroPack is a one-of-a-kind supported seat bag targeted at weight-conscious bikepackers and tourers. It’s the lightweight pick (especially the carbon version) and also the most expensive pick, especially if you spring for the proprietary compatible bags. Its forward position can interfere with a dropper if tire clearance is limited, but for taller riders it’s a good way to increase cargo capacity without over-weighting your dropper.
Those three rack systems work on bikes without rack mounts, but if your bike does have eyelets you can save money by just using a regular rack (Tubus is a good brand).
Dropper Travel for Bikepacking
The most important part about choosing a dropper post is getting the right size for your bike and body. The choice can seem a bit complex but OneUp has good instructions, as does PNW. Essentially you need the lower to fit properly in your seat tube and the upper to extend the right amount for your inseam. The overall post length you choose will dictate how much travel you get (the max height range of your seat).
Generally you want to get the longest travel dropper you can fit on your bike. Too much travel is not a problem for bikepacking, even if your seat bag doesn’t fit when the post is fully dropped, because you don’t need to use all the travel you have (see below). Assuming you also use your dropper for unloaded riding, as most people do, you can enjoy the longer travel on your day rides.
If you’re a shorter rider using a seat bag, the limiting factor will probably be your seat bag hitting your tire. This could take inches away from your travel depending on the setup. Taller riders can usually preserve most of their dropper travel when using a seat bag, except the last inch or two where the seat bag strap wraps around a Wolf Tooth Valais on the stanchion.
My dropper post, as you can see from the picture below, is not making the most of my frame geometry. I could have fit at least one size longer, which would have put the mid cap (where the stanchion slides into the lower tube) closer to my seat post clamp, thus giving me more drop.
At the time I bought this post I expected to mainly use it while bikepacking with a seat bag. I recall thinking it didn’t really matter if my post had more drop because I couldn’t use it all anyway. But now I’m riding more trails at home and also have an OMM rack, and could be enjoying longer travel on both my day rides and bikepacking trips. Live and learn! For my riding style I don’t really need more travel, but some people might.
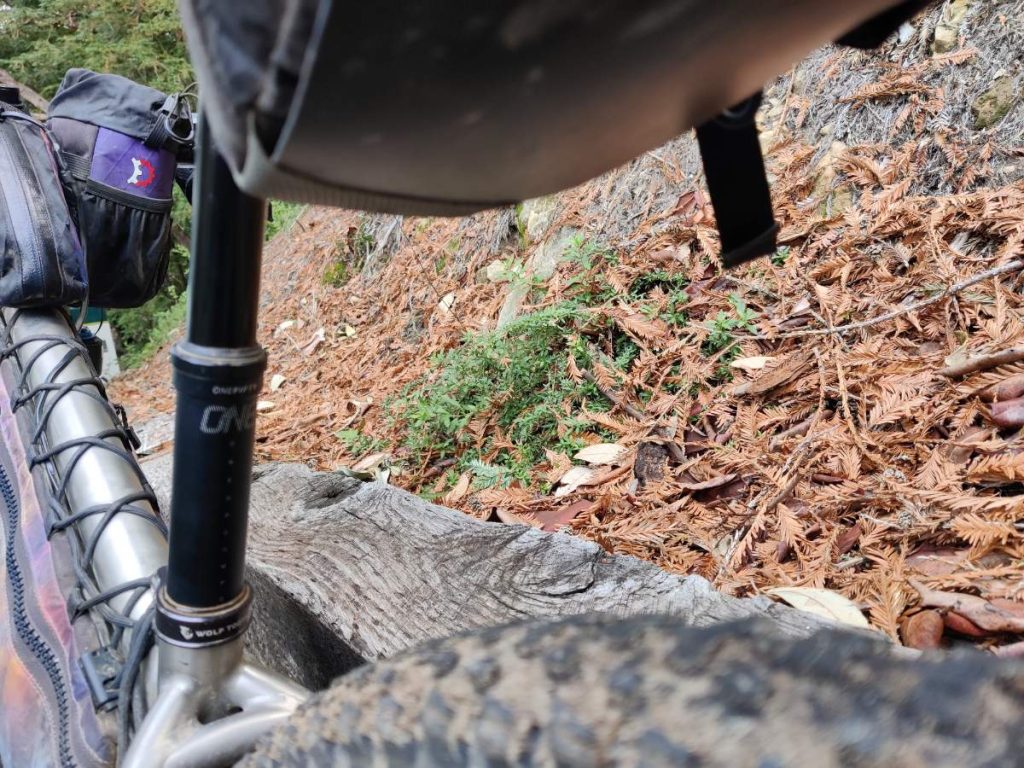
In hindsight I could have gone with a longer travel post on this bike. Though it wouldn’t have mattered with this seat bag, I might enjoy it on unloaded rides.
Small consideration: If you want to run a top tube bag in the rear “jerry can” position against the seat tube, and your seat tube doesn’t extend much above your top tube, you might want a couple inches of lower dropper tube above your seatpost clamp so you don’t scratch the stanchion with the bag straps.
Too much travel for bikepacking?
Before I got my dropper post I had trouble envisioning this, so here’s a quick explanation. If your seat is able to drop low enough that your bag contacts your tire, what happens?
If it’s light contact, no big deal, you’ll immediately hear the buzzing and raise your seat. If your bag is fabric on the bottom you’ll wear a hole in it eventually, but a rigid plastic harness can probably take a few hits.
That said, it’s not ideal to be dropping your bag onto your tire all the time, and it could cause a crash if you do it with a lot of force. Fortunately there are solutions if you want to bikepack with a dropper that has too much travel for your cargo setup:
- Simply remember not to slam your seat all the way down when using your seat bag. You’ll get used to it eventually.
- Clamp a Wolf Tooth Valais in the correct size (25mm or 26mm) around your stanchion where needed to prevent further lowering. In my case I can position a single Valais so it limits my seat position and also holds my seat bag strap. If that’s not possible for you, consider a second Valais as needed.
This means you don’t have to worry about getting a dropper with too much travel for bikepacking. Get the longest travel dropper you want (that fits on your bike), enjoy all that travel when unloaded, and worry about the bikepacking setup later.
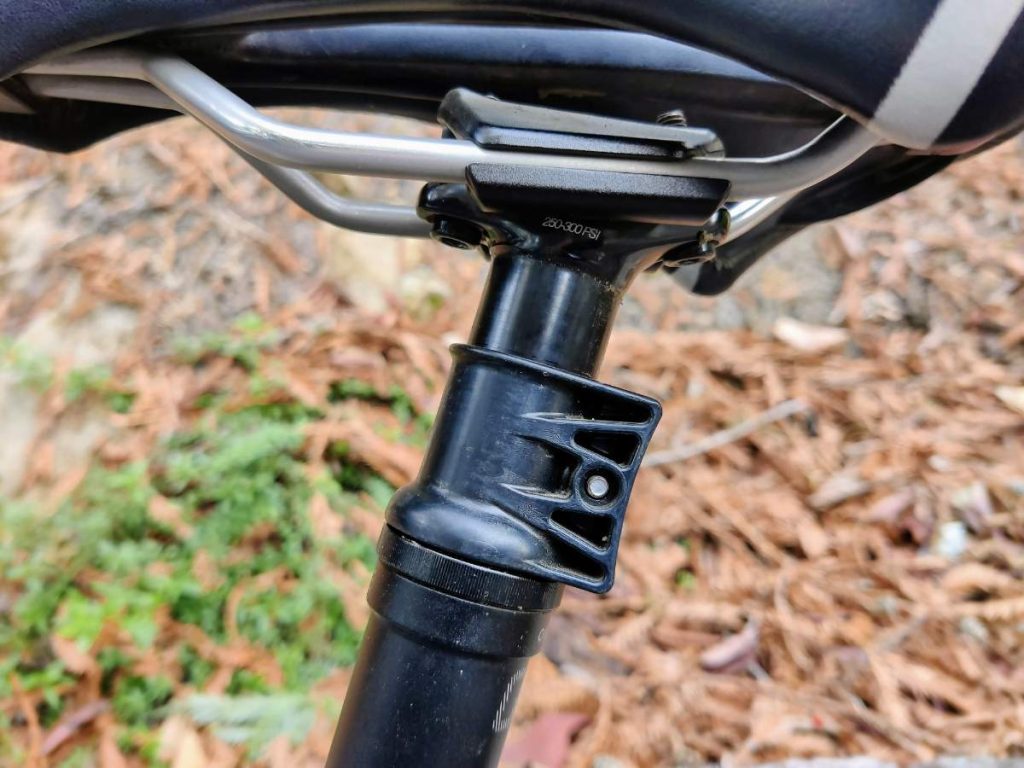
A Wolf Tooth Valais being used to limit travel by a couple inches.
Choosing a Dropper for Bikepacking
There are many dropper posts that can work for bikepacking. Here are a few factors to keep in mind when making your choice.
Sealed cartridge droppers are said to be pretty reliable, generally aren’t damaged by pulling up on the saddle, and should fail in fully extended position if something goes wrong. All good characteristics for bikepacking!
Externally routed cables are easier if you want to swap back and forth between a dropper and rigid seat post. My dropper uses internal seat tube routing which requires cutting the cable to remove the post, so I’ve been lazy and just left it installed. Not a dealbreaker, but worth considering if you’re imagining a versatile setup. That said, internally routed cables are nice and clean.
Tool-free travel adjustment is handy, but not essential. I originally thought I might use it to switch between bikepacking and day riding mode, in other words to limit the travel when riding with a seat bag. This turned out to be less important than I expected, thus I just leave the travel as-is and use a Wolf Tooth Valais when running a seat pack. Keep in mind that when you adjust the travel you also need to change the post’s position in the seat tube to account for the difference.
Reliability: The folks at bikepacking.com have a good article covering some favorites they’ve tested over the years. So far I have no issues with my OneUp Components V2 after 600+ miles.
Maintenance and Repair Concerns
Dropper posts, like most moving bike parts, do need periodic maintenance to work their best. Details vary by post and manufacturer, but on trips of a month or longer you might actually run up against maintenance intervals while on the road. Certainly you wouldn’t be the first to stretch the schedule a bit, but you don’t want to go so long that you damage your post.
For example, my OneUp Components V2 recommends “an upper bushing clean and grease every 25hrs or riding, a clean and grease service every 75-100hrs of riding, and a full rebuild every 250-350hrs of riding.” Oops, I’m already overdue for that clean and grease!
If your post uses an adjustable air cartridge, like the OneUp V2 and several offerings from PNW Components, a shock pump could be handy on occasion. I don’t travel with one on short trips, but if I were running a dropper on a long trip I might bring my shock pump along (it’s also useful for suspension forks).
The possibility of mid-ride failure, however rare, is definitely concerning. Depending on its design the post could fail to extend all the way or get “squishy,” both of which make it hard to pedal effectively. According to the folks at bikepacking.com, who have tested far more droppers than I have, modern droppers with fully sealed cartridges are the safest bet because they’re designed to fail in a fully extended position.
When bikepacking with a dropper post, I suggest you carry a Wolf Tooth Valais (make sure to choose the correct stanchion size, either 25mm or 26mm) even if you aren’t running a seat bag. In case of a dropper failure that prevents the post from staying extended, you can use this as a clamp to secure your seat in a fixed position.
A few other random tidbits of dropper care to be aware of:
Don’t over-tighten the seat post clamp. Usually 4Nm is a good max.
Avoid lifting up on the bike by the saddle during transport or hike a bike, especially if the post isn’t fully extended, because on certain droppers this can cause a seal failure. It’s not the end of the world for many modern droppers, but it’s best to build the good habit.
Be cautious when clamping a dropper post in a work stand. The folks at Park Tool made an excellent video explaining the best approach: fully extend the post, clamp on the lower if there’s room, otherwise clean the stanchion and clamps and carefully clamp on the stanchion.
When is a Dropper Worth It?
With all this in mind, do you want to be bikepacking with a dropper post? Here’s my two cents.
If you’re bikepacking on technical trails or particularly rugged 4×4 roads, I think a dropper is definitely worth the drawbacks. On this type of terrain you want to pack light anyway, so the cargo restrictions of a dropper can be a benefit in disguise.
If you mostly ride gravel and dirt roads, I would suggest going with whatever is already on your bike. If your bikepacking bike came with a dropper post, no need to take it off. You can simply not use the full range, or not use it at all, when your bike is loaded. If your bike already has a rigid post I don’t think a dropper will add enough value on this kind of terrain to be worth the money.
For example, consider the famous Great Divide Mountain Bike Route. It’s mostly gravel roads, with some pavement and just a few short nasty sections where a dropper would be useful. I rode this route on a rigid seatpost, as many people do, and I don’t think a dropper is worth buying for this route specifically. If I already had a dropper, however, I might leave it on. I could also see replacing it with a rigid post if I felt motivated to save weight and not worry about maintenance on a multi-month ride.
For rides in countries with limited bike shops, very remote expeditions, or long round-the-world type tours, I would err on the side of NOT using a dropper unless I really felt it would improve a big chunk of my riding experience. The risk of failure and need for maintenance would outweigh the benefits for me.
My personal opinion is that many people overuse dropper posts on easy terrain. To each their own of course, and I know it’s second nature for many folks who come from a mountain biking background. But having done a ton of rugged riding with a rigid post I don’t find it worth the effort to lower my seat for every gentle downhill.
If your riding buddies are adjusting their seats often on mild terrain, you might assume you need a dropper to ride on any kind of dirt. I’d encourage you to question this, especially for bikepacking. In my opinion you only need a dropper post when you’re struggling to successfully and safely ride a certain level of terrain. At that point, it opens doors and the additional weight, cost, and complexity are worth it.
Since first installing my dropper post I haven’t taken it off. It’s a bit of a pain to uninstall thanks to its internal routing and very tight fit in the seat tube. If I were prepping for a long non-technical bikepacking trip, especially overseas in a place with few bike shops, I would go to the effort of reinstalling my rigid post. For now the dropper remains on my bike for both day rides and shorter bikepacking trips, and I’m enjoying it a lot.
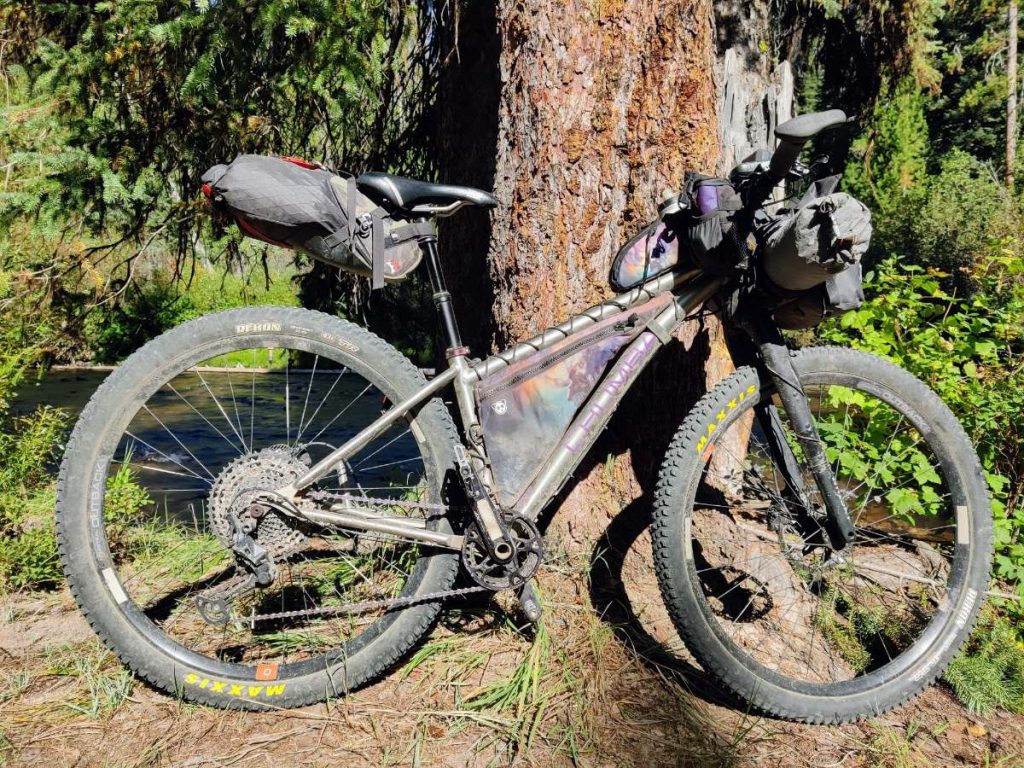
Rigid mountain bike with dropper post, the perfect setup for the Idaho Smoke ‘n Fire 400.
More Bikepacking Resources
If you enjoyed this post, you might like these too:
Or visit the bikepacking section for lots more.
About the Author
Hi there, I’m Alissa, founder of Exploring Wild. I’ve traveled over 19,000 miles by bike and still can’t stop planning my next ride (and helping you plan yours). Pavement and panniers or singletrack and seat bag, I love it all. On my bike I feel free. Learn more about me here.
Shop Bikepacking Resources
digital help with planning, riding, and problem solving
Bike resources in your inbox?
There’s more where this came from! Sign up here for occasional emails full of inspiration and information about bikepacking and bicycle touring.
Share the Adventure
If you found this article helpful, please consider sharing so more people can benefit from it:
The post Bikepacking With a Dropper Post: Impressions of a Reluctant Convert appeared first on Exploring Wild.
https://exploringwild.com/bikepacking-with-dropper-post/?utm_source=rss&utm_medium=rss&utm_campaign=bikepacking-with-dropper-post
 CampingSurvivalistHuntingFishingExploringHikingPrivacy PolicyTerms And Conditions
